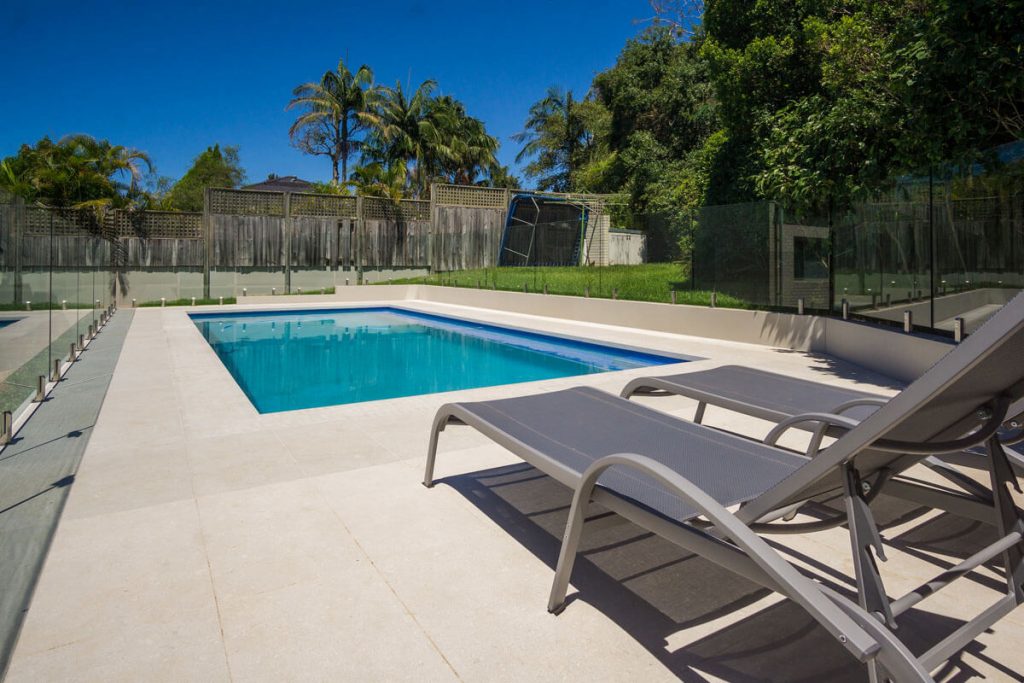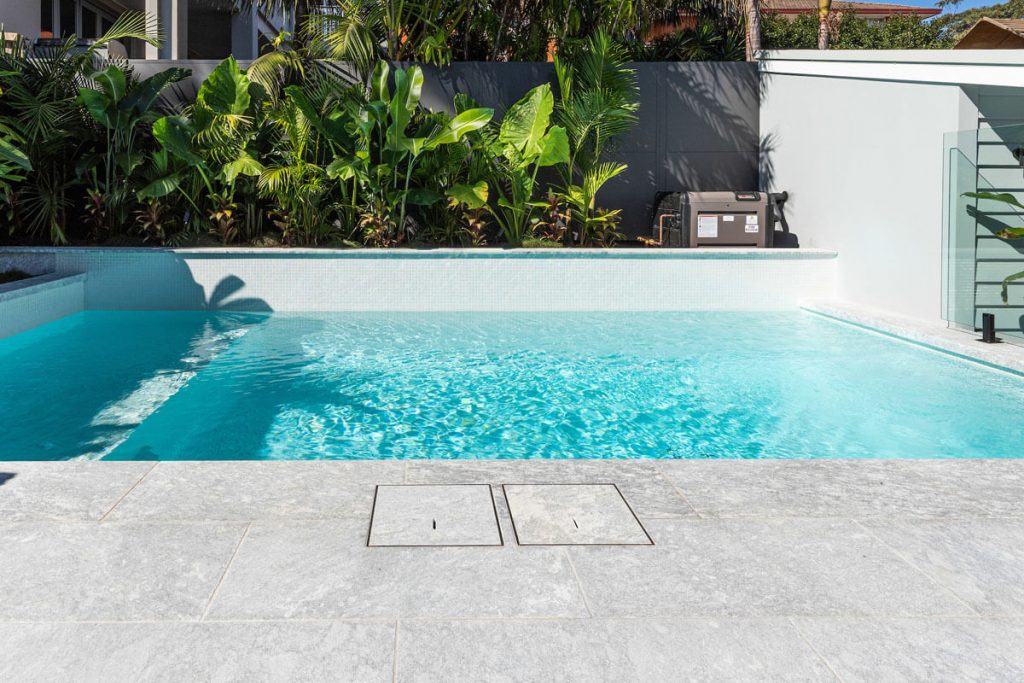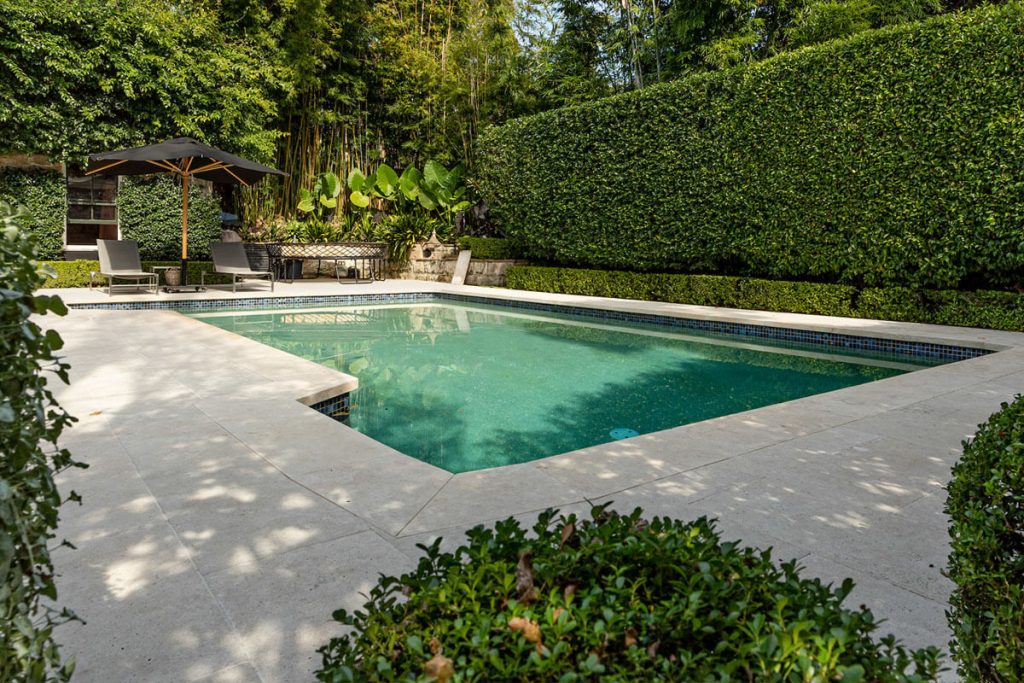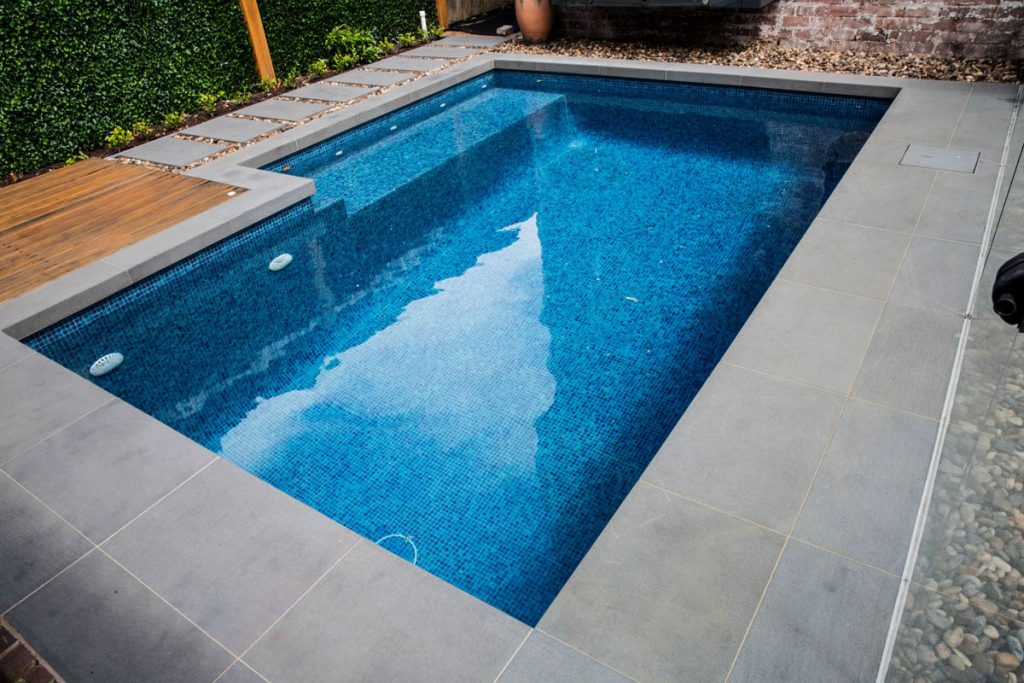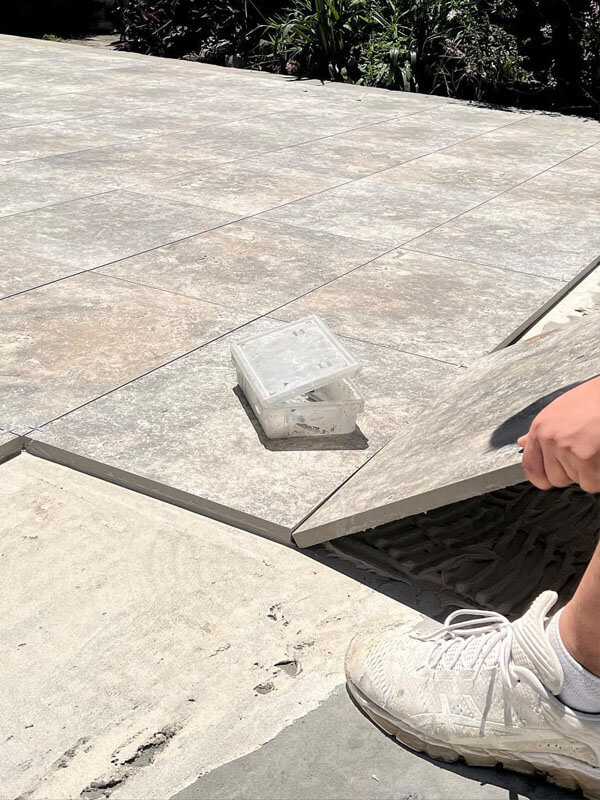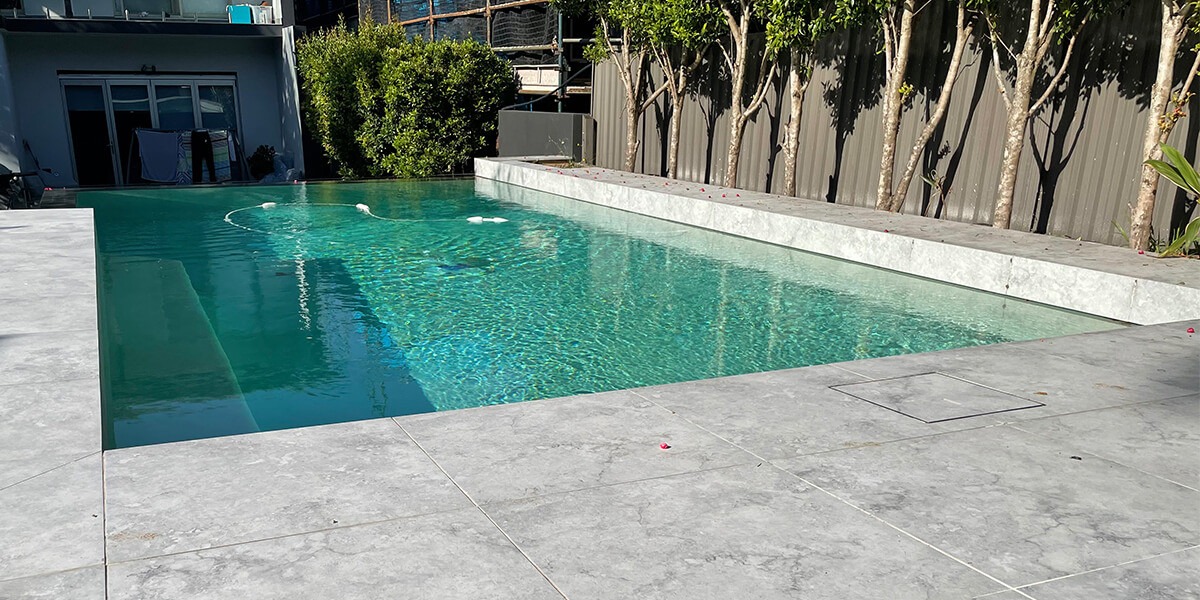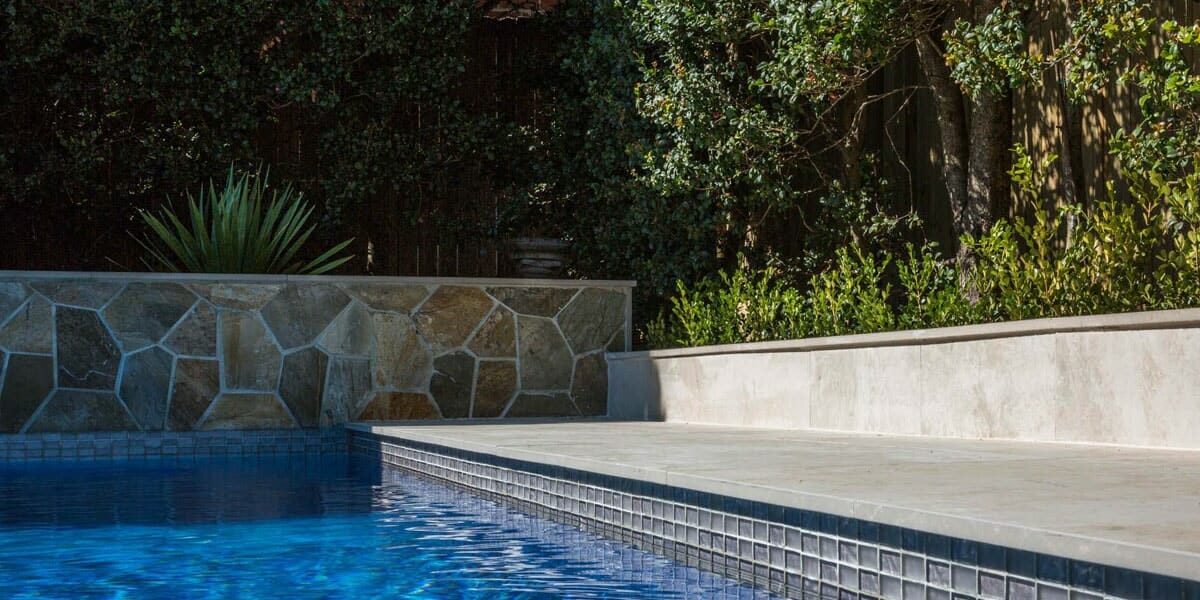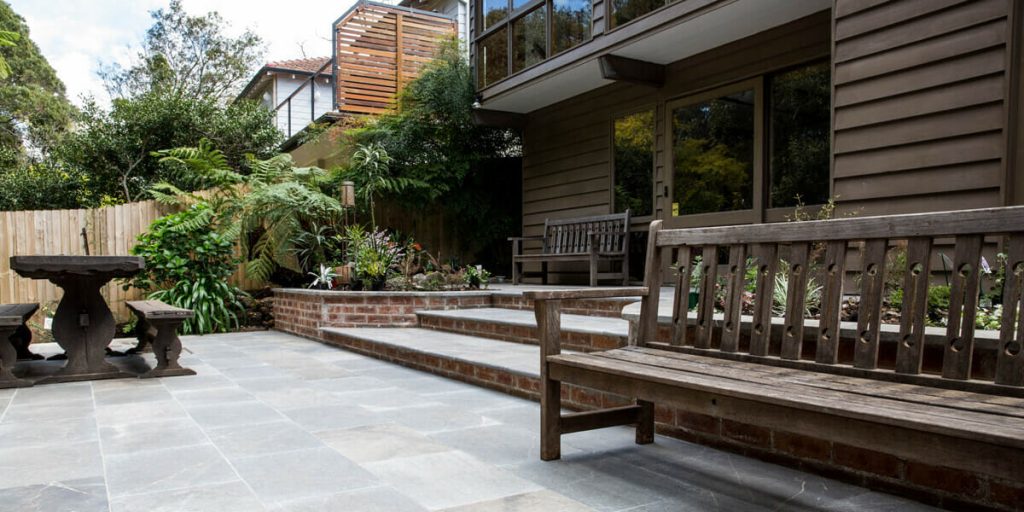
The 9 Most Frequently Asked Questions About Travertine Pavers (FAQ)

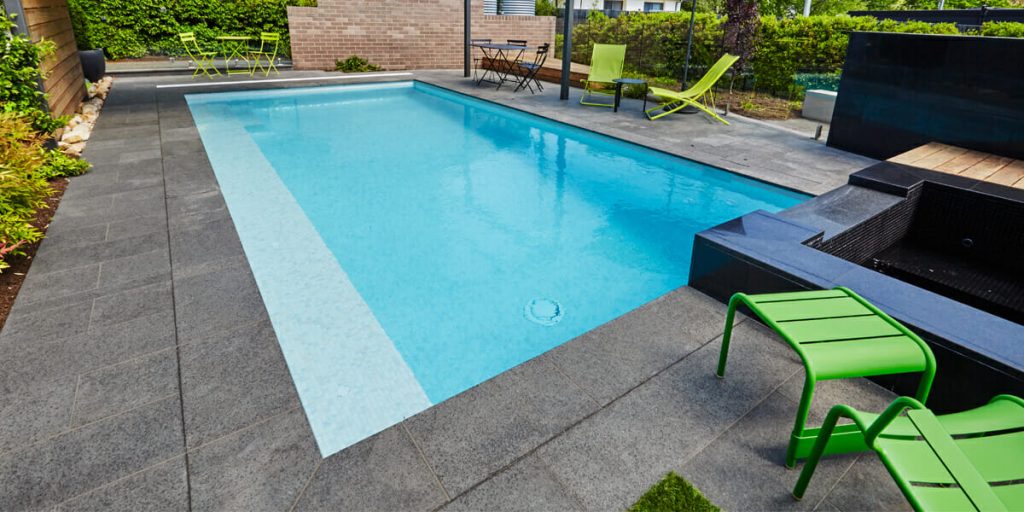
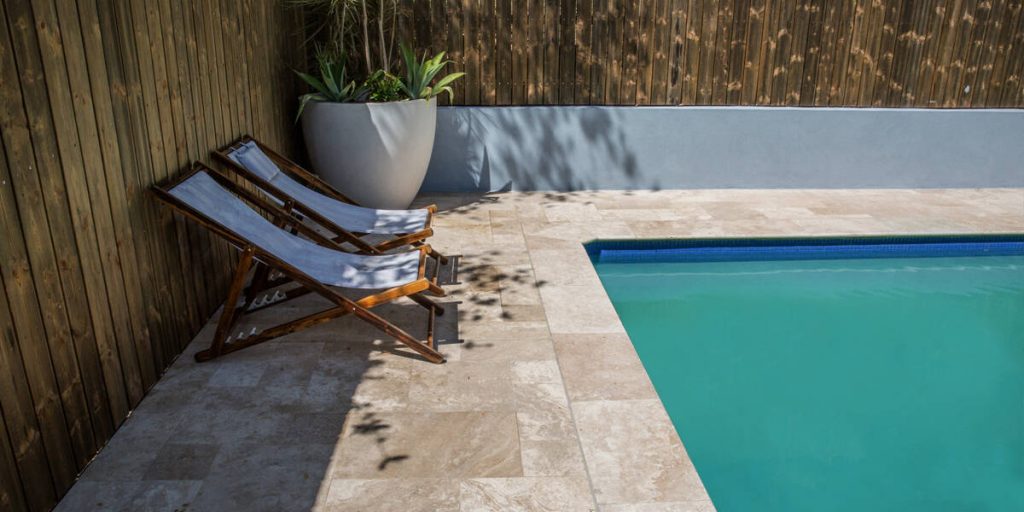
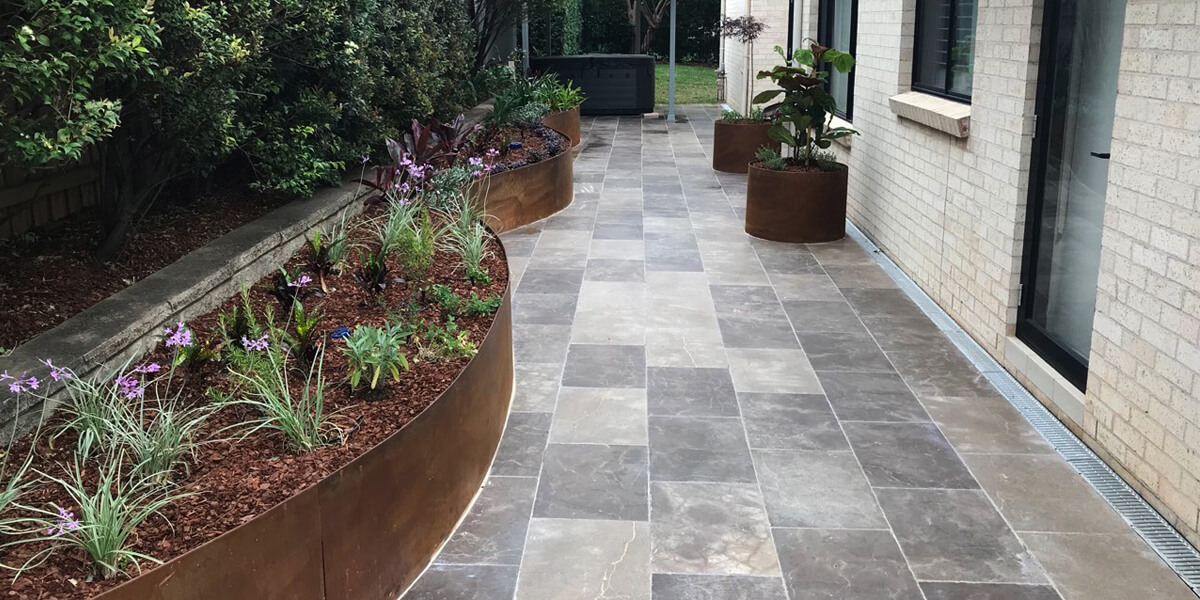
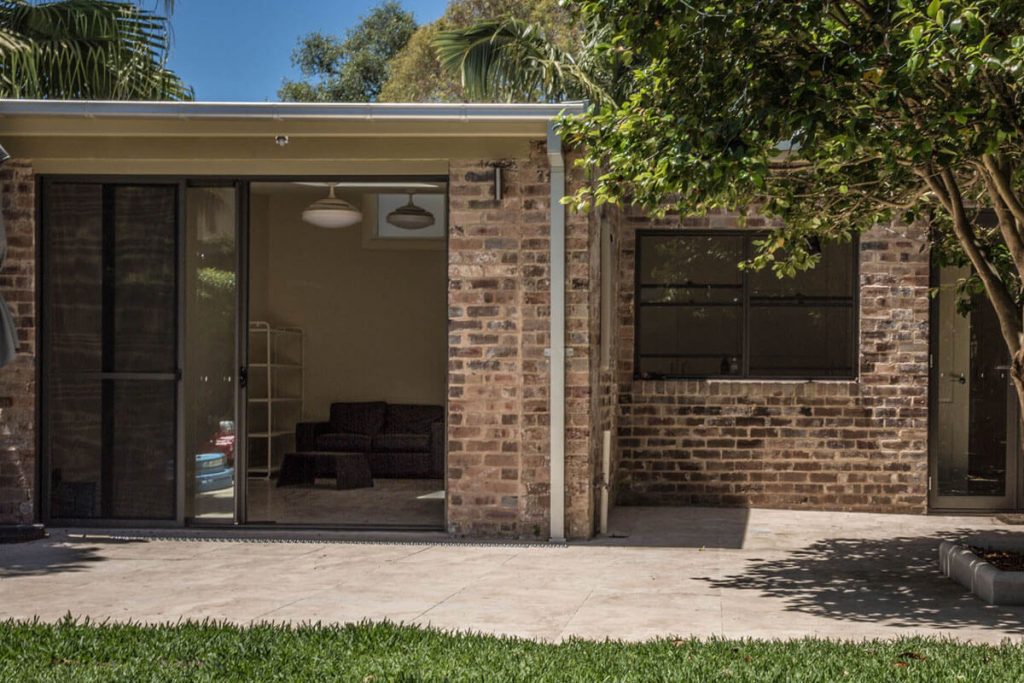
Silver Travertine Pavers

So you’re looking to transform your backyard, courtyard or patio with a timeless and classic natural design?

Yes?

Perfect!

Let’s see if Travertine pavers may be the best choice for you.

In this article we will look at some Frequently Asked Questions about Travertine Pavers.

This will give you a firm understanding of this natural stone.

And equip you with the correct information to make a decision if it’s the best choice for your circumstances.

1. WHAT IS TRAVERTINE?

Travertine is a calcite based natural stone.

It is formed beneath geo-thermally heated hot springs over a period of millions of years.

The hot water shoots up through the stone creating the pits and character you see on the surface of the stone.
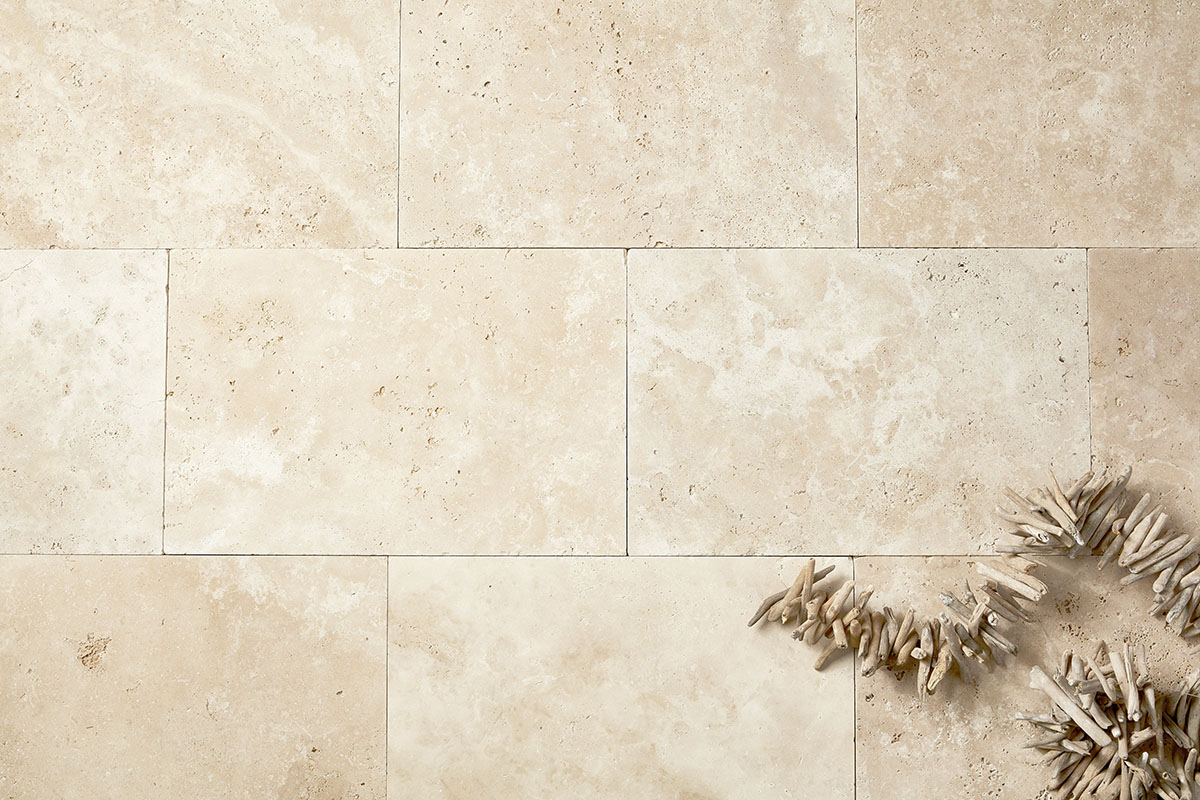
Leggero

2.  WHAT COLOURS ARE TRAVERTINE PAVERS AVAILABLE IN?

Travertine comes in a variety of colours.

The most common ones used in Australian are Classic Light Cream and Beige, Medium Cinnamon, and finally Silver Grey Travertine.

Due to travertine’s subtle tones and veining texture.

It is easy to see why it is a popular choice amongst Australian homeowners and installers alike.
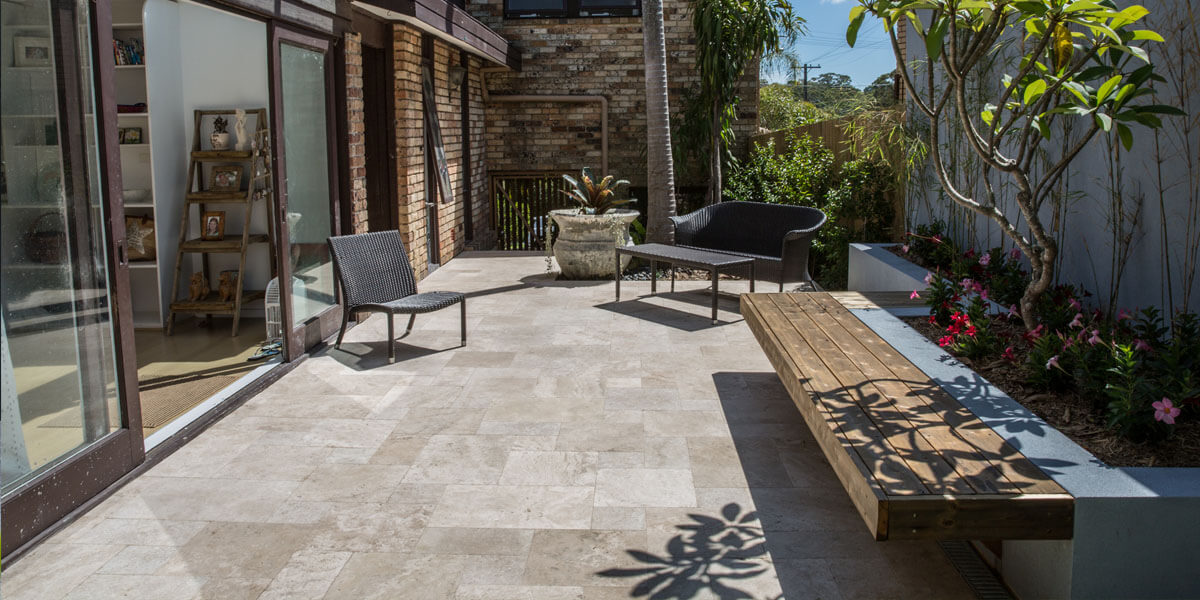
Cinnamon Travertine pavers

3.  HOW MUCH DO TRAVERTINE PAVERS COST?

With a range of benefits, travertine pavers are a relatively cost-effective natural stone.

Depending on the quality and stone colour, travertine pavers can cost from $45m2 – $98m2.

The classic colours like beige and cream travertine pavers require less investment because they are more common.

On the other hand, silver travertine is not as readily available in quarries and as such has a higher investment cost.

4.  DO TRAVERTINE PAVERS STAIN?

Even if you seal the stone, any natural stone can cause stains.

As we explain in this blog,  the purpose of a sealer is to reduce the porosity of the stone.

And in doing so, help the stone withstand stains from non-acidic particles.

As such, if acidic particles penetrate the travertine paver, they can still stain the stone.

Unfortunately, there is no bullet proof alternative, unless you choose to install travertine look-a-like porcelain pavers.
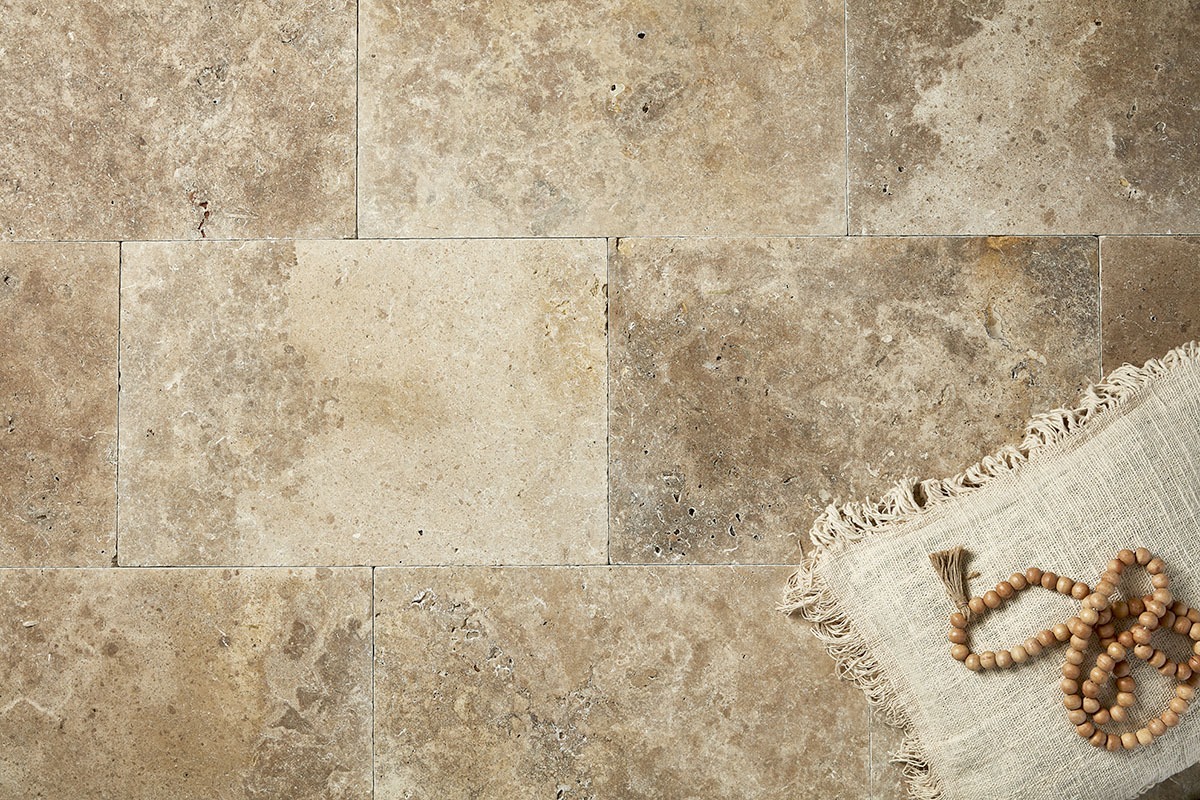
Cinnamon

5.  SHOULD TRAVERTINE PAVERS BE SEALED?

Yes.

It is highly recommended to seal travertine pavers.

In the off-chance that a liquid is spilled onto the travertine stone surface.

It can almost instantly stain the stone.

This is because it has a high degree of water absorption.

As a result, travertine pavers are relentless and unforgiving because the reaction time to clean them is basically zero!

This is why sealing travertine surfaces is so important!

Sealing significantly reduces the degree of water absorption.

And gives you more time to clean the stone and remove the contaminants before a stain can surface.

In saying this, depending on your lifestyle and outdoor setting, you may want to choose a high quality and premium sealer.

When tested, these have demonstrated the longest reaction time (measured in hours).

And are thus better equipped for protecting surfaces from a wide range of both water and oil-based contaminants.

6.  DO TRAVERTINE PAVERS GET HOT?

Since travertine comes from the calcite family, it reflects heat.

This makes it a perfect stone for outdoor areas that have constant heat from the sun.
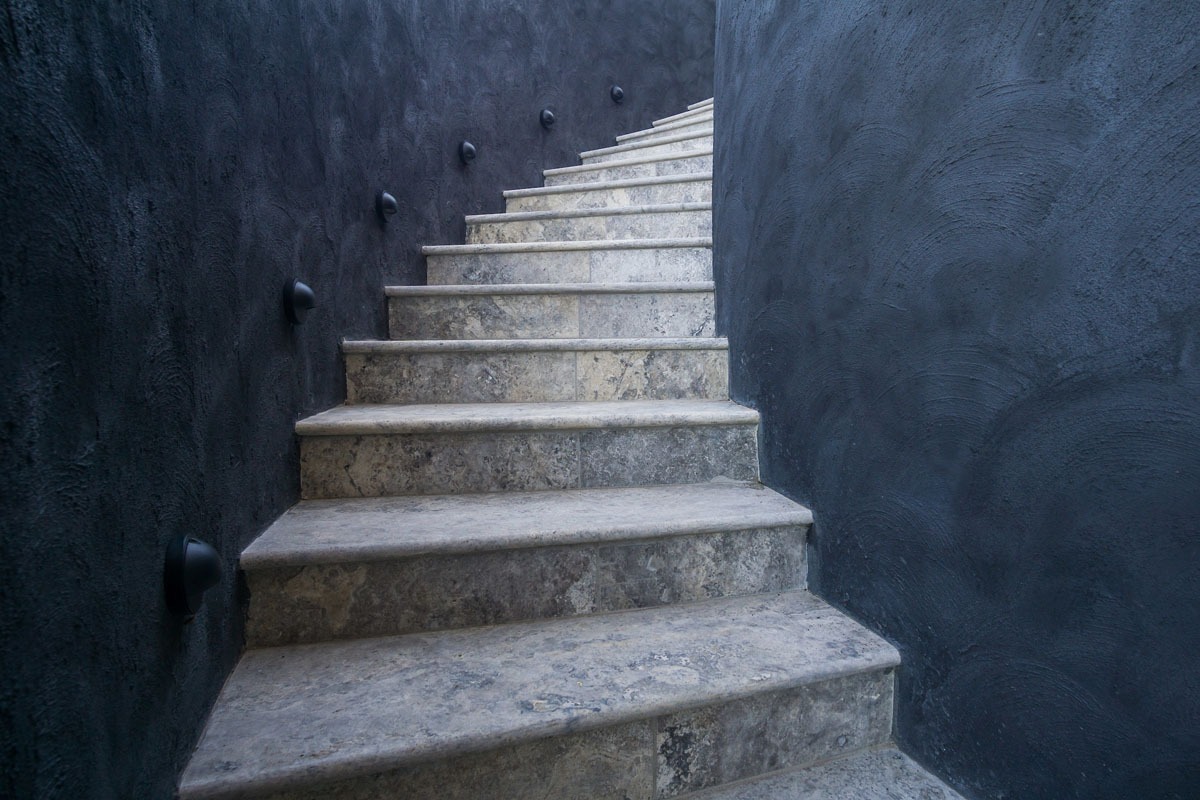
Silver Travertine Pavers 13

 7.  IS TRAVERTINE SLIPPERY WHEN WET?

Yes and no.

Yes, your ordinary tumbled travertine pavers can get very slippery when wet.

And are not recommended to be used around a pool.

As a pool area is under constant water stress, the last thing you want is an accident.

At Armstone, we conducted a “Wet Pendulum Test” on Travertine Pavers.

This resulted in P3 slip Rating for your ordinary tumbled Travertine.

On the other hand, you have “B” grade travertines which are more porous.

As such, they absorb more water.

This makes the travertine less slippery.

8.  CAN YOU LAY TRAVERTINE PAVERS ON SAND?

Yes, high-density first-grade travertine pavers can be laid on a sand base for foot traffic areas.

These pavers need to have a minimum thickness of 30mm.

You need to be very mindful of the hair fractures in All-Natural Stone pavers.

These are basically the weak part of the stone paver where cracks can potentially occur when laid on soft substances like river sand.

By keeping the pavers a thickness of 30mm or more, you significantly reduce its chances of cracking.

If cost isn’t an issue.

We recommend laying the pavers on a sand-cement bed rather than a river sand bed.

This will also help you grout the joints in between the stones.
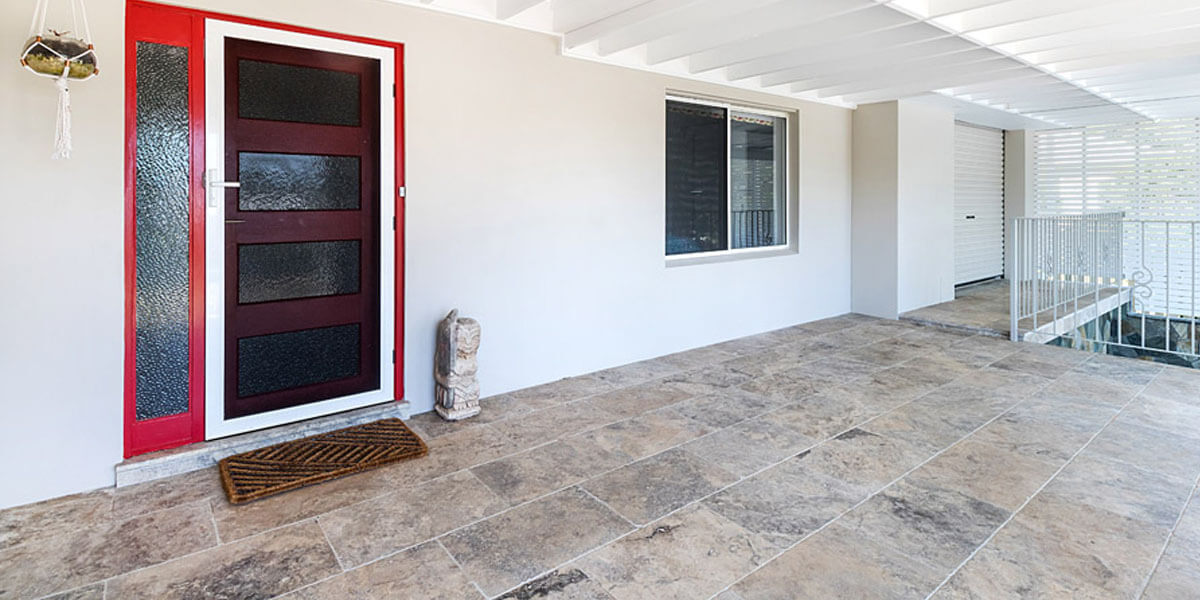
Silver Travertine Pavers armstone

9.  HOW TO GROUT TRAVERTINE PAVERS?

Some people prefer not to grout travertine pavers because they like to keep the look as close to natural as possible.

However, this becomes problematic when the cavities collect dirt and it’s very hard to clean this.

To some degree, you will be able to clean the cavities using high-pressure hosing.

But some debris will remain.

As the stone is a natural product, the holes will also attract mould and mildew.

As such, we recommend grouting both the paver joints and the entire paver.

Filling all the holes with a proper fine grout will make cleaning and general maintenance a lot easier for you.

Silver Travertine Pavers 11

CONCLUSION:

Travertine pavers are a popular choice amongst home owners and builders alike for a good reason.

They have a very appealing natural aesthetic and for a natural stone, they are reasonably priced.

On a final note, we strongly advise that if you choose travertine pavers that you pick an A grade product.

And find a tradie who is experienced with the installation procedures for this particular stone.

As always, it’s been a pleasure!

And if you have any questions feel free to give us a call or send us an email.

One of our experts would love to help you!
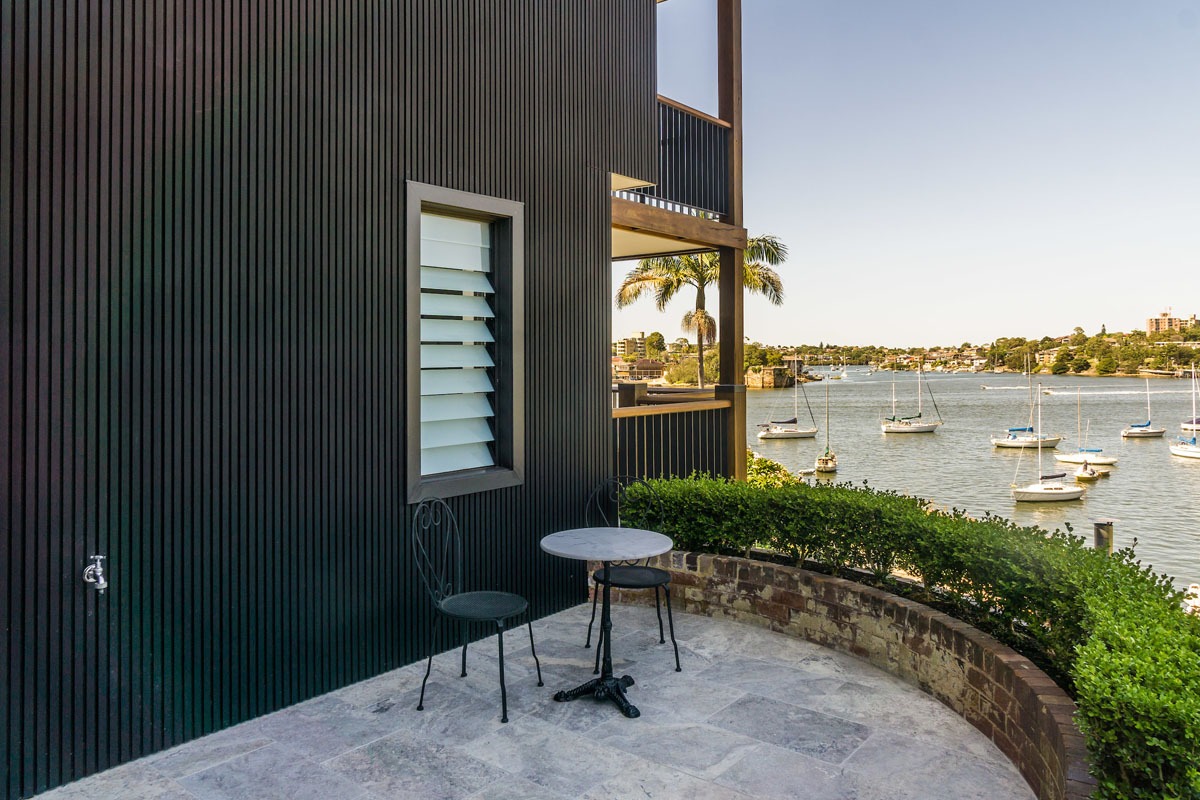
How To Lay Cobblestones on Mesh?

Bonza cobbles 1

If you want to add character and a sense of antiquity to your front or backyard, cobblestones can really help achieve this aesthetic.

Now, before we jump into how to lay cobblestones on mesh, let’s first start at the beginning.

And find out …

What are Cobblestones?

Cobblestones are based on the century old roads and walkways that are prominent in Europe.

Given their historical value, they bring a tremendous amount of character, timelessness and beauty to any space.

Cobblestones are typically made from dense stone materials such as granite, bluestone, quartzite and porphyry.

They typically have excellent grip strength.

As a result of their superb genetic makeup, they serve as a long-lasting paving solution.

With a wide selection of designs and materials, cobblestones can easily be used to create stunning outdoor spaces.

Audrey Cobblestones on mesh
**Audrey Quartz Cobblestones on mesh

What Patterns do Cobblestones Come in?

Cobblestones are available in a wide range of styles.

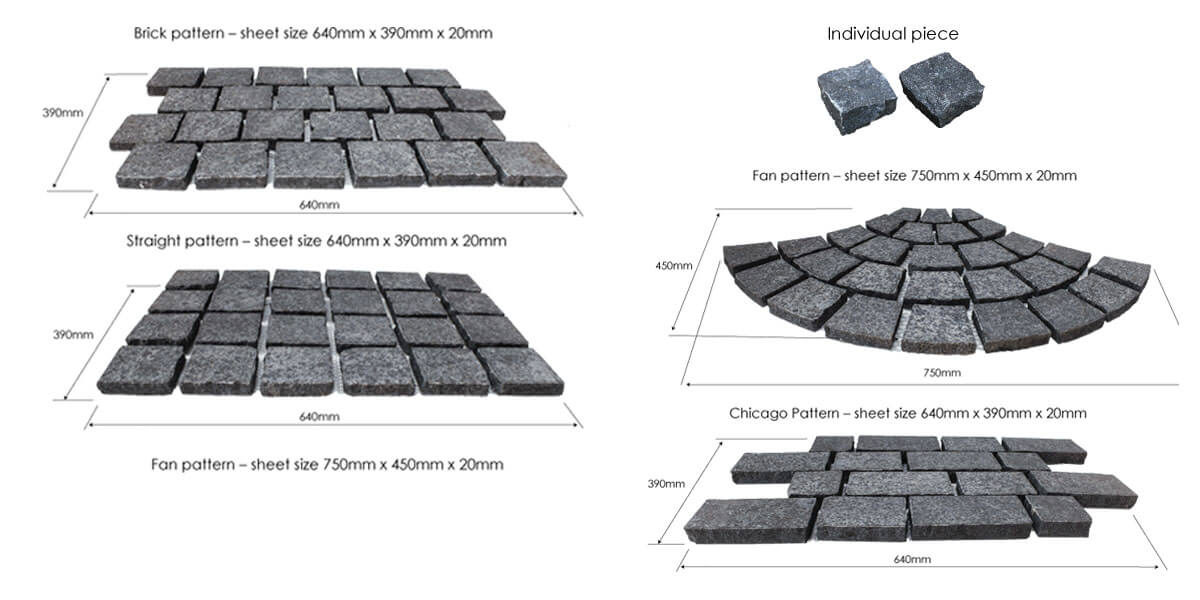
These include the Chicago Pattern, Herringbone Pattern, Brick Pattern and Straight Pattern.

They are also available as loose individual pieces which gives you the chance to create your own unique design.

Below are some examples of how you can arrange cobblestones to turn your outdoor space into a stunning feature for your home.

Cobblestones on mesh 3

How to Lay Cobblestones on Mesh?

Generally speaking, all cobblestones that are on mesh backing of 20-30mm thickness, are to be laid on a cement base.

Depending on where and why you are installing the cobblestones, installation methods may vary.

As such, we strongly recommend consulting your professional contractor to confirm the exact thickness required for the concrete slab.

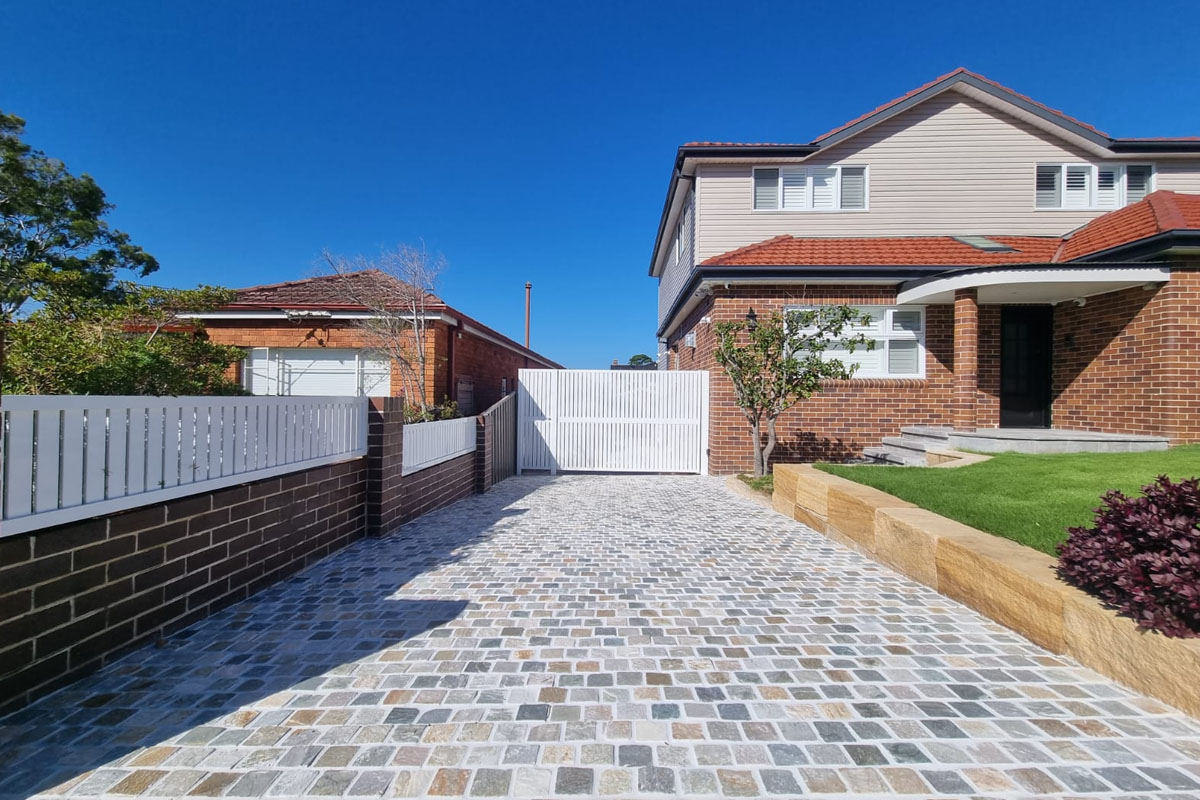
For example, when laying cobblestones for driveways, it is recommended to install them on a reinforced concrete slab that is 120 mm thick.

Cobblestones can vary by 3 – 4 mm in size and/or thickness.

All meshed back cobblestones must have a tolerable thickness and size variation of +/- 2mm.

Cobblestone pavers with a split finish have more flexibility in size and thickness because of the split factor.

It is important to consider these size tolerances during the installation process.

Sometimes the tradesman will need to manually adjust some individual cobblestones in order to maintain the correct heights.

During installation, it is also typical to remove the odd cobblestone that has been broken during transportation.

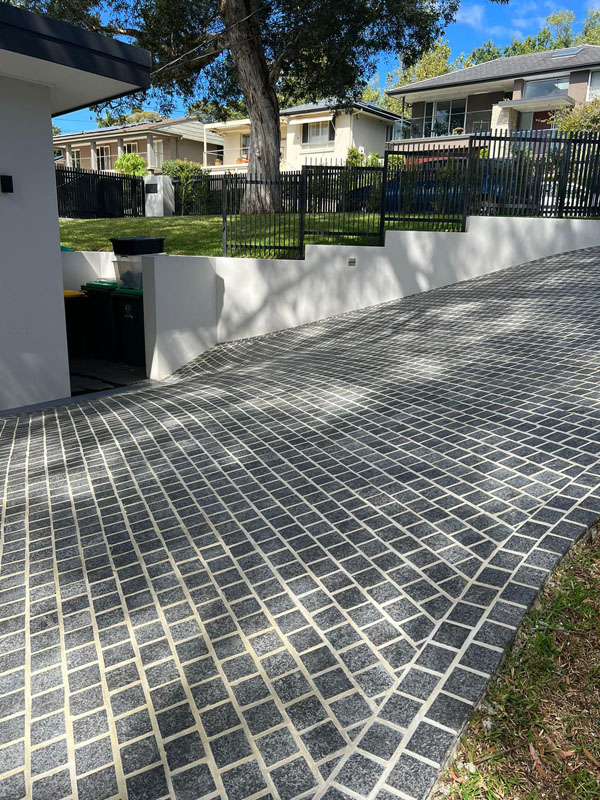
Graphene Granite Cobblestones Armstone

Graphene Granite Cobblestones – Installed by Branch Out Landscape Design

If you want to create that traditional look with your cobblestones, you must use the appropriate installation procedure.

This includes using the proper adhesives, grout, additives, sealers and pre-sealers.

Installing cobblestones the right way will give your paving that “bulletproof” feel.

In this regard, meshed back cobblestones are easier and quicker to install.

However you must use the appropriate adhesives (glue) and grout.

Otherwise your cobblestones will fall apart and that will be costly and time consuming to fix.

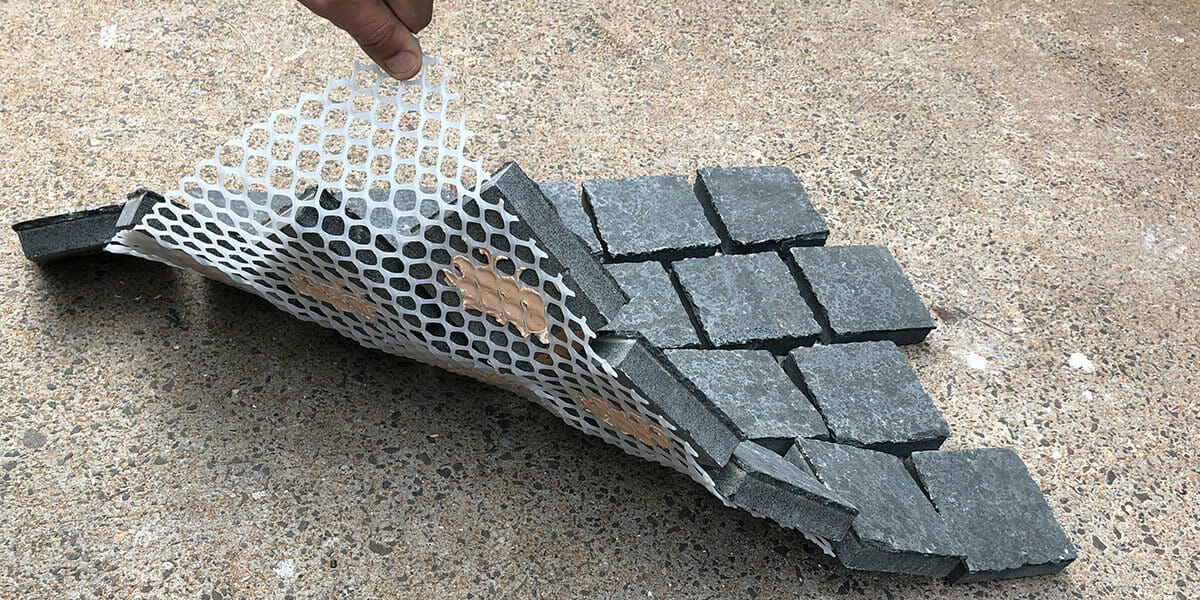
When you get cobblestones with a mesh backing, they are held together on the mesh with an Epoxy Glue.

The mesh backing is made of plastic.

It has holes throughout it so that when you apply the glue to the paving.

This helps it adhere to the back of the cobble stone as well.

Together, the plastic mesh and epoxy glue cover about 50% of the cobblestone’s back.

This leaves another 50% of the space free for the paving glue to stick to the cobblestone.

To avoid the stone from de-bonding over time, it’s very important to use the right adhesive. H

ere we recommend a strong bonding and fibre reinforced ‘Non-Slump Adhesive.’

Cobblestones on mesh

If you want your cobblestones to stand the test of time and stay glued to the cement.

Using only a stronger bonding glue is simply not enough for mesh backed cobblestones.

Let’s say that your car is parked in the driveway and you turn the steering wheel while it’s stationary.

The rubber tyres will grip onto the cobble.

And just as you are rotating the wheel, the tyres will physically rotate the stone.

If you repeat this overtime, it will cause your cobblestones to debond.

In order to avoid de-bonding and increase the strength of adhesion.

We suggest you apply a thicker amount of glue in comparison to installing other ordinary stone pavers.

Use a notch trowel that’s 15mm in width and apply it all over the concrete slab prior to installing the meshed cobblestones.

When you place the cobblestones on top of the glue, keep 10mm space free for the grout.

This means that you will have 5mm of glue under the cobblestones.

And 10mm of glue around the edges of the cobblestones.

This will ensure that all 5 sides of the cobble are somehow glued and joined to another material.

The above method of adhesion is recommended for heavy-traffic areas.

These include driveways that are exposed to more weight and vibrations.

If, on the other hand, you are installing cobblestones for an entertainment area that will only be exposed to foot traffic.

You can get away with a more ‘light’ installation method.

Now that we’ve reviewed the correct way to adhere to meshed cobblestones.

Let’s check out the best products for the installation process.

Lorax Cobblestones

Lorax Cobblestone on mesh

If you are installing cobblestones for an entertainment area that will only be exposed to foot traffic.

You can get away with a more ‘light’ installation method.

However, if you are planning for a driveway.

You will need what we like to call ‘heavy-duty’ installation products.

This is because this area will take a lot more weight and vibrations than an area only exposed to foot traffic.

Bonza cobbles 1
**Bonza Quartz Cobblestones on mesh

RECOMMENDED INSTALLATION PRODUCTS

Adhesive:

Ardex X18

Depending on the area, we recommend different adhesives.

  • For installation on the footpath area, we recommend a Fibre Reinforced Non-Slump Adhesive like Ardex X18.
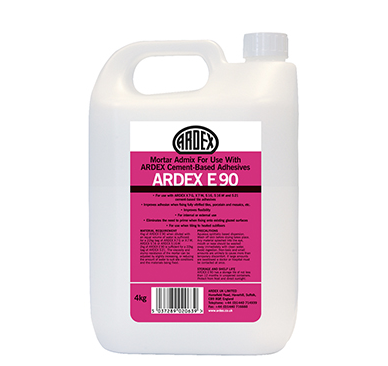
  • For driveways, we recommend the adhesive Ardex X18 mixed with the Ardex E90 Here the mixing ratio must be: 1 x 20kg bag of Ardex X18 + 2L of E90 + 4.5L of water.

Ardex E90

Grout

The recommended grout for cobblestones is Ardex WJ50 Sanded Grout mixed with an Ardex Grout Booster.

Ardex’ WJ50 is a water-based, synthetic polymer grout additive, designed for gaps that are bigger than 3mm.

It improves the strength of adhesion, flexibility and resistance to abrasion.

Grout Booster is added to assist with the grout’s flexibility and also helps reduce efflorescence.

The best mixing ratio is 1 x Ardex WJ50 grout to be mixed with 2L Ardex Grout Booster + 2L water.

Raven cobbles on mesh
**Raven Granite cobbles on mesh

Sealers

Pre-sealing and top-sealing your cobblestones is crucial to increasing their longevity and ensuring a cleaner installation process.

Pre-sealing cobblestones helps clean off any excess grout or ‘grout haze’.

Without using stronger acidic cleaners that can damage the stone.

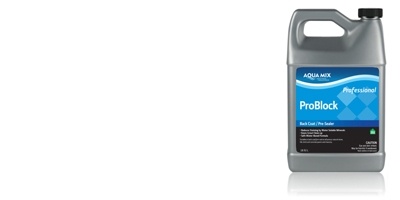
You may use a pre-sealer like the Aqua Mix – Pro Block.

This is an economical, natural-look, breathable, water-based penetrating sealer.

Aqua Mix - Pro Block


It is designed to resist staining caused by water-soluble minerals.

It also helps resist efflorescence migration.

However, ProBlock is not an adhesive bond breaker.

Once you have glued, pre-sealed and grouted the cobblestones, the top sealer provides the ‘final touch’ to the overall aesthetic.

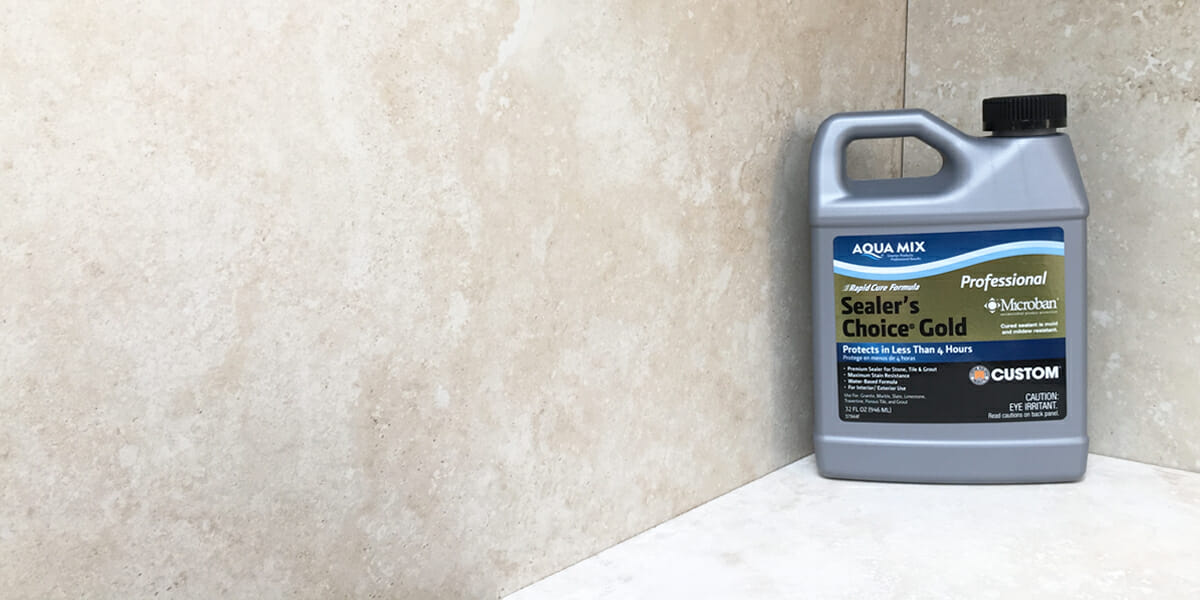
A sealer like Aqua Mix Sealers Choice Gold is a premium grade, high performance penetrating/impregnating stone, tile and grout sealer and will help protect your stone.

It has built-in Microban® – Cured Sealant and is Mould & Mildew Resistant and will last up to 15 years.

Aqua Mix - Sealers Choice Gold


What is the Cost of Installation Materials for Cobblestones?

The answer to this really depends on your project and its unique specifications.

So what we will do is give a quote sample and then show the cost of materials per square meter.

Quote sample for 40m2 of the 100x100x20mm meshed cobblestones:

Description Quantity Unit Price
Ardex – X18 Adhesive 20kg (each bag to be mixed with 2.0L of Ardex E90 + 4.5L water) 10 $45
Ardex – E90 Additive 3.6kg(4.0L) 5 $75
AquaMix – ProBlock – 3.8L Pre-Sealer, Specialty Water-based Pre-Sealer 1 $110
Ardex – WJ50 20KG Grout (Each bag of Ardex WJ50 to be mixed with 2.0L of water + 2.0L of Grout Booster) 14 $36
Ardex – Grout Booster 4.0L 7 $55
AquaMix – Sealer’s Choice Gold 3.8L Premium Water-based Sealer, Rapid Cure Formula, Mould Resistant – Top Sealer 1 $360
Delivery 1 $135

Total: $2305

Taking the above, we can say that you will spend approximately $58m2 on installation materials per square meter of meshed cobblestones.

Gris Cibbstones 1

Gris Granite Cobblestones on mesh

Conclusion

All in all, cobblestones are an exceptional way to decorate your home, garden or driveway.

And bring a world of value and timelessness to your pavements.

Whether you need the cobblestone pavers to suit light or darker landscapes.

They are available in a plethora of styles and materials such as  Granite Cobblestones, Porphyry Cobblestones, Quartz Cobblestones, Basalt Cobblestones and Limestone Cobblestones.

The entire range of Cobblestones can be viewed here.

At Armstone, we recommend consulting your professional installer prior to choosing the cobblestones and ensuring you have everything required for their individual needs.

Hopefully, this article helped you understand the correct installation methods.

And the best materials to use when working with meshed cobblestone.

If you need any help, feel free to call us or send an email.

We love this stuff and are happy to answer any questions.

PS. Below video will help you understand why is it important that your trusted stone supplier works closely with Installer.

How to Build the Ultimate Backyard Stone Fire Pit

Mica stone panels

Australian’s love spending time outdoors.

All with due reason: our summers are warm, our skies are clear and our air is clean.

Whether it’s at the local park or in one’s own backyard, people like to spend time soaking up the sun and enjoying the warm weather.

But what about winter?

That’s what we will be reviewing in this article!

You see, at Armstone we believe that a well designed backyard is the go-to-place in winter – a real communal gathering ground.

And the one accessory that makes this spot both cosy and comforting, is an ultimate stone fire pit. While it sounds tricky to build, it’s actually not as difficult as you may think.

So let’s melt into this!

Different Types of Fire Pits

firepit1

When it comes to stone fire pits and which one to choose, it boils down to a couple of things.

  1. The space you have.
  2. Your preferred aesthetic and what you want it to look like.

Whether it’s round, square, raised or in-ground – the options are endless.

At the end of the day it’s a very personal decision and regardless of what you choose, building your own fire pit is all about being organised, following some simple instructions and roasting the marshmallows with your favourite people, once it’s all done.

Starting Out

The first, and probably most important task, is…

Research!

We suggest you take your time here and review all your options and alternatives now, rather than install something that doesn’t work and spend time and money fixing later.

Here are some questions to prompt your research:

  • Where is the best spot to build the fire pit in the backyard?
  • How will you use the area around the pit?
  • Will it require a seating plan, if yes, how will you organise it?
  • Is the pit far enough from the house and low-hanging tree branches, utility lines and other structures, that it’s safe for an open flame?

You also want to consider the actual aesthetics of your fit pit and research these as well. Here are some questions to prompt this:

  • Do you want a square, round or inbuilt pit?
  • Do you want to burn wood or coals?

Finally, your last point of research must include checking what building licenses and codes are relevant to your neighbourhood about open flames and outdoor fires. Reach out to your local council and ask them to send you all the necessary information regarding these regulations.

How to Build a Stone Fire Pit

Depending on the type of fire pit you want to build, your tools and supplies will differ. However, there are a few basic items you’ll need regardless of your project. These include:

  1. Pavers
  2. Shovel
  3. Tape measure
  4. Level
  5. Steel rake
  6. Spray paint
  7. Glue
  8. Cement

Once you have decided on your stone fit pit, you also want to choose the right stone pavers to install around it. If you are unsure which paver will be best for your choice of fire pit, contact your local stone experts to find out how many pavers you will need, the best material and so forth. Make sure you know the exact size of the fire pit before contacting someone as this will determine their recommendation.

Choosing your paver really depends on the style of the fire pit. For example, crazy pavers, which have the flexibility to be installed in various random shapes, are perfect for round fire pits. On the other hand, rectangular stone pavers are ideal for square fire pits as they match that modern aesthetic.

Now that you’ve done your research, figured out the style you want and chosen your stones pavers, let’s have a look at a step-by-step way to build your backyard fire pit!

firepit3

Step by Step Guide to Building a Backyard Fire Pit

If you follow these 7 simple steps, you will soon have your own backyard stone fire pit!

Excited?

Let’s get started.

  1. Level the Perfect Spot

First and foremost you want to ensure that the ground you’re building on is levelled. You can achieve this with your garden tools by excavating the area to a depth of 15-20 centimetres. Make sure to clear any weeds and rocks from the surface as well.

  1. Mark Out the Circumference of the Fire Pit

Using the spray paint, mark out the borders where you will install the fire pit. This will show you the inner space where you will burn the fire itself. If you have the fire pit bowl handy, you can use this to mark out space. Alternatively, you can layer the space with fire bricks.

  1. Pour the Cement

The area between the edge of the prepared space and the marked line is where you want to spread the cement. This is the area where you will install the wall. Use the spray-painted line as your guide.

  1. Lay the Pavers

Laying the pavers can be quite tricky. The hack here is to lay them one level (or layer) at a time. Remember to check that each layer is level before starting on the next one. If you are using a fire pit ring, place it in the pit and build the wall around it. If necessary, you can fill the gap between the fire pit ring and the wall with crushed stone or gravel.

  1. Add Stone Capping

Once your fire pit is at the desired height, you’ll need to use stone capping to finish it off. Essentially, this means putting a layer of flat pavers on top of the wall. Choose flat stones that fit nicely together and look aesthetically pleasing. Work all the way around the fire pit wall, lay the flat pavers and fill the joints with cement.

oyster and Mica panels

  1. Use Stacked Stones to Dress the Wall

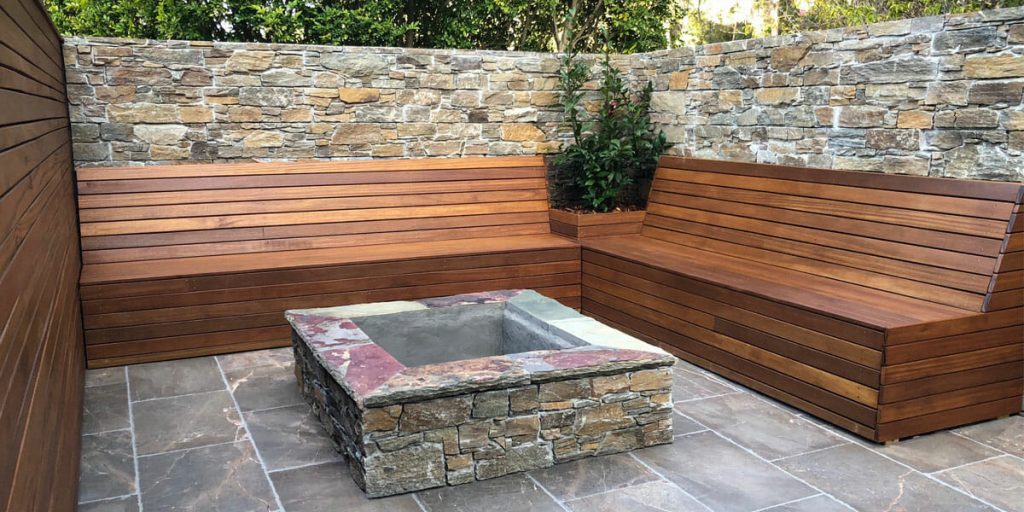
Once you’ve built the fire pit, it’s time to dress it up and make it glamorous. An optimal choice for this is using natural stone wall cladding. These will give your brand new fire pit that natural stone-look wall. The plus side is that these have smooth backs which makes them relatively easy to install. Applying a bit of elbow grease, you’ll be able to build an elegant façade that will stand the test time.

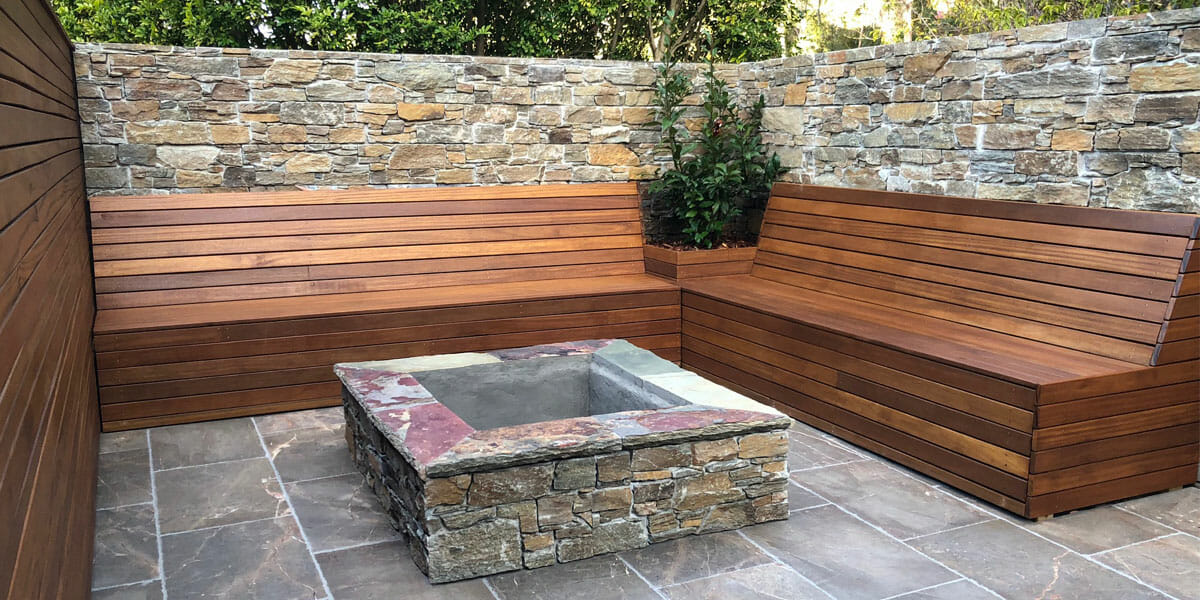
  1. Add Seating

Once you have completed the structure, you can finish your area by adding seating! Whether you want to install comfortable furniture or lay some pavers, this final touch will create the perfect entertainment and relaxation area that you and your family and friends will enjoy for years to come!

firepit2 1

Perfect for Warming Up Winter

There you have it!

Your simple, step-by-step guide to building your very own stone fire pit!

When you’re ready to choose your stone paverswall cladding or capping stones, be sure to reach out to us at Armstone. We will gladly guide you with the best size, style and paver material for your fire pit.

Contact us over the phone or email here or visit us at our Glebe showroom in Sydney!

If you found this helpful, please pay it forward and share the article with a friend.

Thanks for reading!

4 Natural Stone to use when landscaping around your Pool

Chilla Marble pavers

Australia is a desert and it is notoriously known for its sweltering summers.

As such, most Australians have the ultimate dream: to build a pool in their backyard. Someplace where they can easily cool down, host parties and relax.

Sound familiar?

Maybe it’s your dream!

However, like many items of leisure and luxury, installing a pool can be expensive.

And, it can become even more expensive if you cut corners.

But if you do it right the first time, a pool can become your best home investment and accessory.

In this Armstone article, we will dive into some of the questions and considerations we recommend to our clients prior to investing in their pool and surroundings.

Firstly, when creating your dream pool, you want to examine everything from shape and size to aesthetics and practicalities. Here are examples of questions to think about:

  • What is your main purpose for the pool?
  • How much space do you need around it?
  • How will you access it?
  • What costs are associated with building it? How much time and money will you need to spend on maintenance?
  • What are the right pool paver materials?

As you can see, building the dream pool requires a lot more than just an idea and desire. At Armstone, we want to make sure that you invest your time and money wisely.

Below we will review how to choose the right pavers for your pool and the 4 natural stones we recommend for landscaping around your pool.


Dutoit Limestone Pavers 7
** DuToit Limestone Pavers

CHOOSING THE RIGHT PAVERS

Regardless of your chosen pool design, deciding which natural stone pavers to use for your pool surrounding will make a very powerful statement about your taste, status and success. Some factors to consider include: appearance, durability, non-slip finish, environmental factors like weather conditions and finally, the sealant.

Appearance

As a general rule of thumb, you want to choose pool pavers whose colours compliment your house and garden.

For example, if you have a dark timber deck, a bluestone paver will clash with the dark timber. As both are aesthetically beautiful on their own, together they will wash each other out. Instead, a lighter coloured marble or limestone paver will complement a darker timber deck very nicely.

The same concept applies when choosing the colours and materials for your home!  Unless you want to make a statement with a deliberate clash and contrast, whether it’s glass, cladding, render or brick, you want your pool pavers to blend seamlessly with your surrounds.

When it comes to appearance, it’s also important to consider the paver style against the aesthetic of your house’s general architecture. If you want to match the style of your home to your pool, choosing the right profile of the pool coping is very important.

If you want to be more arty and creative, you can use crazy paving to break up spaces and add a unique style to your home or garden.

Durability

The pool surrounding is a high-traffic area, especially in summer. So it goes without saying that whatever stone pavers you choose, they simply must be durable!

On the topic of durability, remember that the pavers will have chlorine or salt-water splashed on them regularly so it’s important to choose natural stone pavers that won’t deteriorate from such splashes.

Next, there will be occasions when food or leafs from trees will drop on them, or even sunscreen or pool chemicals will be spilled on them. As such, you want to select stone pavers that can withstand such circumstances: pavers that will remain sturdy, untarnished and will stand the test of time.

Limetta Limestone Pavers 2
** Limetta Limestone Pavers

Non-slip finish

All that water in the pool tends to find its way out, whether it’s from people jumping in or out, or just splashes from the pool due to wind and changes in the weather. Undoubtedly, having slippery pavers is exceptionally dangerous, so make sure you check the paver’s non-slip rating before making your investment. This is usually identified with a P in front of it. For example, P3 is very slippery. You want to aim for pavers with ratings of P4 and P5 for pool surroundings.

Weather conditions

As they are installed outside, Natural Stone Pavers will experience all weather conditions. As such, you want to consider how they’ll cope with rain, storms, extreme heat and so forth. For instance, will the paver get too hot on a 35-40 degree summer day? Will it be unbearable to walk on? Will it reflect too much of the sun’s glare and make the eyes sore? Maybe the stone is extra porous and not ideal for pool surroundings because it will dissolve over time?

Some of these seem a bit far-fetched, just trust us when we say that we’ve seen people install the wrong pavers around their pools and watched them spend a fortune in fixing a problem that should never have been a problem, to begin with!

So it’s best to ask even the most ludicrous question now, rather than patch-work the problem later.

Seal the deal

Finally, natural stones can be porous and sensitive. This is why it’s important to protect them with the right sealer. Your pool is an investment, and an expensive one at that. You want to ensure that it stands the test of time so that you can enjoy it for many, many years to come!

THE TYPES OF STONE TO USE:

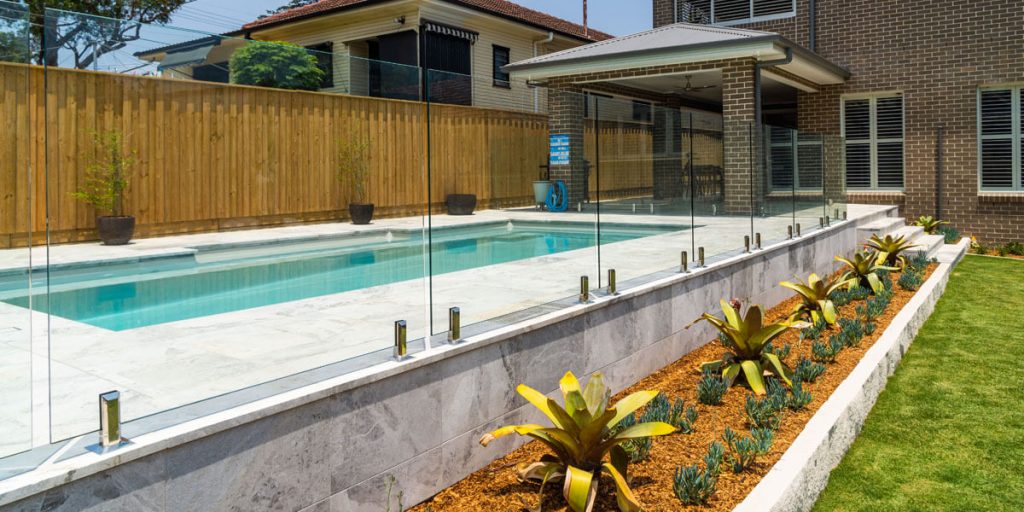
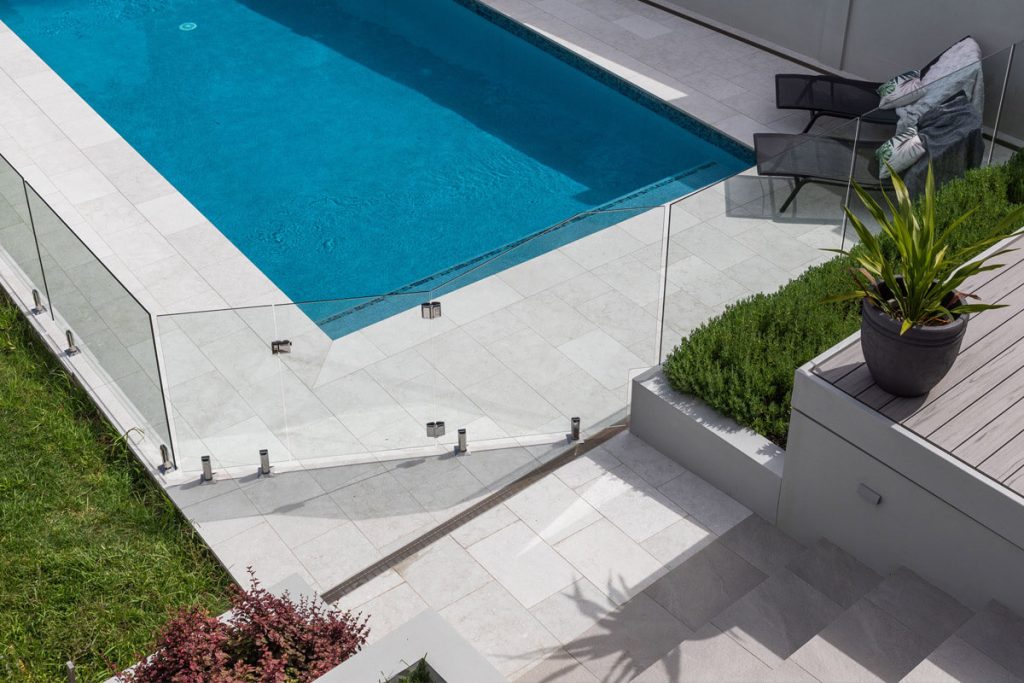
Now that we’ve reviewed a few vital considerations, there are several options of natural stone that are best suited for pool surroundings. These are: marble pavers, limestone pavers, granite pavers and bluestone pavers.

Let’s look at them individually below:

1. MARBLE PAVERS

Frostine marble pavers 5
**Frostine marble pavers

A beautiful, light coloured stone, marble has many advantages as a pool paver. Though it’s popular for its aesthetic, it is a very hard-wearing stone which means that it will last for years! It also doesn’t absorb a lot of heat, making it an ideal paver for harsh hot summers where the stone will be a cool welcome for your feet.

2. LIMESTONE PAVERS

Melba limestone pavers
** Melba Limestone Pavers

As one of the world’s go-to building materials, limestone is known to retain its form regardless of the conditions that come its way. It has an earthy colouring which makes it suitable for an outdoor environment. Limestone pavers can withstand heavy foot traffic and extreme weather conditions and are available in a variety of colours and textures! It’s no wonder that they are such a popular pool paver.

3. BLUESTONE PAVERS


Nulla Bluestone Pavers 4
**Nulla Bluestone Pavers

Dense and hard-wearing, bluestone (also known as basalt) is a practical option for pool paving because it is salt resistant. Besides being very durable, bluestone is available in a variety of shapes and styles ranging from tiles to cobblestones! As such, it’s a very versatile paver for your home and garden. In the photo above, the paver has been laid in a ‘crazy’ paving style making it a feature for the pool surrounding.

4. GRANITE PAVERS

Raven Granite Pavers
** Raven Granite Pavers

Non-slip and with a flamed finish, granite is ideal for pool settings. It’s elegant and works very well with contemporary architecture. It’s one of the densest natural stones which is why it’s so popular as a pool paver. Granite sports a speckled finish which makes it an appealing stone for pool pavers because it hides stains. In the case that an accidental spill or stain occurs, you can easily hose down this paver because it has a low-porous rating.

If you want more information on How to Choose Pool Pavers and Pool Coping, follow the link before.

Take your pick

At the end of the day, remember that building a pool is an investment for your home. So it’s vital to choose a stone paver that has the best aesthetics, durability and longevity for your lifestyle.

Now that you are better equipped with choosing the right stone for your pool, check out our 5 Tips On How To Choose Pool Pavers and Pool Coping.

Armstone is the leading provider of premium natural stones, including travertine, bluestone, sandstone, limestone, marble and granite pavers. We have been trading for over a decade and are very passionate about helping our customers create spaces that bring them joy and happiness.

If you need some help deciding which natural stone best suits your lifestyle and home, contact us for information and expert consultation.

PS. Below video will help you understand why is it important that your trusted stone suppler works closely with Installer.

Tips on Sealing and Cleaning Natural Stone Pavers

Cinnamon Travertine Pavers

Like all materials, if not maintained properly, stone pavers can age and lose their elegant aesthetic and appeal.

Foot traffic, weight stress, dirt, debris and exposure to the elements, are all factors that can contribute to this deterioration.

Like all materials, if not maintained properly, stone pavers can age and lose their elegant aesthetic and appeal.

Foot traffic, weight stress, dirt, debris and exposure to the elements, are all factors that can contribute to this deterioration.

However, regular cleaning and high-quality sealing will give your natural stone pavers the best chance at retaining their original aesthetic and longevity.

In this article, we share simple strategies and steps you can take to maintain your pavers from the challenges of everyday wear and tear to keep them looking lush and new.

1. Use the Right Cleaning and Sealing Products

You have probably found that there are numerous cleaning and sealing products available on the market. These products include stain-removal, polishing creams, pre-sealers, deep cleaners, concentrated cleaners, and many others.

However, choosing the product on price point is not the best strategy for finding the best sealer or cleaning product for your particular paver. Choosing the best product depends on the type of stone you’ll be sealing, the stone’s grouting, density, porosity and many other factors. For example, your natural stone pavers might need a heavy-duty cleaner and grout removal.

In order to achieve that quality clean you want, it’s important to find the right product for your paver. If you need some assistance or advice, we suggest contacting a professional, or calling us at 1300 560 560.

2. Avoid Harsh Cleaners

Not all cleaners are created equal. More specifically, not all cleaners are designed for natural stones. We strongly suggest against using acid-based cleaners, vinegar or other harsh soap-based products on natural stones. If you use these, they will leave dull, hazy or milky stains on the stone. The best cleaning products for natural stones are pH-neutral cleaners, that are specifically designed for natural stone pavers. Another important detail is creating the solution by mixing the product and water in the right ratio, which is dependent on the soil buildup.

Limestone Pavers Oyster

3. Wipe Spills Immediately

You may have heard that prevention is far more effective than cure. In the case of natural stone pavers, in the odd occasion where prevention is not possible and spills accidentally occur, wiping them immediately can save you a lot of time and money in the long term. Acidic drinks and food items, cooking oil and demineralised water can damage the natural stone’s finish and stain the stone with etch marks. To avoid long term damage, we recommend cleaning the spill as quickly as possible. Once you’ve wiped the spill, use an appropriate cleaner or stain-removal product to reduce the risk of staining.

4. Sweep Regularly

When it comes to maintaining stone paving, as overwashing can result in soiling the grout and other parts of the stone, regular sweeping is more recommended than regular wet cleaning. Dirt, grime, and grit are the key culprits to damaging your stone pavers. Regular sweeping will remove these from the floor and thus reduce the stone’s surface wear and tear.

5. Clean the Grout

Dirt, grime, grit and dust loves gathering in small spaces. This is why it’s super important to clean the grout area (the space between your pavers). To do this most effectively, mop the floor’s surface with a non-acid based detergent cleaner.Once complete, use a soft, non-scratch brush to scrub both the pavers and the grout.

6. Seal Correctly

Sealing helps protect your natural stone pavers from staining and odours. Like painting a house, sealing your pavers not only protects the underlying material but also keeps the pavers looking beautiful. While it is common for natural stone pavers to be pre-sealed prior to installation, ongoing sealing is a recommended necessity to prolong your pavers longevity, protect them from deterioration and staining and keep them as close to new as possible.

Aqua Mix - Sealers Choice Gold

When applying the sealant, make sure you accurately follow the sealant manufacturer’s instructions. Poor application can leave residues and stains, leading to dirt accumulation and difficulties in cleaning in the long term. Avoid unnecessary peeling and scuffing by selecting a sealant that is designed for natural stone. Remember that depending on the stone and the sealant, you may need to apply several layers for maximum effect.

General Product Instructions

To make it easier for you, we wanted to share some general product instructions for applying sealant:

  1. Sweep, vacuum or dust the surface thoroughly.
  2. Test the sealant on a small area prior to application.
  3. Apply the sealing solution using a paint pad applicator, pump sprayer, sponge or brush and allow approx 3 minutes of penetration before wiping the area dry.
  4. Leave the sealant for a minimum of 30 minutes to dry before applying the second coat.
  5. Ensure that no sealer is left on the surface by wiping it completely dry using clean, dry cotton, paper or microfibre towel after each application.
  6. Check that the surface is completely sealed after 2 hours by applying droplets of water onto the paver. If the water penetrates, an additional application is required. If it doesn’t, your paver is now successfully sealed!

Sealing Wet Areas

If you’re sealing a paver that is exposed to a wet area, such as the space around a pool or pond, you might need a special sealant that is specifically designed to withstand such exposure. Alternatively, ensure that your natural stone pavers have been dip sealed prior to installation.

7. Maintaining Sealed Pavements or Re-sealing

After you’ve successfully applied your sealant, check the manufacturer’s instructions and note when you’ll need to reapply it. Sealants can last for as long as 15 years, however because some areas that are prone to heavier traffic than others, the sealant may wear out faster. As such, we recommend checking once every three to five years to see if resealing is required.

To check this, simply drop some water onto the surface of the paver. If the water beads and doesn’t absorb, you can probably leave it for a while.

Routine cleaning of your paver should include regular sweeping, as mentioned before, as well as mopping or lightly scrubbing the pavers with the appropriate pH-neutral detergent.

8. Allow Drying

After applying the sealant, let the paver’s dry for a minimum of 12 hours. It’s preferable to let the sealant dry for up to 24 hours, however this would depend on each manufacturer. So remember to read their instructions first and foremost.

More on Natural Stones

Choosing the right cleaning and sealing products, along with regular cleaning, not only protects the appearance of your natural stone pavers but also prolongs their beauty and life.

If you are interested in laying natural stone pavers in your home read this for tips and best practice.

Armstone is Sydney’s leading provider of pavers, tiles, stones, and cladding. We work with the world’s best manufacturersto supply you with the highest quality products.

We hope you found this article helpful! If you need any other assistance, contact us here for help from one of our natural stone experts.

Concrete vs Porcelain Pavers: Advantages and Limitations

Tuscany Porcelain Pavers 3

If you are considering a paver for your home.

The two that will come up most frequently are either concrete or porcelain pavers. 

Whether you’re paving a driveway or a patio, they are both excellent choices.

However, it’s imperative that you are aware of their differences.

And take these into account when making your final decision. 

So if you are thinking concrete vs porcelain pavers and would like to make the right choice for your project.

This quick guide will help you better understand both of their potential advantages and drawbacks.


Platto Porcelain Pavers

The Advantages of Concrete Pavers

Concrete is a sturdy material.

As such, concrete pavers fall into the same category of sturdiness.

They are also conveniently available in a range of colours and shapes.

This makes them a versatile option for outdoor spaces.

1. Range of Options

Concrete pavers are available  in a wide variety of colours, shapes, and sizes.

So you can customise your driveway or patio layout to your taste and design.

As concrete pavers are an inexpensive material with a low-cost manufacturing process.

Manufacturers are always delivering innovative designs.

This broadens the variety of concrete pavers available on the market. 

2. Versatility

Concrete pavers mix well and can be mixed and matched to create unique walkways and outdoor surfaces.

Along with an already broad range, you can also buy pavers with different textures and edges.

Whether you like smooth shapes or novel shapes – like tongue-and-groove designs.

Concrete pavers can be cut to your desired pattern and design.

In this regard, they’re an extremely versatile and flexible material.

3. Cost

Concrete pavers are a cost-effective paving option.

Thanks to their smart manufacturing processes.

Concrete pavers are less expensive than other paving options like poured concrete or asphalt, or even sandstone, granite, or clay.

If you are on a tight budget, concrete pavers are a good choice for your project.

4. Strength and Durability

Concrete pavers can be as strong as natural stone.

More durable than black asphalt, and multiple times stronger than poured concrete.

Additionally, they come as interlocked pieces which allows for expansion and contraction without the risk of surface cracks.

5. Weather Resistance

If you live in a location that experiences extreme colder climates, especially with significant snowfall.

Then concrete pavers are a good option for your home.

This is because concrete pavers remain durable against the cycle of freezing and thawing.

They can also tolerate de-icing salts and are naturally slip resistant.

6. Low Maintenance and Quick Installation

Another advantage to concrete pavers.

As opposed to pouring concrete.

Is that repairing concrete pavers can be much cheaper.

This is because you simply need to swap any damaged piece rather than re-concrete the whole area.

As it is easy to cut concrete pavers into uniform shapes, they are also easy and hassle-free to install.


Concrete pavers

Limitations of Concrete Pavers 

As with any paving option, concrete pavers come with their own potential limitations, including:

1. Fading

Concrete pavers are manufactured with colour pigments.

As such, the colour may fade a little over time.

Especially if the pavers are installed under direct sunlight.

2. Erosion

While concrete pavers are typically unaffected by the chipping and cracking that is often associated with other paver options.

Like most materials, they can gradually erode.

With time and general wear and tear.

The smooth finish can wear away completely and expose the composite material underneath.

3. Longevity

We have mentioned earlier that concrete pavers are ideal for colder climates due to their durability and strength.

However, as mentioned in the previous point, they can erode over time.

And as such if you are looking for an even more durable stone paver.

You may find that natural stone or porcelain pavers have better longevity.

Again, this largely depends on your project and where you will be installing the paver.

4. Sealing and Installation

Concrete pavers require good sealing and it’s recommended to re-apply it over the paver’s lifespan.

In this regard, you might consider that the pavers require a bit more time for maintenance and upkeep.

Now that we have detailed the advantages and limitations of concrete pavers.

Let’s review the advantages and limitations of porcelain pavers.

Advantages of Porcelain Pavers

If you are looking for a ‘natural stone look’ paver without the price-tag of natural stone.

Or because you are installing the paver near water.

And want to use a more suitable material.

Porcelain pavers are an ideal choice for your project.

Structural porcelain is a type of ceramic that is manufactured into a paver.

As such, it can be  stronger and tougher than other paving options. It’s other advantages include:

Grey Porcelain Pavers

1. Strong Aesthetic Appeal

One of the leading benefits of porcelain pavers is its aesthetic appeal.

Manufactured from high-quality materials.

Porcelain pavers are luxurious and alluring when installed around your home.

Their design resembles natural stone.

So if you prefer this aesthetic, you may want to consider porcelain pavers for your project.

2. Variety of Options

Porcelain pavers are made from clay.

As such, they are available in a vast variety of colours and prints.

For example, our selection of porcelain structural pavers is available in over 50 different prints and 10 different stone-looks.

Thus, you can have the beauty of natural stone.

And thanks to it being a man-made material.

You have an additional bonus of easy upkeep and maintenance.

3. Durability

Porcelain is one of the toughest flooring pavers available on the market.

It’s resistant to most heavy impact.

Making it suitable for high-traffic areas and even industrial sites that use heavy equipment.

4. Moisture Resistant

Porcelain pavers perform better than most other paving options when exposed to moisture.

As porcelain pavers are more dense and less porous than natural stone pavers.

Their composition makes it nearly impossible for moisture to seep through them.

This is why porcelain pavers are an ideal solution for pool surroundings.

And also for colder climates that experience heavy rainfall or snow.

5. Stain Resistance

Porcelain is naturally a stain resistant material.

And even more so when it has a glazed finish.

Since it’s also less porous than other materials.

It is very easy to wipe off stains or spillages.

Porcelain pavers can also be kept clean with harsher cleaning products.

Such as acid, which would otherwise damage natural stone pavers.

6. Fireproofing

We mentioned earlier that porcelain pavers are made from clay.

As a result, porcelain pavers are extremely heat resistant.

They simply don’t catch on fire and can help limit the spread of fire if one does break out.

Living in Australia where we are constantly subject to bushfires.

This is an extremely advantageous quality in a paver for your home, especially outdoors.

7. Long Lifespan & Longevity

If properly installed and maintained.

Porcelain pavers can last decades.

You will save time and money on replacing pavers and renovating. 

Limitations of Porcelain Pavers

While porcelain pavers have their advantages.

Like any product, they also have particular limitations.

Let’s review these:

1. Installation

While one of the advantages to porcelain pavers is that they are dense and strong, this makes them harder to cut.

So if you need particular shapes or designs, unless you’re an expert, porcelain can be hard to install.

So instead of doing it yourself, it may be advantageous to call an installer who has experience working with these pavers.

2. Weight

Again, because porcelain is made from clay, it is a dense and tough material which makes it heavy.

As such, not all areas in your home may sustain its weight.

If you are installing porcelain pavers on a deck or any elevated structure.

We strongly recommend checking with a professional if the structure will support the added weight before investing in the material.

3. Price

Unlike concrete pavers, porcelain pavers have a higher outright investment in terms of material cost and installation.

On the flip-side, they are more durable and can stand the test of time.

So it really depends on what you want from your paver and where in your home you’re installing it.

If you would like any help with this, call our experts in Sydney at 1300 560 560.

We would love to help you out. 

Porcelain Pool Pavers

Choosing the Right Paver For You

Now that you fully understand the advantages and limitations of both concrete pavers and porcelain pavers.

You can see how concrete pavers could provide you with a durable, cost-effective solution that requires little maintenanc.

Whereas porcelain pavers could be preferable for such projects where you want to prioritise longevity and aesthetic appeal. 

In order to decide which paver would best suit your needs.

You’ll want to consider:

  • Your budget
  • The space you are paving
  • The climate and
  • Whether you need a water resistant option. 

If you decide that neither of these options suit you.

And instead you’re interested in natural stone pavers, read this article we wrote about the pros and cons between porcelain pavers and natural stone pavers. 

If you need any help making the best choice for your project, contact us today for more information. 

Or, if you’ve already decided which paver you want to install.

Browse our range of high-quality pavers online or visit our Sydney showroom in Glebe and see the beautiful pavers in person. 

Thank you for reading our blog and if you found it helpful, please share it with your friends.

PS. Below video will help you understand why is it important that your trusted stone suppler works closely with Installer.

How to Choose Outdoor Pavers and Tiles for the Perfect Patio

Oyster Limestone Pavers

Thinking of installing a new patio?

Or perhaps you’re looking to lay some pavers to create the perfect garden path, pool or entertainment area?

In this article, we explore the top trends when choosing stone pavers and porcelain pavers and dive into which may be most suitable for you.

And first…

What’s the difference between stone pavers and porcelain tiles?

Before choosing between natural stone pavers and porcelain pavers for your outdoor space, it’s essential you know the difference.

  1. Stone pavers are unique and individualistic because natural stone is quarried from the ground and no two pavers will ever be the same. As such, no material can rival against that luxury appeal of natural stone pavers. In saying that, they have their own downfalls, especially when it comes to maintenance.
  2. Porcelain pavers look very similar to natural stone pavers, however, they are manufactured. As such, they are easier to maintain and more functional for everyday purposes. They are also on average 35% cheaper than natural stone pavers. So if you’re building on a budget and love the natural look, porcelain pavers will help you achieve this aesthetic without breaking the bank.

Now let’s have a look at…

When to use Natural Stone Pavers?

Marble pavers and limestone pavers are quite distinguished in appearance and being available in a wide assortment of colours. These natural stones are often selected for indoor and outdoor settings because of their elegance and unrefined look, so it’s easy to see why they are a popular choice in contemporary designed homes and landscapes.

If you want to create a clean, minimalist and eye-catching path or indoor environment, install either marble and limestone pavers. Representing both strength and elegance, they will add a lot of character to any modern home.

Limestone is also quite unobtrusive in appearance. As such it can give a lovely organic touch even in a large backyard. Alternatively, it can be used as a trim around wooden decks or stepping stones along a garden path.

Striking and robust, granite pavers create a clean look for modern properties. As a strong and dense stone, granite is very suitable for high traffic areas and makes it an equally attractive (and practical) choice for pathways, patios or even driveways!

Melba 2

Bluestone pavers are another natural stone that is robust and suitable for outdoor areas with heavy foot or tyre traffic. These versatile pavers can be laid in a variety of designs like herringbone or fan shapes. Alternatively, you can use them as stepping stones.

If you love sandstone, we can relate! As a timeless stone it oozes character and makes your garden look majestic and regal. However, since it is a softer stone, it doesn’t bode well with lots of pressure and foot traffic. As such, we suggest using sandstone in areas with light or minimal traffic or simply adding it as a defining trim along your garden.

Now that we’ve reviewed natural stones, let’s have a look at…

When to use Structural Porcelain Pavers?

All porcelain pavers have a high break-load and most are designed to reduce glare from the harsh summer sun. So, not only will they stand the test of time but they will be easy to maintain, giving you all the time in the world (ish) to enjoy your space.

Let’s review which ones to use and when and where to install them!

If you love the granite look but want to install a paver that’s easier to maintain, Porcelain Granite Pavers are your answer!

With a 1200kg break load, these pavers can be installed on pretty much anything: sand, screen, pedestals. Porcelain pavers also absorb 35% less heat than their natural stone counterparts. Given Australia’s harsh desert summers, this makes them an ideal choice for outdoor (and indoor) locations.

Similar in appearance to classic travertine pavers, ivory porcelain pavers have a lighter tone. This makes them inviting, pleasant and extremely dense. Also, the staining issues that can affect natural travertine stone are completely nonexistent with porcelain pavers because they never permanently stain. Ivory porcelain pavers are popular for entertainment around the pool and are perfect as stepping stones for  pathways.

If you want a sandstone paver that is hard wearing and suitable for pool areas, you may wish to consider sandstone look porcelain pavers. These offer an elegant, yet functional, solution to outdoor entertainment. They feel like a natural sandstone underfoot and have a similar colour tone and appearance but are much easier to maintain. This is important, especially around the pool where water and acidity from plants or spilled drinks, can damage and stain natural sandstone!

Elite Silver

If you are looking for something more earthly in tone, we suggest tuscany porcelain pavers instead of ivory porcelain pavers. They are also ideal for high traffic areas.

Limestone porcelain pavers have a similar look and feel to limestone pavers and are predominantly neutral in colour (available in both grey and beige). Beyond the advantages that porcelain pavers have over stone, Jura is more uniform in colour, thus embodying a cleaner, more minimalistic aesthetic to any patio or entertainment area.

Robust and hard to stain, porcelain pavers are useful in large outdoor entertainment areas. Typically grey in colour with copper tones, quartz porcelain pavers are almost identical to naturally occurring split-face quartz stones. Their other advantages are that they’re slip resistant, show no fracture points, and absorb less heat than natural stone quartz.

Now that you know the difference between stone pavers and porcelain pavers, it’s time to…

Choose a tile or paver that is right for you!
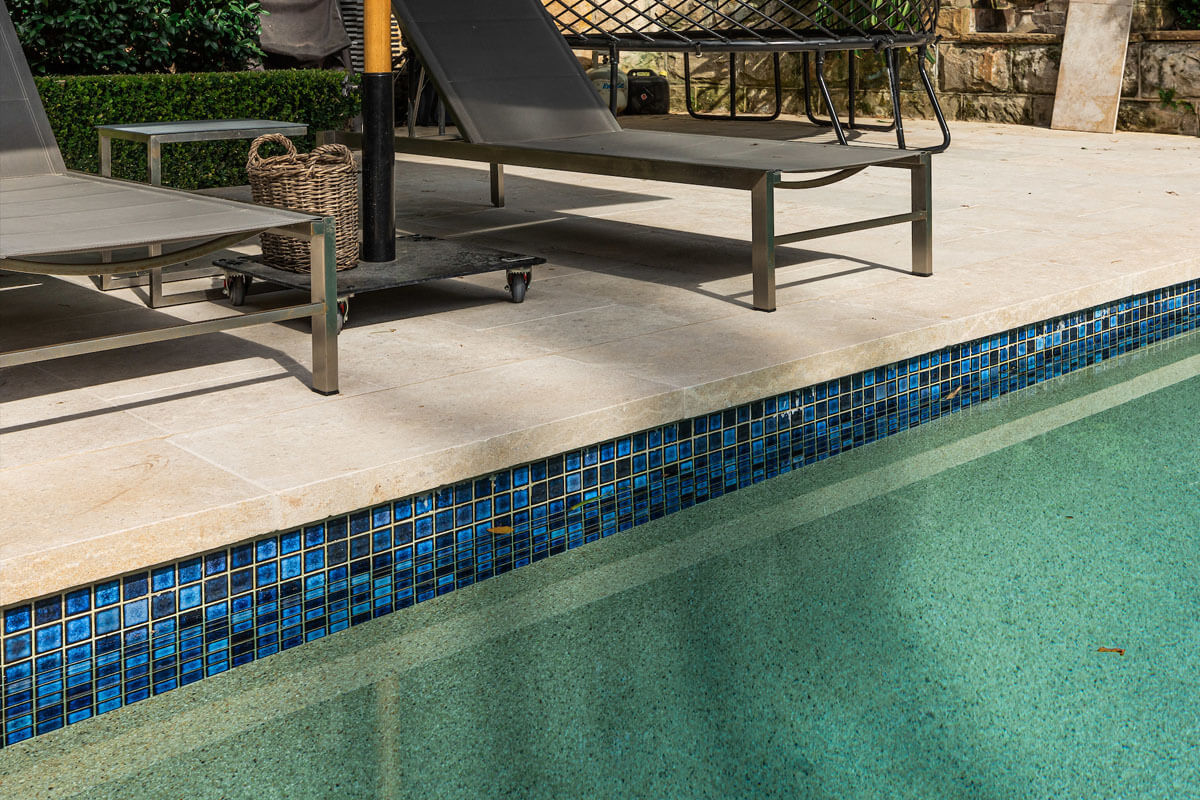
Finding not only the best, but the right paving solution can be quite a cumbersome and challenging experience.

If you need some help, advice or professional consultation, please reach out! We would love to help you find the best option for you and your family.

Simply give us a call and one of our experts will steer you in the right direction.

Thanks for reading this article!

If you found it helpful, please share it with a friend.

How to Lay Natural Stone Pavers? Informative and Technical

Oyster Limestone Pavers

This is a very good question because installing stone pavers can be quite challenging.

On top of that, you may have found there are a lot of different opinions on the “correct” and “best” method of installing natural stone pavers.

As with any industry, there are also many “techniques” (read as ‘shortcuts’) that can save time and money.

Now, these are all well and good.

Until something goes wrong.

When this happens, you will be left with devastating consequences for your home or commercial project.

This will add extra costs and time to fix.

Not to mention the added stress on your mental health.

Doing it properly from the beginning would be best, wouldn’t you agree?

This is why it’s important to take advice from those professionals who have a successful track record in the industry.

It’s equally important to invest your hard-earned money in products supplied by companies that have a track record for quality materials.

You see, it’s all part of the package.

If you want to create impeccable pavement, this involves investing in quality materials and quality workmanship.

Having one without the other will make a world of difference once the project is completed.

Also, cutting costs (or corners) may seem like you are ‘saving’ today.

But in reality, it is likely to increase ongoing maintenance costs or fork out lumpy sums for repairs in the long haul.

In this article, we will review four methods of laying stone pavers.

This will give you a solid foundation when starting your project.

When you speak to your installer, be sure to make notes and compare them with what we discuss in this article.

If you find inconsistencies, make sure to get another opinion.

If you would like additional support, we are happy to chat with you over the phone and assist with:

  1. Interviewing your installer for you.
  2. Cross-checking the information the installer provided to you.

Oyster Limestone 0Limestone Pavers – Installed by Just Clip It

When choosing an installer.

Make sure to take notes of what they say.

And compare their words with our methods below to see if there are any inconsistencies.

Also check out this article to understand why it’s important that your stone supplier works closely with an installer.

But now…

Let’s get to the technical things.

3 METHODS HOW TO LAY NATURAL STONE PAVERS


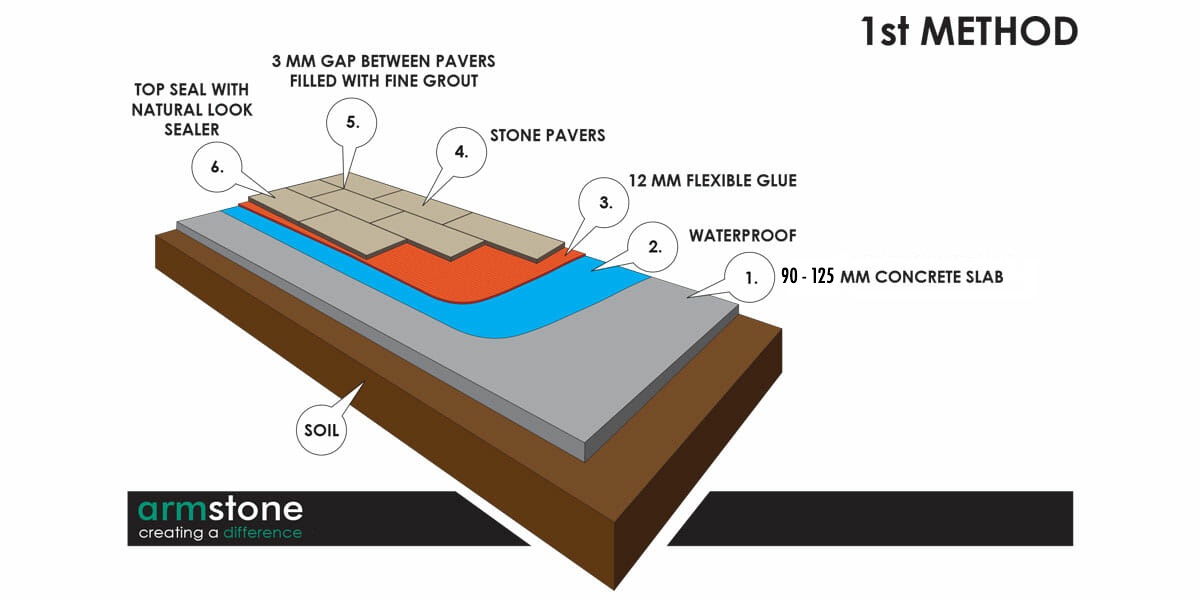
The 1st Method called “SLAB PAVING”- The best and most ideal method

Our preferred method for laying stone pavers is to always start with installing a concrete slab that’s 50-60mm high.

Let’s have a look at the steps involved:

  1. Install 100mm compacted road base footing.
  2. Pour a concrete slab min 90-100mm thick for foot traffic and 125mm thick minimum for a driveway. Once poured, allow 14 days for it to cure.
  3. Waterproof your concrete slab to avoid efflorescence. Efflorescence happens when salts come to the surface of the concrete. This creates a white icky, foam-like substance along the grout joints. As most natural stones are porous.If the concrete slab is not waterproofed. Efflorescence can come out of the pores of the stone.Otherwise, with stones like porcelain pavers, the salt will find any way to seep through.And this typically happens through the grout joints.

    But efflorescence can also occur when using a traditional mortar bed installation.

    Why?

    Well, there are salts and minerals found in the bush sand.

    We recommend using a product like Mapei Mapelastic Smart!

  4. Once your concrete slab has been waterproofed. Use your 12mm Notch Towel to apply a flexible glue, like Ardex x18, onto each paver. Allow a minimum 3mm gap between each stone paver for expansion and contraction.
  5. If you are working with highly textured surfaces, be sure to pre-seal them before you start grouting. Otherwise, it will be very challenging to remove any grout haze from the textured surface. To do this, you can use a specific non-bond-breaking sealant, such as the Aqua-Mix Pro Block. This product improves adhesion and lightly seals your natural stone which makes cleaning the excess grout easier.
  6. Once you’ve laid the concrete slab, waterproofed it, sealed the stones and applied the glue, you can finally grout your pavers! Here we recommend using either the Mapei Ultracolour Plus range or the Ardex FG8 with an added Grout Booster. The Mapei Ultracolor Plus products have an in-built sealer. This helps the stones resist efflorescence as well as fight against mould and/or staining. The majority of other grouts on the market do not have this added feature.As always, research the products to ensure they are a premium make.With helpful benefits for your home in the long term.
  7. Once you’ve finished grouting, you want to clean off any excess grout from your pavers. To make this process easier, we suggest using the Aqua Mix – Grout Haze Clean-UpSimply add this liquid to your bucket of water while you are cleaning the grout. After you’ve completed the initial clean, revisit the grout the following day. When you do this, you may find that some pavers still have grout haze left on them.This typically has a film-type look.Remove this with the Aqua Mix- Cement Grout Haze Remover.

    This product has Phosphoric Acid in it so before application, read the instructions to determine the correct mixing ratio.

    Call 1300AQUAMIX if you need any technical assistance with Aqua Mix products.

  8. Now that your pavers look schmick and clean, you can add the final touch with the top sealer! We recommend using a product from the Aqua Mix range called the Sealers Choice Gold. As a water-based sealer, it penetrates well into the pores of the stone and typically lasts up to 15 years. You are using nanotechnology and micro-band formulation. It also fights against active mould and is specifically created to have a low VOC rating.

There is nothing better than having an A-grade product with an A-grade environmental rating!

Congratulations!

Now that your pavers are sealed you enjoy your entertainment area with your family and friends.


Natural Stone Installation method 1


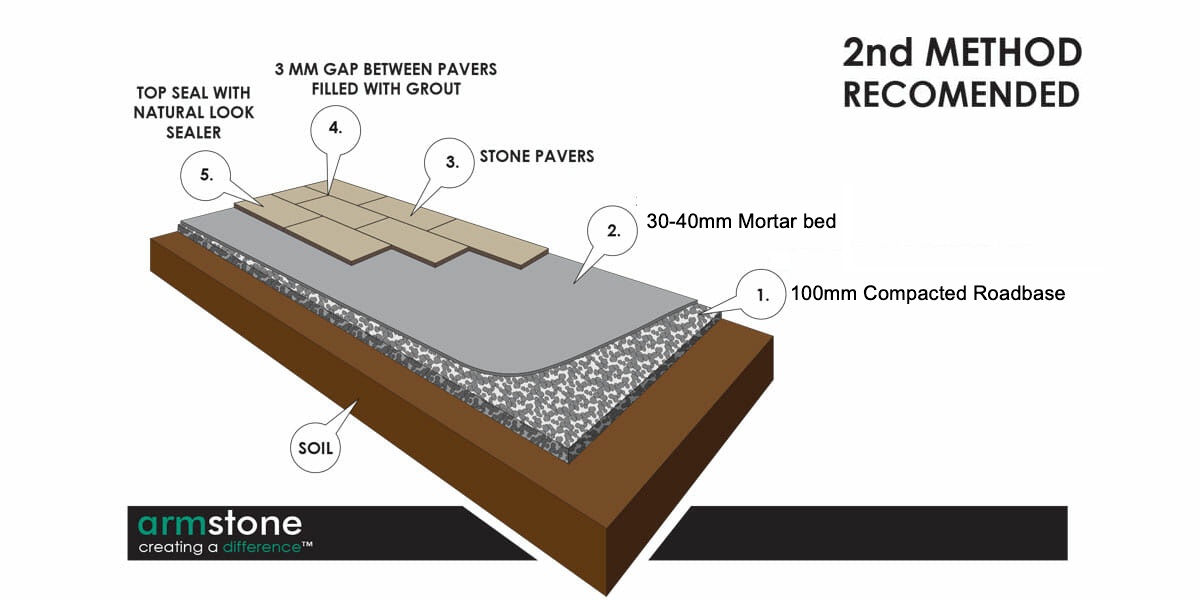
The 2nd Method called “RIGID PAVING” – Recommended method

When it involves improving one’s home.

We understand that this can become a costly investment.

And sometimes concessions need to be made along the way.

This is why we have this method as a recommended alternative to the first one.

This installation method can only be used on stones that have a thickness of 30mm and more.

20mm porcelains can be used as they are very dense and tough.

However, for any stone slabs that are less than 20mm or 12mm, this method is not recommended.

This is because this thickness is classified as a tile.

And, as such, must be installed using a tile adhesive on a sand cement tile screed.

Or using a direct stick method as referred to in the 1st point.

Here’s how this method works:

  1. Install 100mm compacted road base footing.
  2. Once the road base is set. The stone can be installed using a mortar bed installation. This consists of:
    – 3 parts washed bush sand: 1 part GP white cement.
    – 1 part water and or/additive.
  3. Once the mortar mix is made, the mortar can be trowled out onto the slab. Or on road-base footing. The mortar bed should be no more than 30-40mm thick. Using a bricklayer’s trowel the mortar can be spread evenly. Make sure there are no air pockets. Once the mortar is ready, the paver can be placed on the mortar bed.Tap into place using a rubber mallet.Only tap a few times.

    Roo much mortar or over-hitting can loosen the bond between the mortar.

    This will cause it to be drumy once set.

  4. Using a string line for correct fall(s) is recommended when using this technique. This will ensure that the stone is even and has correct falling.
  5. Once installed in its desired position. Leave a 3-5mm joint for grout. Fill any voids and air pockets around the perimeters of the stone leaving it completely sealed.
  6. Once this paver is set you can move on to the next stone installation following the same technique.
  7. Once the mortar is set and the paver is solid you can now walk on the area and proceed grouting.

While this method is less costly and more efficient.

It is still considered a quality installation for laying natural stone pavers or porcelain pavers.

Stone pavers Installation method 2


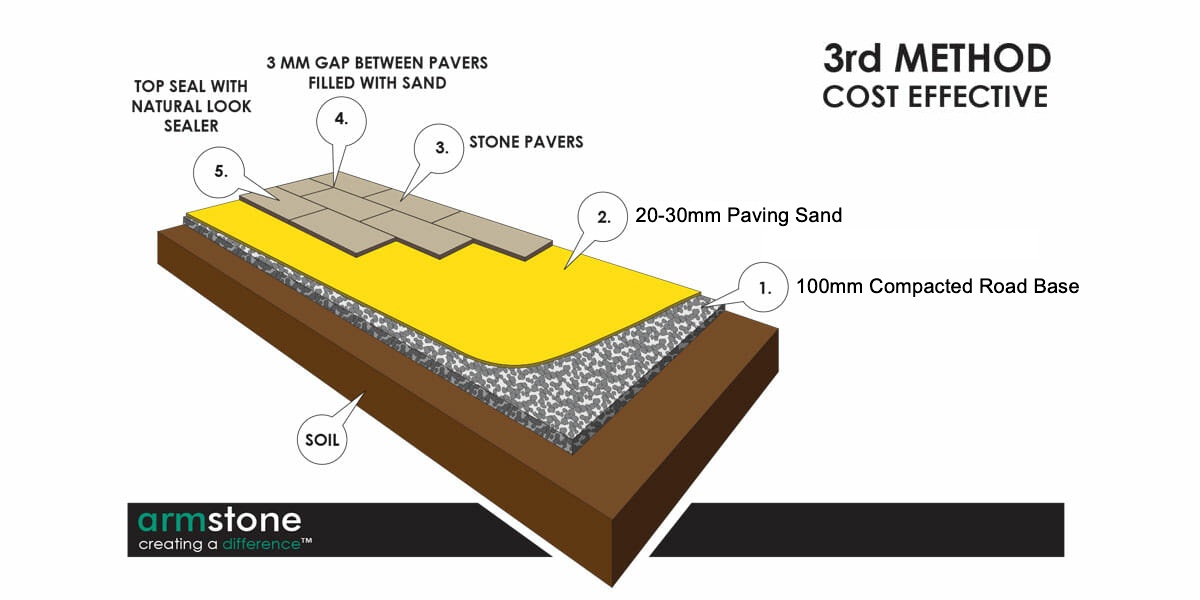
The 3rd Method called “FLEXIBLE PAVING”The most cost-effective

Another widely accepted and adapted method of installing stone pavers.

Is known as flexible paving.

This is traditionally seen and used on brick paving.

Any pavers or stones that are 30mm thick (or thicker) can use this method.

  1. Install a 100mm compacted roadbase footing.
  2. Install a 20-30mm paving sand/river sand bed.
  3. You can use screed rails or some form of rigid steel bar or pipe. This can be used as a gauge for your sand bed. Place the screed rails evenly apart (enough to get a large screed or level to be placed over the top).
  4. Set the two rails to the desired height and fall.
  5. Once set, infill with your paving/river sand. Scrape the sand back using the rails as a guide with your screed or level to create the perfect fall and surface.
  6. Repeat this until the area is complete.
  7. Once complete, carefully remove the screed rails. Then infill where the rails have been with paving/river sand to fill in the voids.
  8. Once the screed and level are complete you can begin by placing your pavers into position. And lightly tapping them down with a hammer.
  9. Leave a 3mm gap in between each paver.
  10. Fill the gap with Sydney sand/paving sand.
  11. Lightly mist the surface of the pavers. Sweep sand in the joints until they are flush with the surface.

This is by far the most cost-effective option.

It involves laying your natural stone pavers or porcelain pavers onto a substrate made of compacted road base and 20-30mm of River Sand.

An alternative to stone for this method would be installing the Armstone 20mm Structural Porcelain Paving range.

We recommend our structural porcelain paving range in this situation because the material is extremely dense and hard-wearing.

This is an ideal solution where using other (more natural) pavers may be somewhat dangerous.

While you still need to allow a 3mm gap between pavers (for expansion and contraction due to temperature changes).

You fill those gaps with sand, instead of grout.

As this method of installation will naturally evoke the movement in the base and pavements.

Grout will create visible cracks in the paving joints.

Ideally, you want to avoid this.

As with all budget options.

There are a few disadvantages to this method.

Namely:

  • Strong rain can wash off the sand between the pavers. This means you will need to regularly refill the gaps. Depending on Mother Nature, this may become a regular (and time-consuming) process and occurrence.
  • Weeds can easily grow through the grout joints because there is nothing stopping them from coming through. The time it will take for you to maintain the grout joints can cost you more than if you had invested your funds (and time) in methods 1 and 2.


Stone Pavers method 3


Conclusion

Unless you are in extremely dire circumstances.

At Armstone we recommend using methods 1 and 2 for laying natural stone pavers.

We suggest holding off on method 3 as long as possible.

Overall, installing stone pavers does require a certain level of expertise.

As such, we strongly recommend finding a professional who can tailor the ideal solution for your unique landscape.

You are, after all, working with a valuable asset.

A little piece of Australia: your home.

We wrote this article to serve you as a general guide and blueprint.

If you are looking for an installer, we can easily recommend one.

You can reach us on the phone or online here.

As always, thank you for reading this article.

It’s been a pleasure helping you!
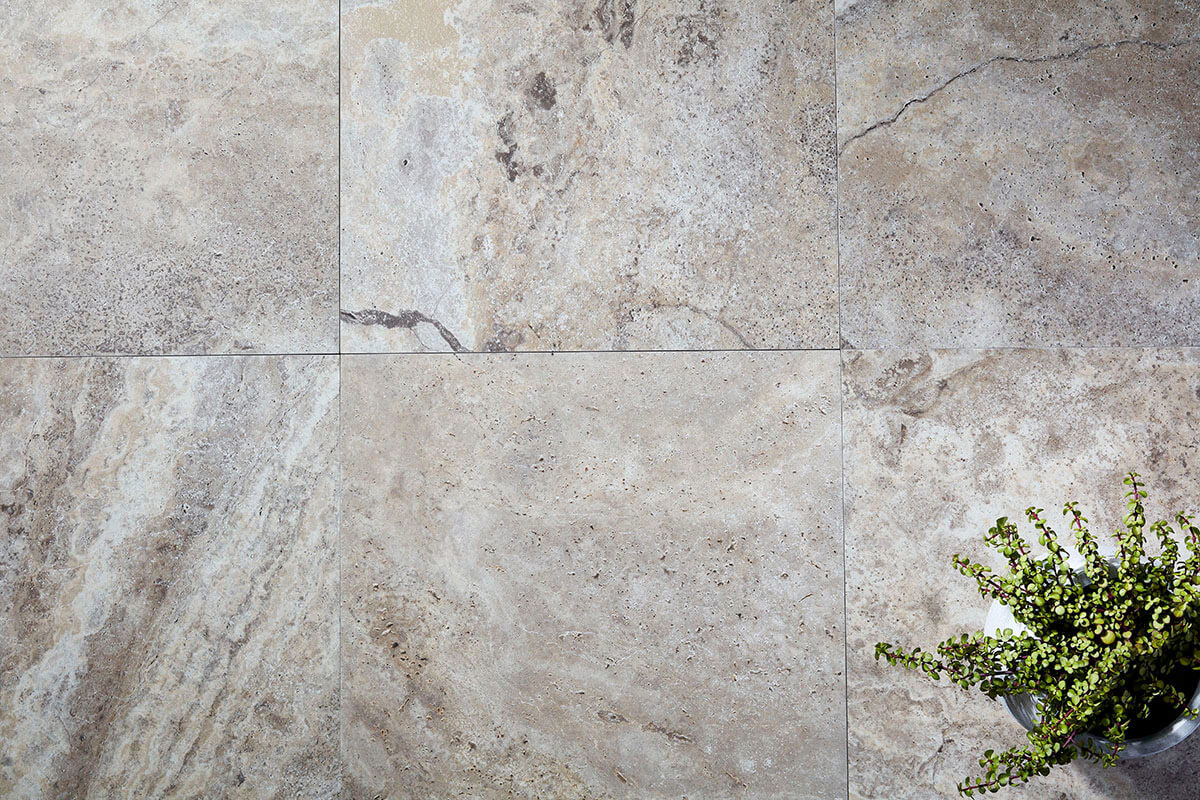
And if you found the information useful.

Please share it with a friend.

How to Choose the Right Garden Edges for Your Outdoor Space

Garden Edging

So you’ve nearly finished updating your outdoor space?

This is extremely exciting!
All that is left to do is complete the edging for your garden beds.

Sounds simple enough – right?

Pick the material, install and wipe your hands clean off the decision!

Done!

Well… it’s not quite as clear-cut as that.

You see, when your garden edges look good, they work with the outdoor space flawlessly – whether they blend with the garden or contrast against it. However, when the edging is wrong, it can be very wrong. And we’re not just talking aesthetically. Things that can go wrong include the edging not being able to hold the soil in place for your garden bed and this can spill over onto your pathway and create a mess.

So whether you’re creating a garden or updating your outdoor space, in this article we will review some of the things to consider when choosing the material for your garden edges.

But first let’s start with …

Why use garden edging?

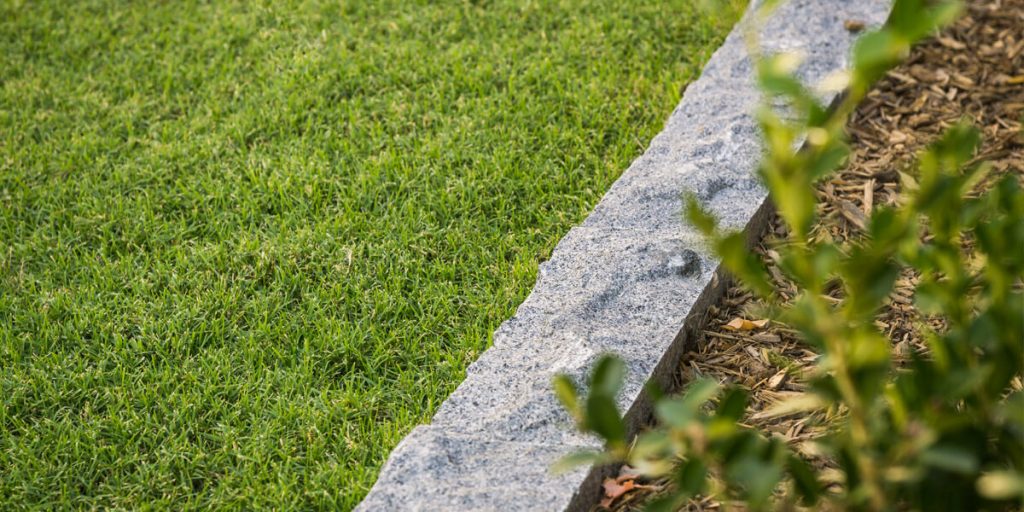
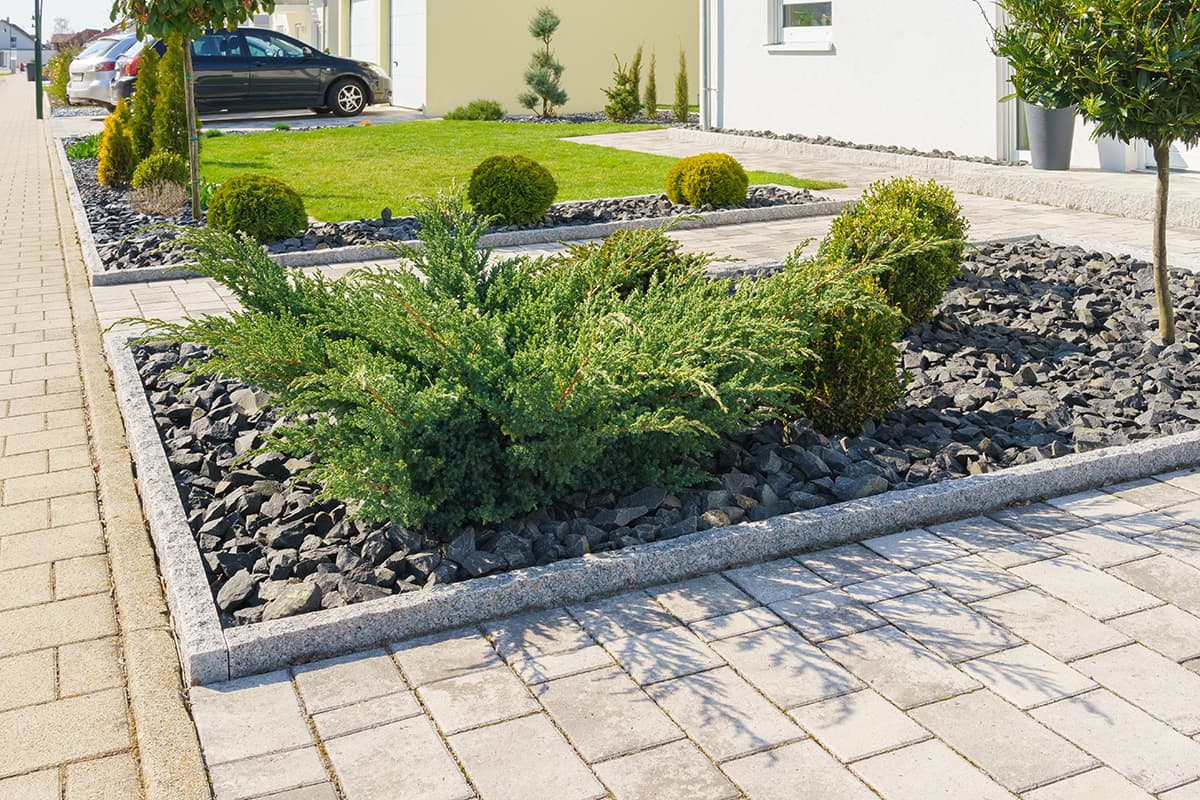
Garden edging is designed to define and divide spaces. Most commonly, borders are used between garden beds and lawns for easier garden maintenance. However garden edging can also be used within a garden bed to separate planting styles or to contain certain species.

Garden edging can also be used to define straight or curved pathways and can even function as a retaining wall to hold back soil where there is a change of elevation in your garden.

armstone - How to Choose the Right Garden Edges for Your Outdoor Space

Things to consider

Now that you have a better idea of what garden edging is used for, there are a few things to consider before starting your project. These include choosing a style and material and reviewing its durability and cost. If you’re not confident in your own ability to make this decision, you can always consult a professional. If you would like any help with this, reach out to our team of experts at Armstone’s headquarters in Sydney at 1300 560 560. We would be happy to help or point you in the right direction.

Style

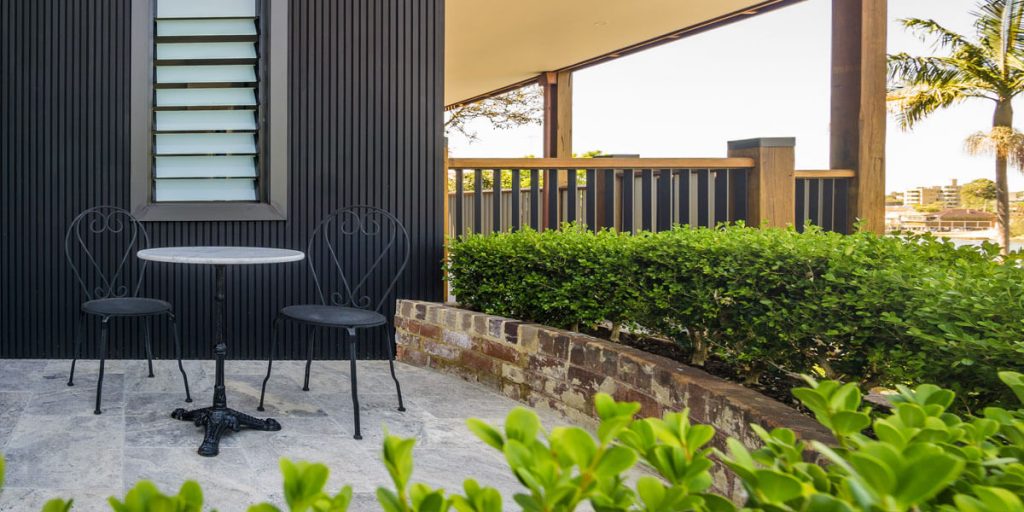
While garden edges are mainly about maintenance, its still best to choose a style that matches your home and garden’s general decor as well as something that reflects your personal style. It is recommended to choose materials and colours that complement your current garden themes and match your furniture and general outdoor ambience. As with all style choices, remember that you can either choose your garden edges to be statement pieces or you can design them to blend inconspicuously with the rest of the home.

Durability

It goes without saying that anything you choose to install in your garden needs to have some sort of longevity. This might mean that you need to invest more in a particular material just so that it withstands the test of time, especially since it is for your garden – a space exposed not just to the elements like the weather but also lawnmowers, moisture, line trimmers and all other gardening products. As such, choosing a durable material and spending a little extra on it not only secures your space for the foreseeable future but it also gives you a peace of mind.

Price

A mistake we see many people make when renovating, upgrading or building their home is opting for the cheaper option only to end up with a broken product in a year’s time. Why is this problematic? Well, eventually, you’ll spend so much money on replacing the edging that you would have spent less if you had decided to invest a little extra to begin with. In saying that, we don’t recommend just choosing a material because it costs more. What we recommend is finding a material that is durable and matches your style and gives you the most value for your money. If you are working on a budget and are unable to invest in the type of edging you want across your entire garden, mix it up by getting the higher investment one for your key areas such as the entry to your home and entertainment areas and a cost effective option for the rest.

Choosing the material

With so many materials to choose from, it can be overwhelming to decide which one is the best for your project. Below we will review a few options and their best application.

Simple Borders – Metal

When it comes to choosing a garden edging that is simple and subtle, metal is definitely your go to material. This is because metal (steel or aluminium) and plastic are easier to bend and as a result, they can be curved around garden beds or pathways with ease. These materials also tend to blend into the background and disappear against the grass and garden bed so it looks like there is nothing separating the areas. Finally, metal and plastic is easy to install and long-lasting.

Limestone Pavers Oyster

Bamboo

Ah, bamboo! You might remember the scene from Rush Hour with Jackie Chan and Chris Tucker where Chan says that bamboo is very strong? Well … it is. So this material definitely passes the durability test. It also works fabulously in tropical gardens or as an accent against traditional spaces. When it comes to garden edging, you can dye bamboo in different colours and cut it to different sizes to suit your needs. Not only is it durable, it’s also flexible and can be adapted to most spaces. Bamboo adds a neat finish to the edge of your garden or flower bed. It’s definitely an excellent choice!

Stone

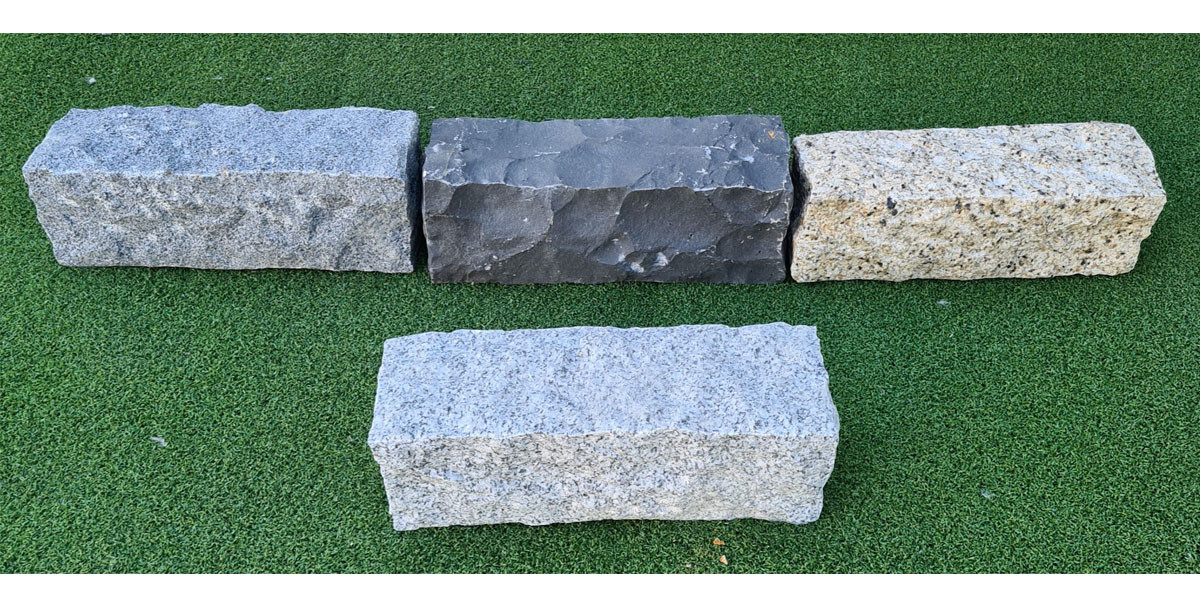
If you are looking for investing in a material that will 100% stand the test of time, stone and concrete are definitely ideal for you. These materials also suit almost all gardens and outdoor aesthetics: from more traditional spaces to contemporary and modern ones. There are also so many options within the stone category, from sandstone pavers to limestone or slate and stone cladding. If you desire versatility for your garden edging, then choosing to invest in either stone, concrete or brick, allows you the chance to play around with the edging design and bring a unique and custom look to your outdoor area. With regards to durability, these materials will hold up to almost anything that comes at them: from weather to garden tools. Finally, if you have a particular design that you want to stick to throughout your garden, installing stone, concrete or brick as your garden edging adds a level of consistency throughout because they can be used anywhere and still be as effective as ever.

Stone Garden Edge

Call us to find out the cost of the above Stone Garden edging on 1300 560 560

Timber

When it comes to blending into the natural environment seamlessly, timber is definitely the most suitable choice. However, choosing natural wooden garden edging finishes has a few downfalls. Namely, when it comes to longevity, wood can fall short, particularly in wetter climates where humidity and moisture can damage the material’s composition causing it to deteriorate and require replacement. On the other hand, it’s cheap and easy to install, which is a big advantage. It’s also available in a wide range of styles, colours and varieties. If you’re set on creating a cohesive look across all areas of the garden without necessarily using the same material throughout, timber is a good choice. For example, you can use timber for the deck, the pathway and the edging but for variety, you can install different styles. Additionally, you can use timber to create a sense of drama and distinction, simply by using a larger piece of wood.

Wire

It’s simple and elegant and it looks great in cottage-style gardens: what is it? It’s wire garden edging! And it works best when it’s not actually being used to hold foliage in but rather for the purposes of stunning visual effect. The wonderful thing about wire is that it is extremely versatile and flexible which means that it can be shaped in a variety of ways like hooped or crisscross style, so even if your next door neighbour uses wire to edges their garden, yours will look completely different. In case you needed more advantages to use wire, it’s available in a wide range of colours and is exceptionally easy to install.

Strength and simplicity

Now that you are fully equipped with the information for your garden edging project, remember this one thing: no matter the material or materials you use, strong and simple is always the best choice. Carefully consider the options before investing, determine how much wear and tear your edging will be subjected to, how will the environment affect the material, how much budget you want to allocate to this part of the project and off you go!

A few rules of thumb before we finish this article: if you use the whipper snipper or lawnmower often, then stone edging will be more suitable than wire and if you live in a tropical area, you may want to use bamboo rather than timber.

Finally, remember that not every material will suit every home and garden aesthetic and reflect your particular style. If you’re unsure with your research and what to invest in, reach out to our team of experts at Armstone.

We would love to help you out!