How to Build the Ultimate Backyard Stone Fire Pit
Australian’s love spending time outdoors.
All with due reason: our summers are warm, our skies are clear and our air is clean.
Whether it’s at the local park or in one’s own backyard, people like to spend time soaking up the sun and enjoying the warm weather.
But what about winter?
That’s what we will be reviewing in this article!
You see, at Armstone we believe that a well designed backyard is the go-to-place in winter – a real communal gathering ground.
And the one accessory that makes this spot both cosy and comforting, is an ultimate stone fire pit. While it sounds tricky to build, it’s actually not as difficult as you may think.
So let’s melt into this!
Different Types of Fire Pits
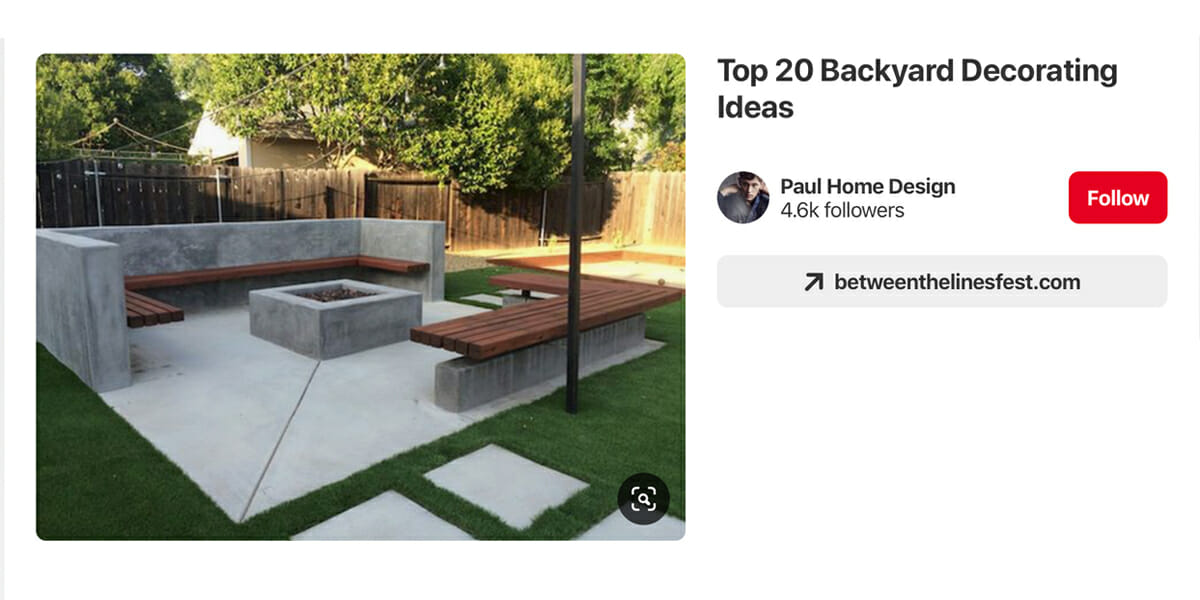
When it comes to stone fire pits and which one to choose, it boils down to a couple of things.
- The space you have.
- Your preferred aesthetic and what you want it to look like.
Whether it’s round, square, raised or in-ground – the options are endless.
At the end of the day it’s a very personal decision and regardless of what you choose, building your own fire pit is all about being organised, following some simple instructions and roasting the marshmallows with your favourite people, once it’s all done.
Starting Out
The first, and probably most important task, is…
Research!
We suggest you take your time here and review all your options and alternatives now, rather than install something that doesn’t work and spend time and money fixing later.
Here are some questions to prompt your research:
- Where is the best spot to build the fire pit in the backyard?
- How will you use the area around the pit?
- Will it require a seating plan, if yes, how will you organise it?
- Is the pit far enough from the house and low-hanging tree branches, utility lines and other structures, that it’s safe for an open flame?
You also want to consider the actual aesthetics of your fit pit and research these as well. Here are some questions to prompt this:
- Do you want a square, round or inbuilt pit?
- Do you want to burn wood or coals?
Finally, your last point of research must include checking what building licenses and codes are relevant to your neighbourhood about open flames and outdoor fires. Reach out to your local council and ask them to send you all the necessary information regarding these regulations.
How to Build a Stone Fire Pit
Depending on the type of fire pit you want to build, your tools and supplies will differ. However, there are a few basic items you’ll need regardless of your project. These include:
- Pavers
- Shovel
- Tape measure
- Level
- Steel rake
- Spray paint
- Glue
- Cement
Once you have decided on your stone fit pit, you also want to choose the right stone pavers to install around it. If you are unsure which paver will be best for your choice of fire pit, contact your local stone experts to find out how many pavers you will need, the best material and so forth. Make sure you know the exact size of the fire pit before contacting someone as this will determine their recommendation.
Choosing your paver really depends on the style of the fire pit. For example, crazy pavers, which have the flexibility to be installed in various random shapes, are perfect for round fire pits. On the other hand, rectangular stone pavers are ideal for square fire pits as they match that modern aesthetic.
Now that you’ve done your research, figured out the style you want and chosen your stones pavers, let’s have a look at a step-by-step way to build your backyard fire pit!
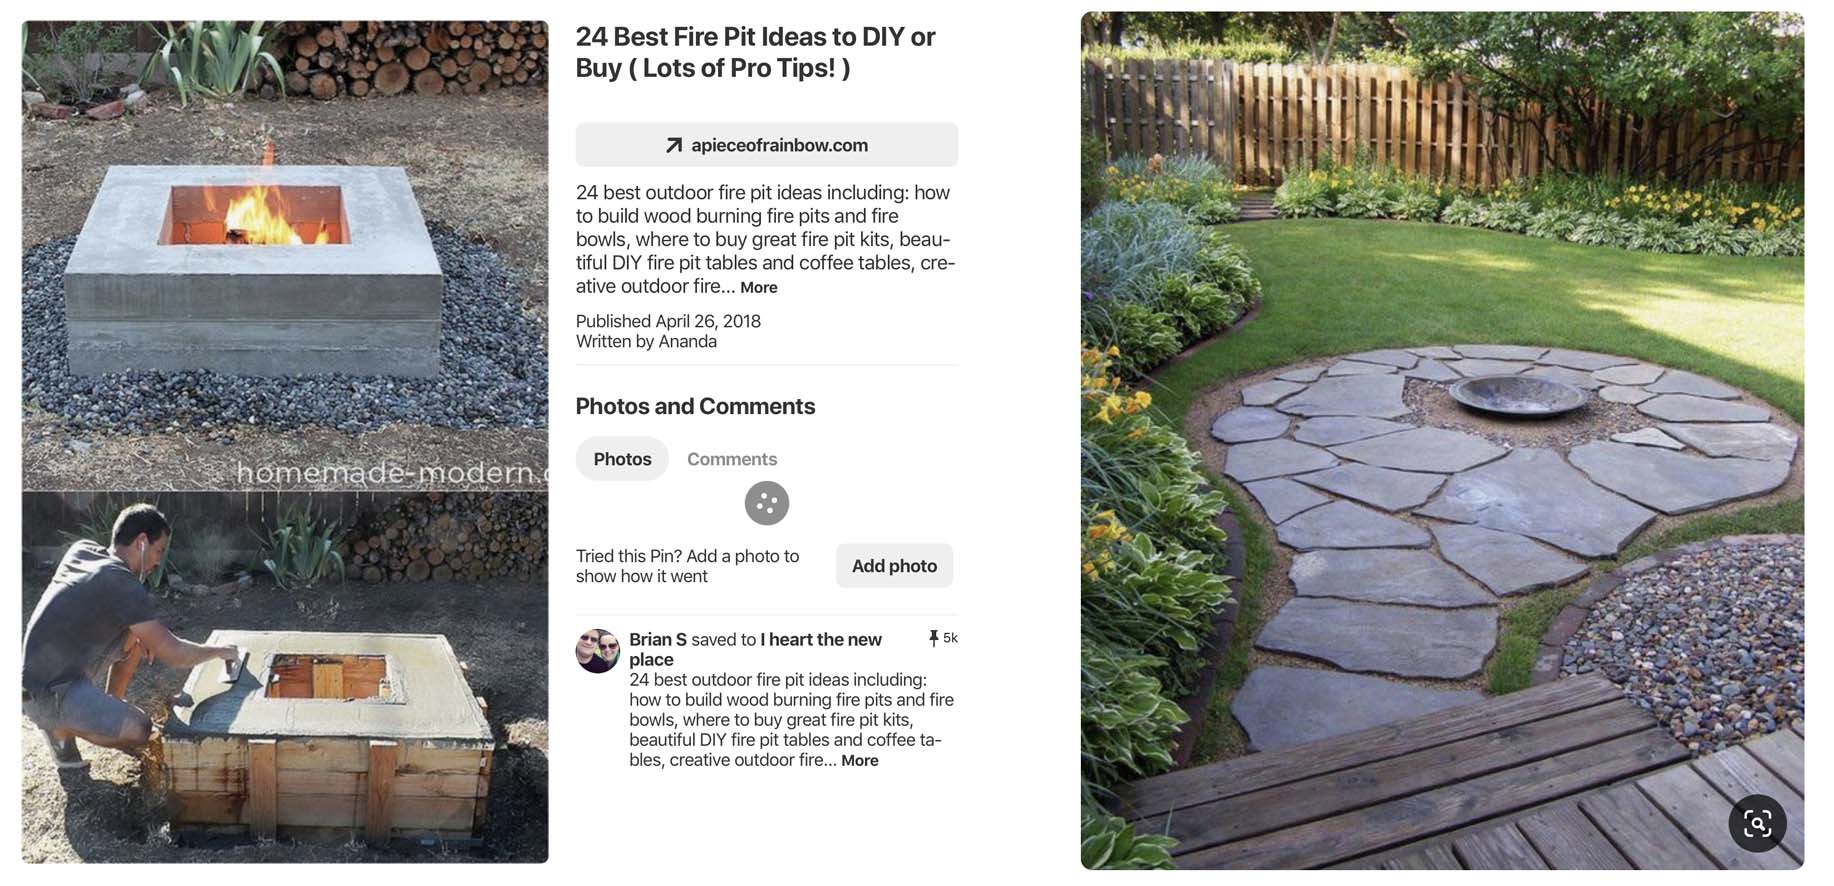
Step by Step Guide to Building a Backyard Fire Pit
If you follow these 7 simple steps, you will soon have your own backyard stone fire pit!
Excited?
Let’s get started.
- Level the Perfect Spot
First and foremost you want to ensure that the ground you’re building on is levelled. You can achieve this with your garden tools by excavating the area to a depth of 15-20 centimetres. Make sure to clear any weeds and rocks from the surface as well.
- Mark Out the Circumference of the Fire Pit
Using the spray paint, mark out the borders where you will install the fire pit. This will show you the inner space where you will burn the fire itself. If you have the fire pit bowl handy, you can use this to mark out space. Alternatively, you can layer the space with fire bricks.
- Pour the Cement
The area between the edge of the prepared space and the marked line is where you want to spread the cement. This is the area where you will install the wall. Use the spray-painted line as your guide.
- Lay the Pavers
Laying the pavers can be quite tricky. The hack here is to lay them one level (or layer) at a time. Remember to check that each layer is level before starting on the next one. If you are using a fire pit ring, place it in the pit and build the wall around it. If necessary, you can fill the gap between the fire pit ring and the wall with crushed stone or gravel.
- Add Stone Capping
Once your fire pit is at the desired height, you’ll need to use stone capping to finish it off. Essentially, this means putting a layer of flat pavers on top of the wall. Choose flat stones that fit nicely together and look aesthetically pleasing. Work all the way around the fire pit wall, lay the flat pavers and fill the joints with cement.
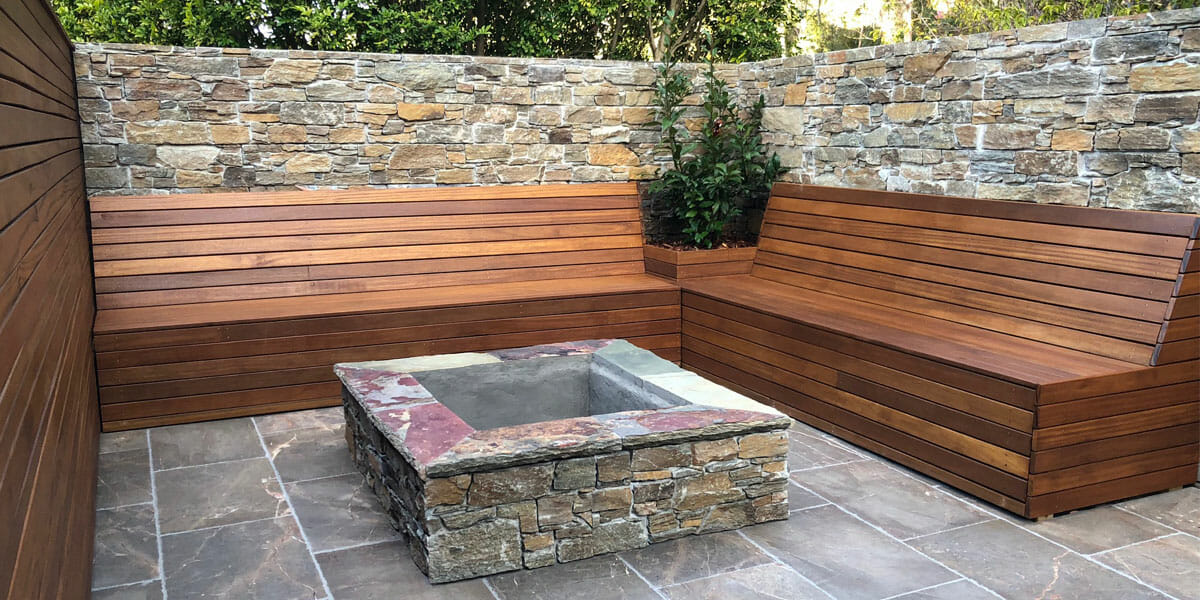
- Use Stacked Stones to Dress the Wall
Once you’ve built the fire pit, it’s time to dress it up and make it glamorous. An optimal choice for this is using natural stone wall cladding. These will give your brand new fire pit that natural stone-look wall. The plus side is that these have smooth backs which makes them relatively easy to install. Applying a bit of elbow grease, you’ll be able to build an elegant façade that will stand the test time.
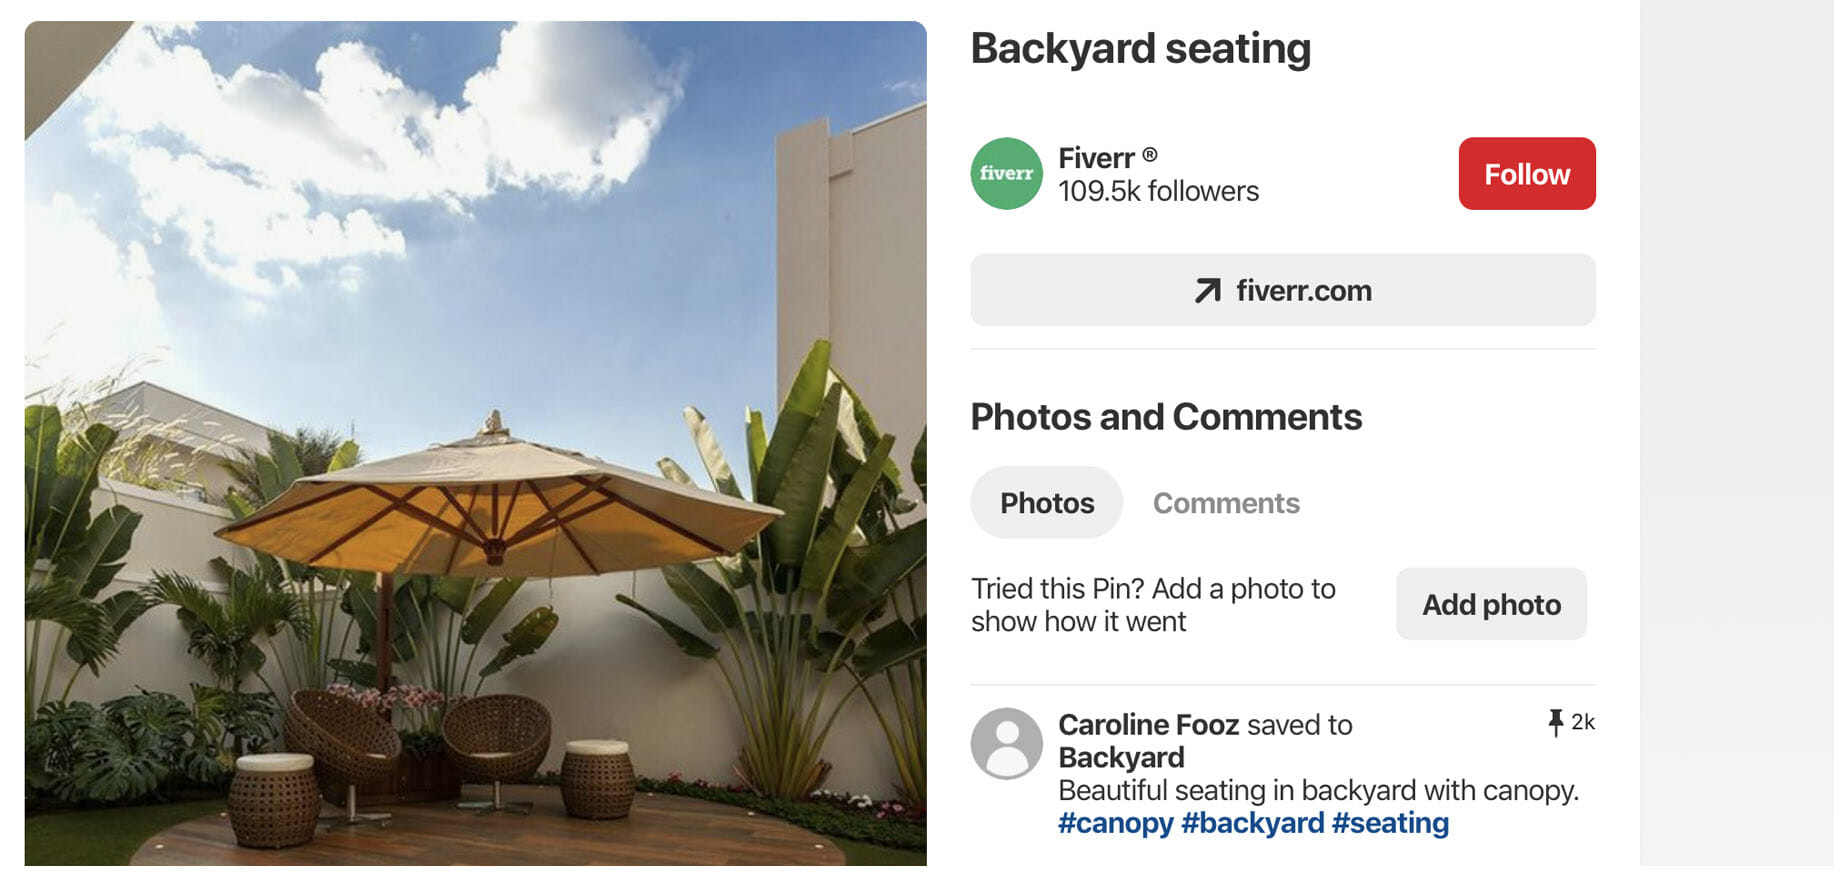
- Add Seating
Once you have completed the structure, you can finish your area by adding seating! Whether you want to install comfortable furniture or lay some pavers, this final touch will create the perfect entertainment and relaxation area that you and your family and friends will enjoy for years to come!
Perfect for Warming Up Winter
There you have it!
Your simple, step-by-step guide to building your very own stone fire pit!
When you’re ready to choose your stone pavers, wall cladding or capping stones, be sure to reach out to us at Armstone. We will gladly guide you with the best size, style and paver material for your fire pit.
Contact us over the phone or email here or visit us at our Glebe showroom in Sydney!
If you found this helpful, please pay it forward and share the article with a friend.
Thanks for reading!
