Latest Trends in Swimming Pools to Prepare for Summer

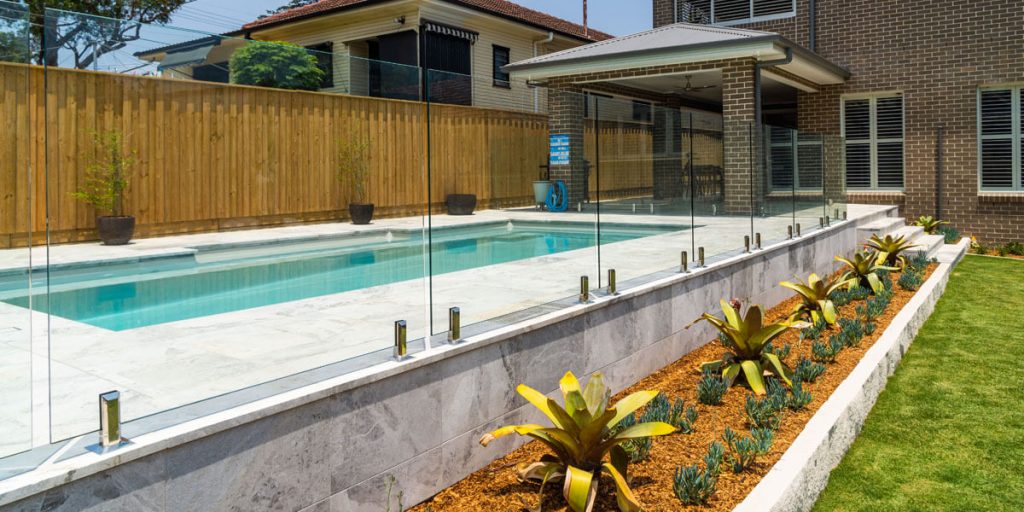
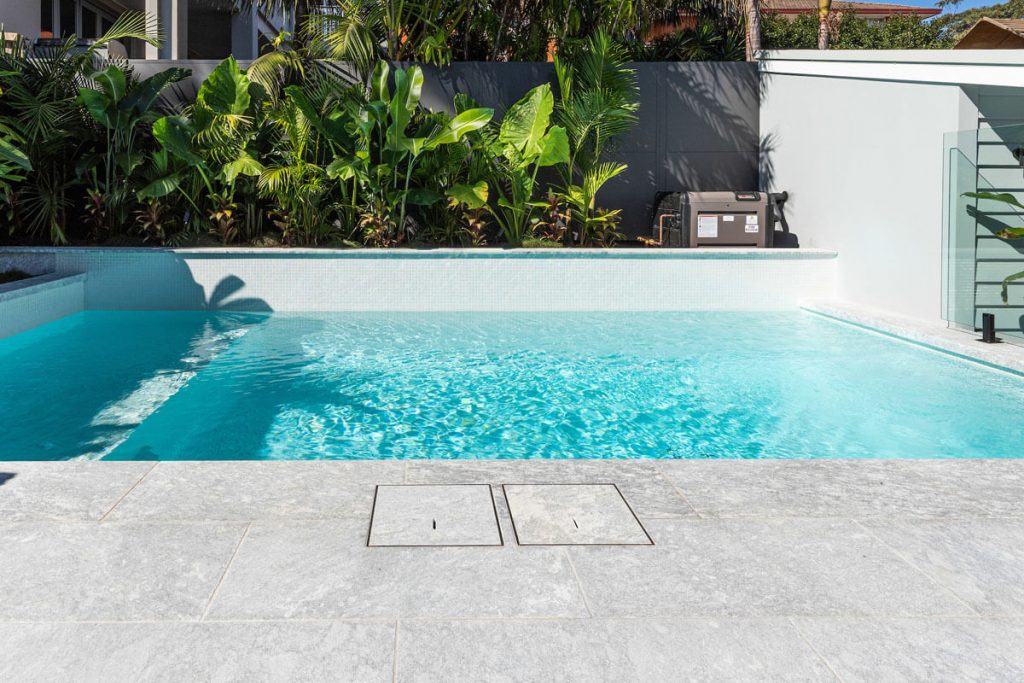
Frostine Marble Pavers

Like many things around the world, swimming pool design has come a long way from being a simple structure made of white rectangular boxes with a shallow end at one end and a deep end at the other.

If you look around now, you will notice that today’s swimming pools are often highly customised affairs, with their shape, size, depth, colour and materials chosen to suit not only their owner’s unique lifestyle, but also the aesthetics and personality of their home.

So in today’s article we will have a look at the latest swimming pool trends.

Hopefully you will find something to inspire your summer project!
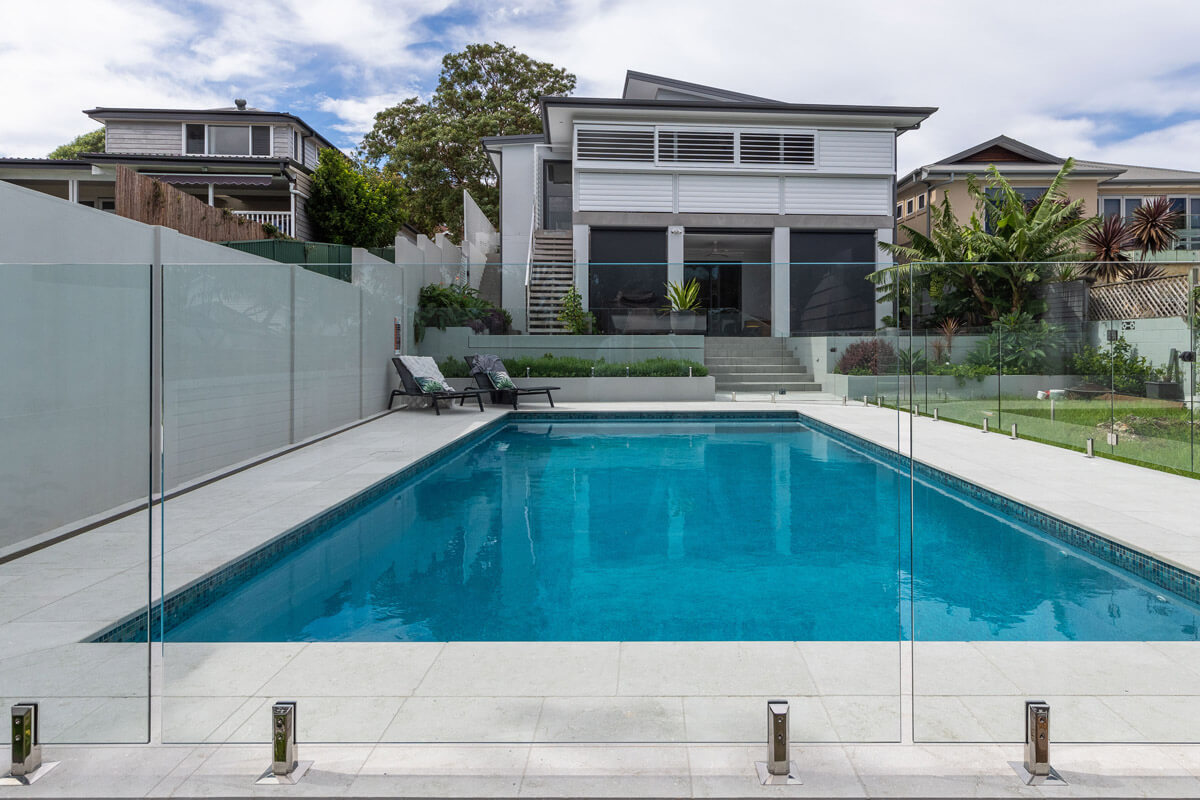
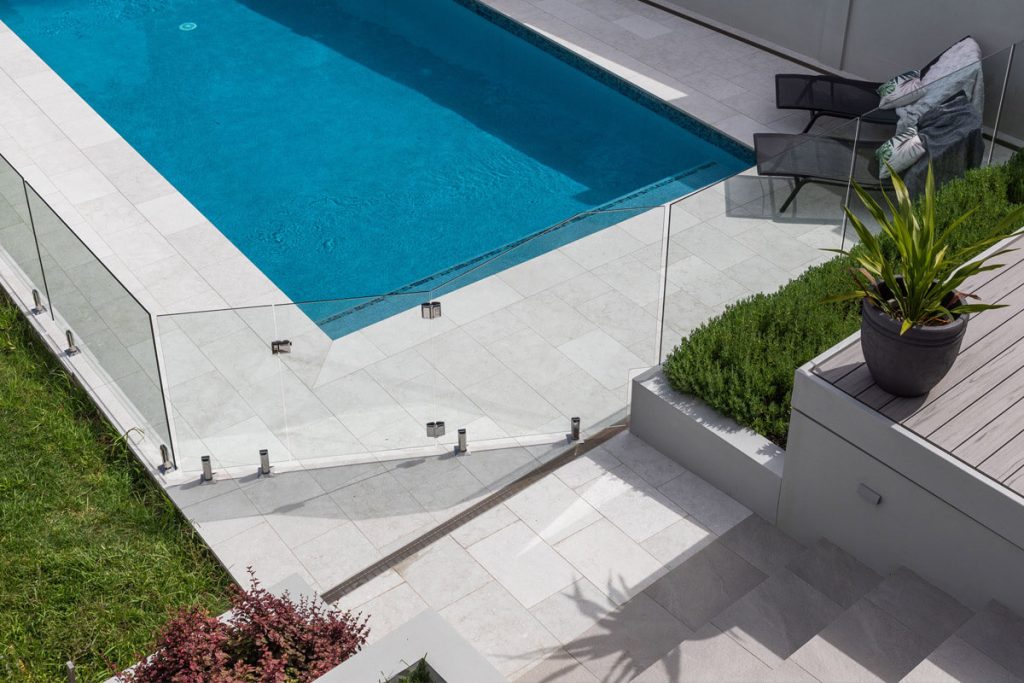
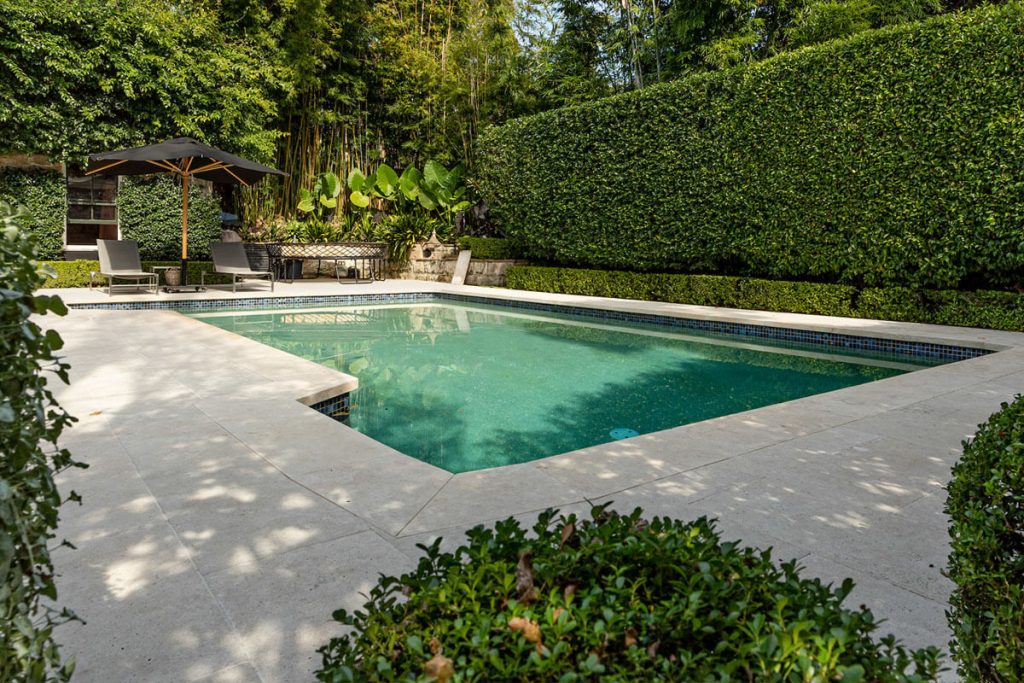
Dutoit Limestone Pavers 2

** DuToit Limestone Pavers

What are the most popular swimming pool designs and shapes?

So what are the latest swimming pool design trends? Let’s take a look at what’s popular in homes across Australia and around the world this summer.

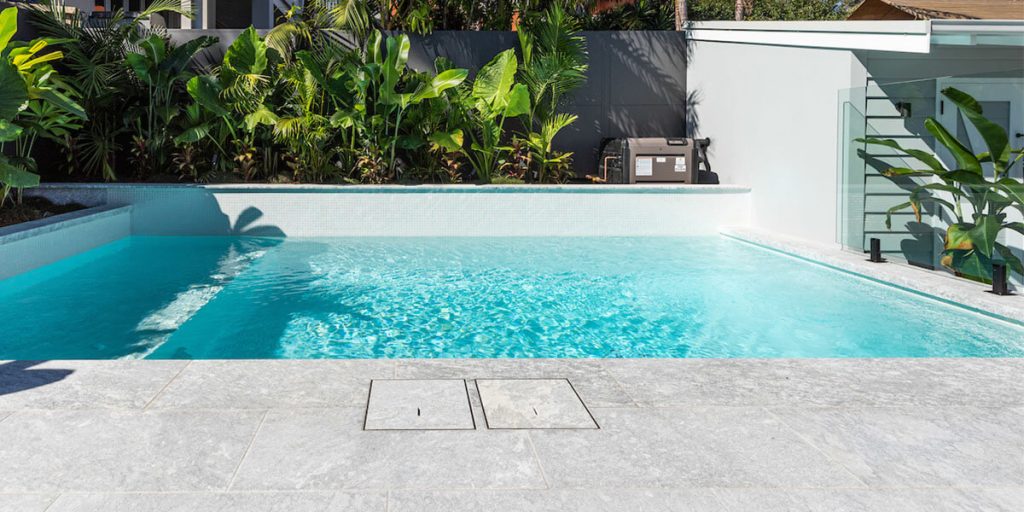
  1. Infinity edges – Also known as disappearing or vanishing edges, this is a modern and highly popular pool design feature where, due to a lowered lip along the outer edge of the pool, the water appears to extend to the horizon towards infinity and beyond. You might have seen some famous hotels – like the Marina Bay Sands Skypark in Singapore – that have iconic pools with infinity edges.
  2. Lounging ledges – These are typically a luxurious addition that is inbuilt to the shallow areas in the pool. They’re about 6 inches deep and are ideal for entertaining and families where swimmers can relax and sunbathe and children can play and paddle in a safer environment.
  3. Swim up bars – These are exactly what they sound like: a little island that acts as a table in the middle of the pool. Particularly popular at resorts and hotels, they are also making appearances in more backyard pools, allowing you to stay cool and relaxed in the water while enjoying your favourite beverage at the same time.
  4. Smart pools – Nowadays, most new pools can have almost every energy-efficient function incorporated into their design and then remotely controlled from your phone or mobile device. These functions include lighting, pumps, cleaning and solar powered heating/cooling.
  5. Lap pools – With limited space becoming a widespread issue in many backyards, lap pools are steadily growing in popularity. They allow you to perform your daily swimming routine and then cover the area to provide additional space for outdoor entertaining.
  6. Plunge pools – These provide even more efficient use of space than lap pools. Plunge pools have water jets and just enough area to swim. These can also be fitted pretty much in any area, providing your home (no matter how small) an ideal space to cool down from the summer heat.
  7. Hydrotherapy jets – Similar to those found in most spas and hot tubs, these jets are built into the walls of your swimming pool to add motion and circulation to the water. They’re also great for soothing tired muscles after your workout.
  8. Saltwater pools – While these are definitely not new, due to their more natural feel and ability to maintain a pools’ chemical balance without the need to use chlorine, salt-water pools are making a comeback and quickly gaining popularity.
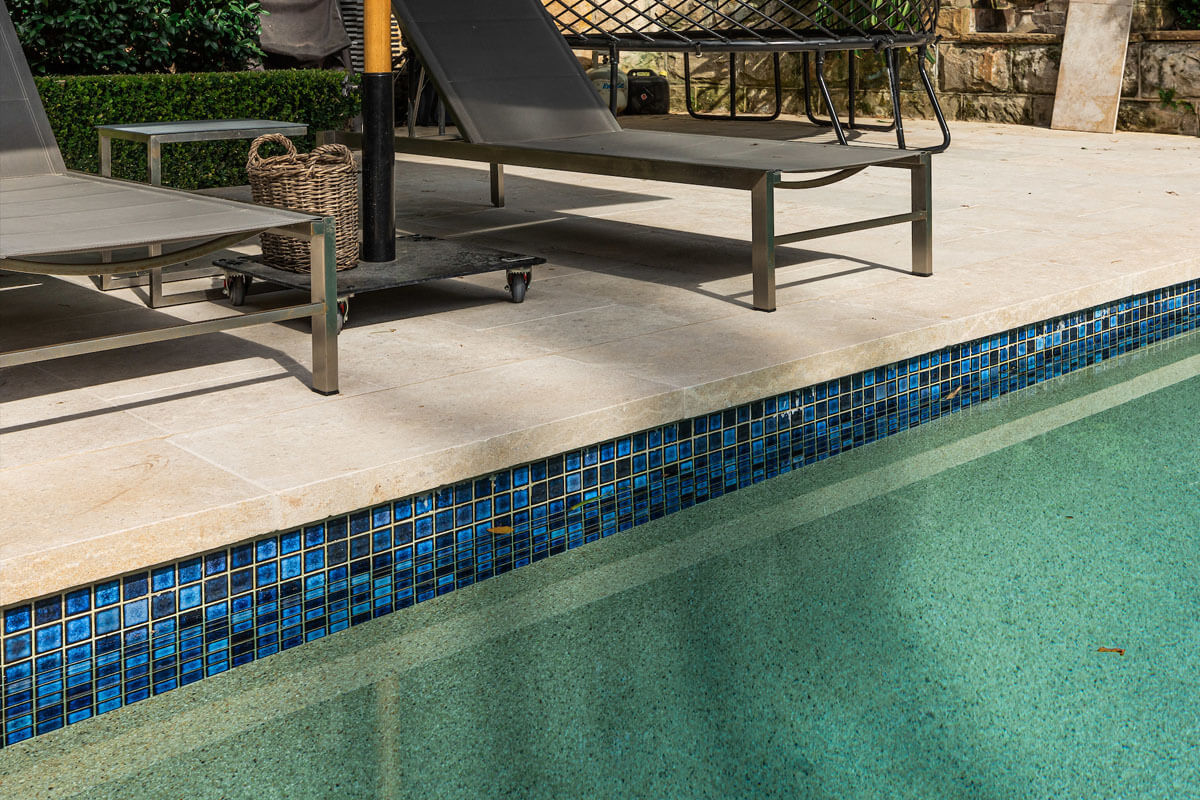
  9. Mosaic tiles – Adding mosaic tiles to the pool is a trend that is increasing in popularity. Whether you opt for a traditional pattern or something more modern and avant-garde, they are a great way to personalise your pool and add visual impact.
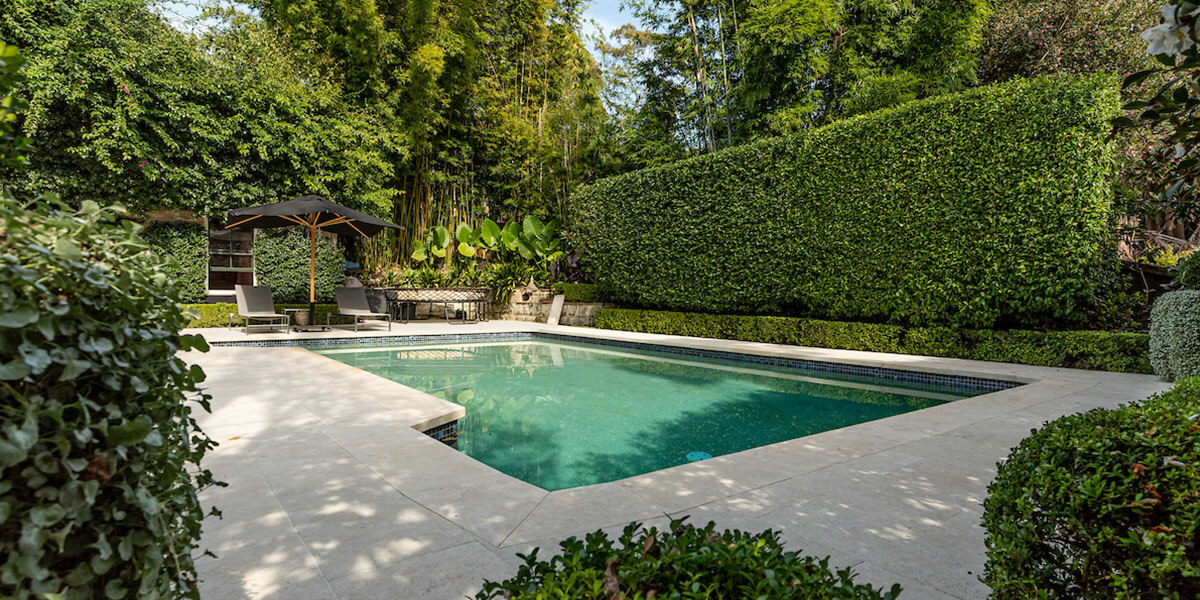
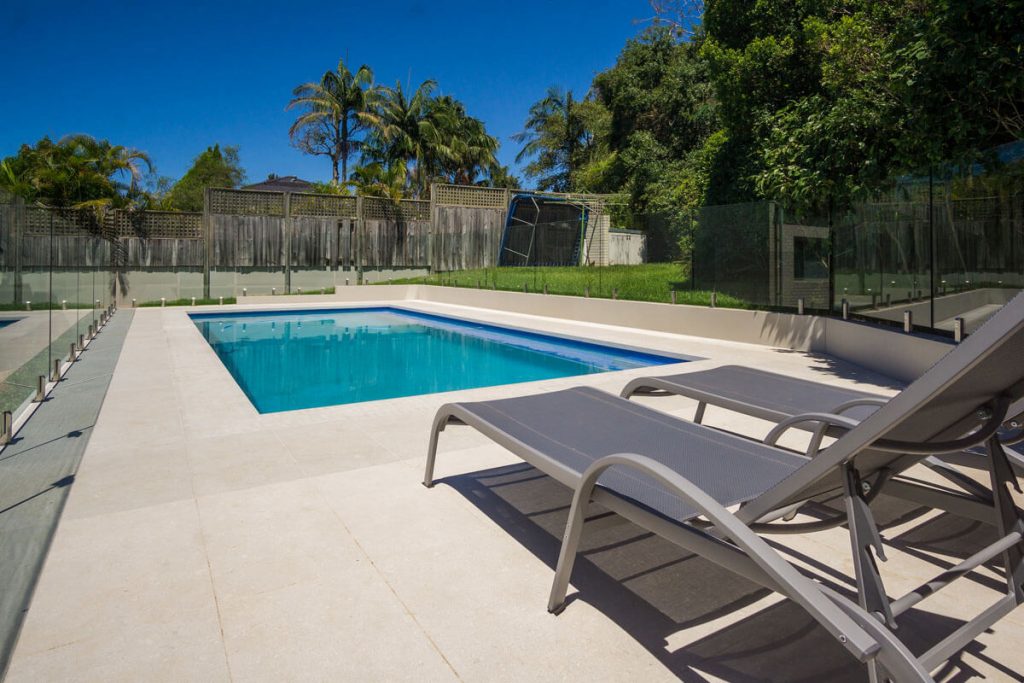
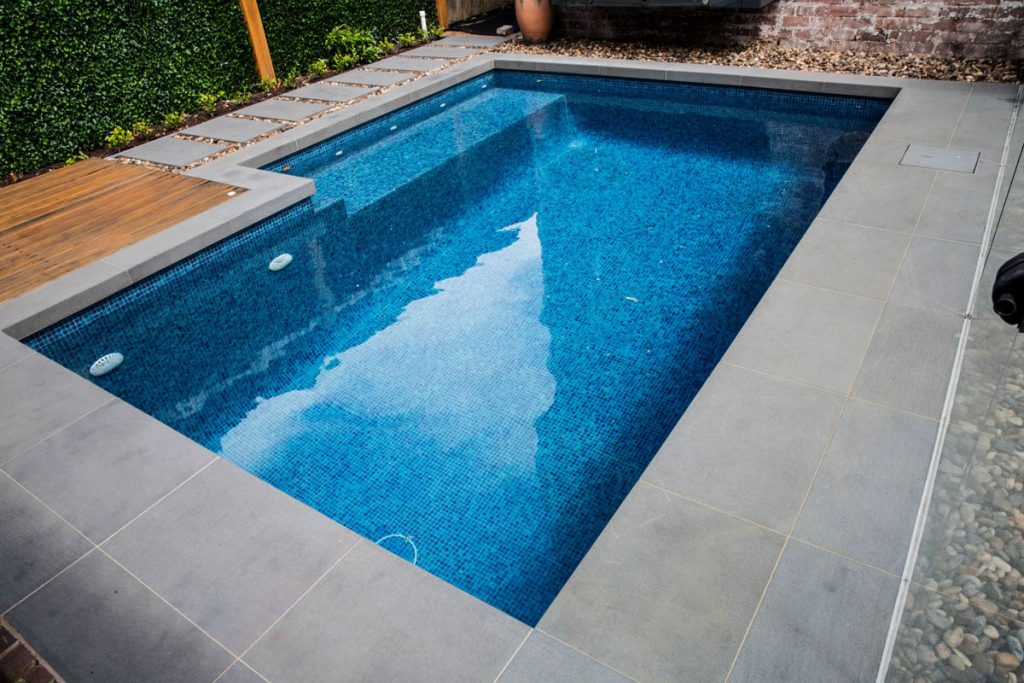
Melba Limestone pavers

** Melba Limestone Pavers

Creating the perfect pool setting

When designing your pool, while it’s important to build a beautiful structure, it’s equally important to create a pleasing surrounding. While poolside design trends are changing all the time, some current popular themes include:

  1. Outdoor living rooms – This involves extending the indoor living room concept into an outdoor setting similar to a patio with a kitchen, but one where guests can enjoy a relaxing dip and a great meal near the poolscape without needing to venture indoors.
  2. Poolside lighting – Outdoor living can be enjoyed at night by adding mood lighting both in and around the pool. Another way to enjoy your poolside area at night is giving it a primal aesthetic by installing flame-based features such as spike lights, fire bowls, braziers and fire pits.
  3. Water features – Adding fountains, waterfalls and rain walls create a sensory delight for your sight and hearing while simultaneously ensuring that the pool water regularly circulates and stays fresh.
  4. Natural swimming pools – There is a popular trend at the moment whereby landscapers are designing pools in shapes and colours that resemble natural swimming holes. These often include rock formations and lush vegetation coming right down to the water’s edge.
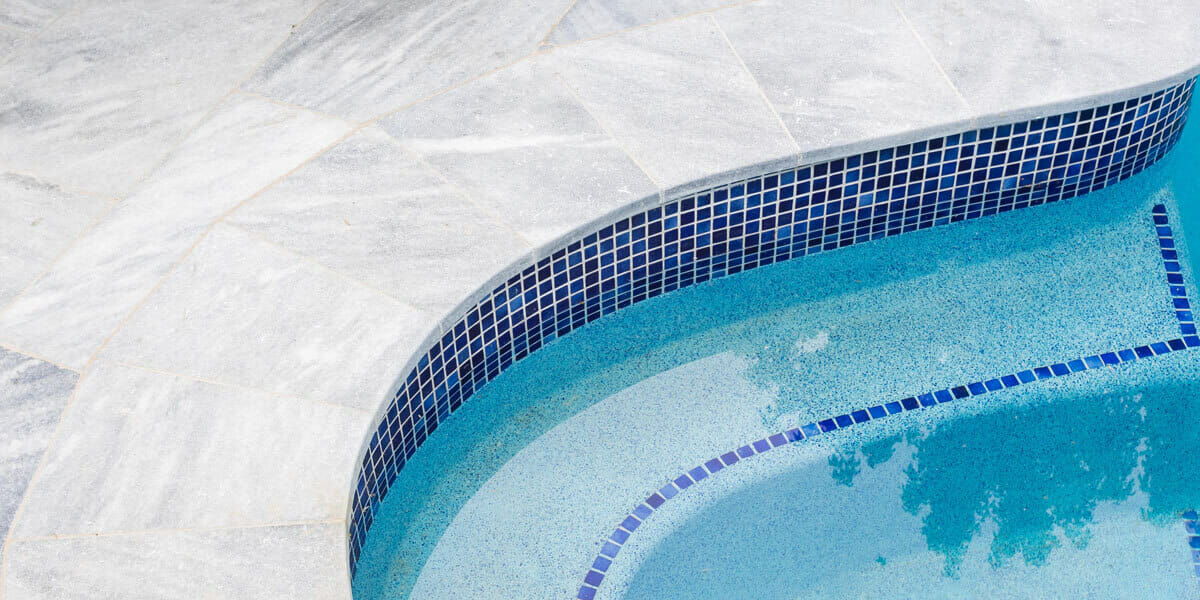
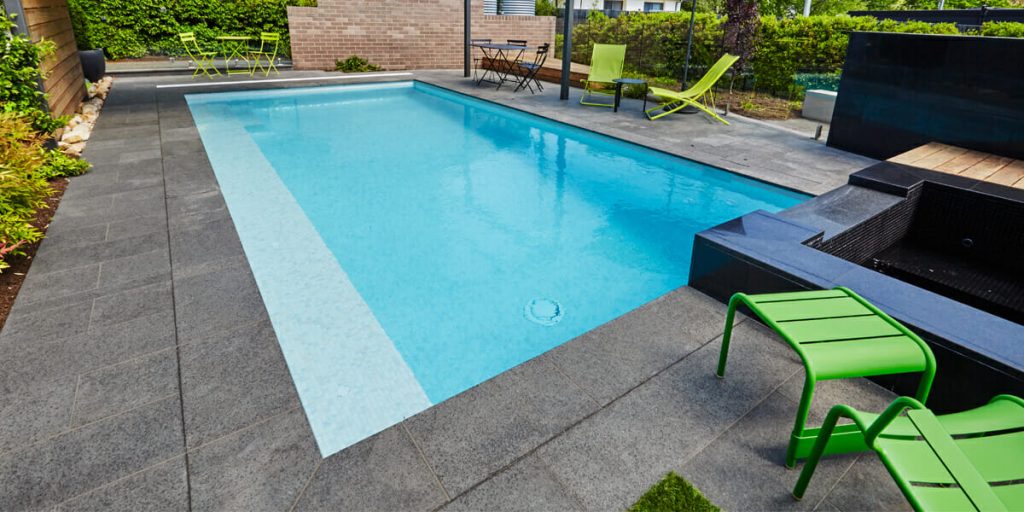
Siri web 3 2

** Siri Marble Paves

Some things are always on-trend

While pool design and landscaping ideas come and go, the most popular materials for swimming pools and surrounds tend to remain the same. Glass mosaic tiles and natural stone pavers – for example – are two materials that never go out of style. They are popular for their natural aesthetics and durability. They also always look elegant and stylish no matter where or when they have been installed.

The most popular glass pool tiles are manufactured in Spain – a country renowned worldwide for its artistry in tile making. While there are a wide variety of beautiful colours to choose from, remember that not all pool tiles are created equal, so be sure to keep factors such as cost, cleaning, slip resistance and ease of installation in mind.

In case you need any assistance with choosing the best pool tiles or pavers for your swimming pool project, reach out to our natural stone experts at Armstone either online or at 1300 560 560. We have over 10 years experience in helping guide homeowners in building pools that are both beautiful and durable.
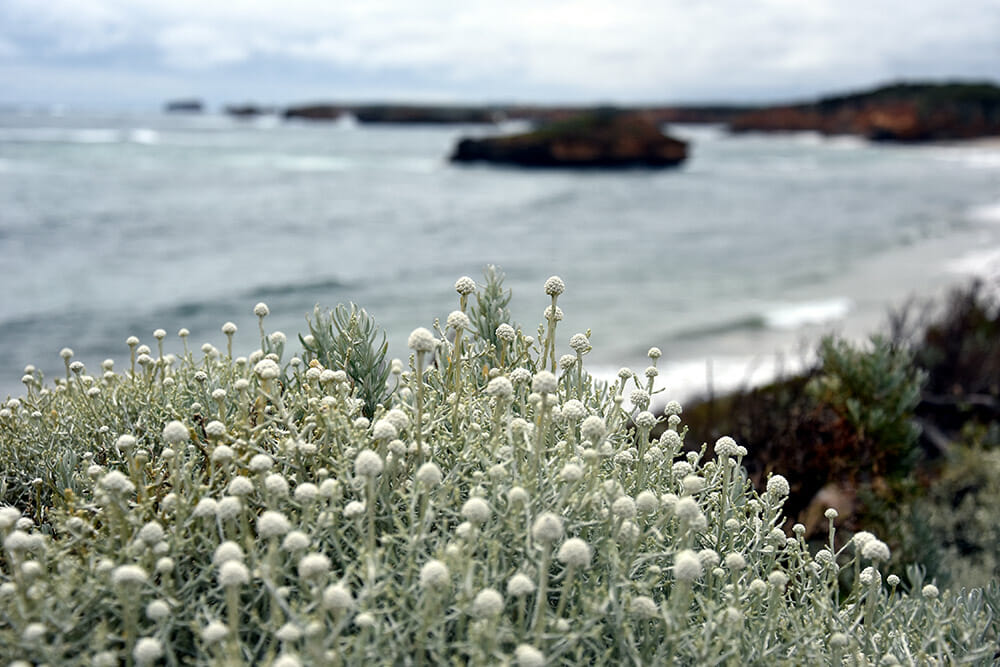
How to Design a Practical Garden with Edible Plants

Armstone Edible Plants

With the rising of the Wellness Revolution, there is an increasing demand and interest in health food, organic food and eating better.

Along with this, more and more people are transforming their gardens into something practical for day-to-day living.

These gardens – with fruits, vegetables and herbs – are known as ‘edible gardens’.

So if you’re looking to make your garden that little bit more practical, this article will help you design it correctly.

Ready?

Let’s begin!

What is edible garden landscaping?

First and foremost, what is an edible garden? Well, basically it’s a garden whose contents – whether they are fruits, vegetables, herbs or flowers – can be eaten. Planting a garden like this is like creating the best of both worlds; the garden is aesthetically beautiful to look at and it’s also good for you because you can (quite literally) eat the fruits of your labour.

There are actually plenty of plants that you wouldn’t expect to be edible – like rose petals and a variety of other flower petals – but are. There are also plenty of edible plants that are aesthetically pleasing on the eye like the blossoms of chives and passion fruits. Meanwhile, other plants like the red and green foliage of lettuce and beetroots, are ideal for garden borders or ground-cover.

Our biggest recommendation with planting edible gardens is creating one where every plant serves more than one purpose. For example, if you plant grapes, you’ll have fruit to eat and to ferment into wine, and if you grow the grapevines over a trellis or arbour, it’ll provide shade for the other plants as well.

Another classic example of plants that perform a helpful dual function are herbs: they’re both aesthetically pleasing and adding flavour to our meals. Examples of herbs that will add a spectacular display of colour to your garden include lavender, chicory, chives, marjoram, rosemary and sage.

Avatar bluestone stepping stones

** Avatar Bluestone Steps

What is companion planting?

If you are keen to reduce the amount of chemicals you use in your garden but you want to protect plants that are susceptible to bugs and garden pests, plant them with complimentary ‘companion plants’. These are typically pest-repellent plants that you can strategically place near those plants that are more prone to attract bugs and pests. Examples of pest-repellent plants include marigolds, lavender, daisies, fennel, dill, rosemary, basil and petunias: all of which make excellent companion buddies for the bug-attracting plants like fruit trees and berry bushes.

Other companion plants you can utilise in your edible garden include climbing and understorey plants such as acacias, casuarinas, grevilleas and banksias. These have a two-fold function because they add beauty to the garden and simultaneously provide important support to the garden ecosystem by supplying it with nitrogen fixation, nutrient accumulation, mulch for the ground-cover and a habitat for the wildlife. Planting larger trees at the edges of your garden is also a good strategy for your edible garden because they provide multiple uses like shade, windbreaks and privacy screening – all of which are important for your garden to grow comfortably and abundantly without being exposed to sunburn and environmental factors.

Garden basics: what to consider

Now, before you actually start planting your garden, it’s important to plan and design it. Within this plan, there are a few notable factors we suggest you consider. These include:

  1. Sun – All living creatures need the sun to provide them with essential nutrients for growth. However, the amount of sun they need is different. Some plants flourish in constant and direct sunlight, while others thrive of partial or limited sun. So it’s very important to determine these before actually planting your garden. Questions to ask include: where does the sun move during the day and how much is one area exposed to the sun compared to another? Where are the afternoon hot spots in summer, the sunny spots in winter, the spots that remain shady all year round? Determining these points is important in choosing which plants will grow most abundantly in which spots of your garden.
  2. Wind – The wind can cause a lot of havoc to vegetation, which is why it’s important to determine how much wind your garden exposed to. Next, figure out which direction do the warm and cold winds come from? Are there any natural windbreakers – like trees or buildings – already present in your garden that you can take advantage of, or, will you need to construct them instead?
  3. Water – All plants need water to grow. Some important considerations for this is checking if your garden has good drainage because if there is too much rain, it can be damage some plants that need less water than others. One way to check the drainage is to dig a few small holes in different positions, fill them with water and time how long the water takes to drain away. Good drainage rate range from one and six inches per hour, while any more or less than this indicates excessive drainage (usually with sandy soil) or poor drainage (usually with clay soil). These can be improved by adding compost or mulch.
  4. Soil – The fourth important component in any good garden – especially an edible one – is ensuring that the soil is of high quality. The plants will feed off the nutrition from the soil and then you will eat those plants, so you want to make sure that they get adequate nourishment. The ideal soil for your garden should be free draining, rich in organic matter and have a neutral to slightly acidic pH level (6 to 7). To see whether the pH levels need adjusting, go to any plant nursery and invest in a soil test kit. Acidic soils can be adjusted by digging in calcium (i.e. lime), while alkaline soils can be improved over time by adding sulphur and compost to them.

Armstone - Create The Perfect Coastal Garden (3)

Designing and landscaping your edible garden

Once you have a rough idea of what you intend to grow in your garden, it’s time to consider the design and make it practical, aesthetically pleasing and easy to access and maintain.

If your garden is a kitchen garden, you should try and locate it as close to the house as possible so that you can just pop out and grab whatever veggies, herbs or other edibles that you need. In permaculture terms, this is known as the ‘oftenest-nearest’ principle, where plants are located according to how often they’re used.

If you want to make it easier to access your garden, raised garden beds are a good idea and the edges can double as garden benches when you just want to sit outside to soak up some sun. If you choose to raise the garden beds, choose stone borders over timber ones because timber tends to rot over time and stone faced beds will help warm the soil faster for longer, helping to extend the summer season for your plants.

Other ways to protect your edible plants is by incorporating walls into your garden as they’ll not only act as windbreaks but also  provide climbing space for espaliers and vines, along with being an aesthetically pleasing backdrop for your garden, particularly if the wall is constructed using bricks or stone. If you’re opting for a stone option, stone cladding is a more affordable solution if your budget won’t stretch to building an entire wall made of stones. Check out our stone cladding online here or visit our Sydney showroom in Glebe for inspiration and ideas.

Ruby Limestone Cladding

Installing clear divisions and paths between your garden beds and the garden’s perimeter is a wise idea so that visitors and others do not trample through the garden and destroy your hard work. The best materials for this are stone pavers or stepping stones because they look good, are easy to clean and provide sure footing. If you add weed block under them, they will keep weeds at bay as well. So it’s really a win-win-win solution for your edible gardening needs.

We hope you enjoyed this article and in case you need any more help planting your edible garden, or adding natural stone wall cladding, pavers or stepping stones, reach out to our stone experts at Armstone online or at 1300 560 560. We would love to help bring your garden design to life and answer any questions.

How to Convert Your Urban Courtyard into a Natural Oasis

Armstone Natural Oasis

Though living in a metropolis or city has many advantages such as being close to shops, essential services and amenities, it has one downside: limited contact with Mother Earth and the natural world.

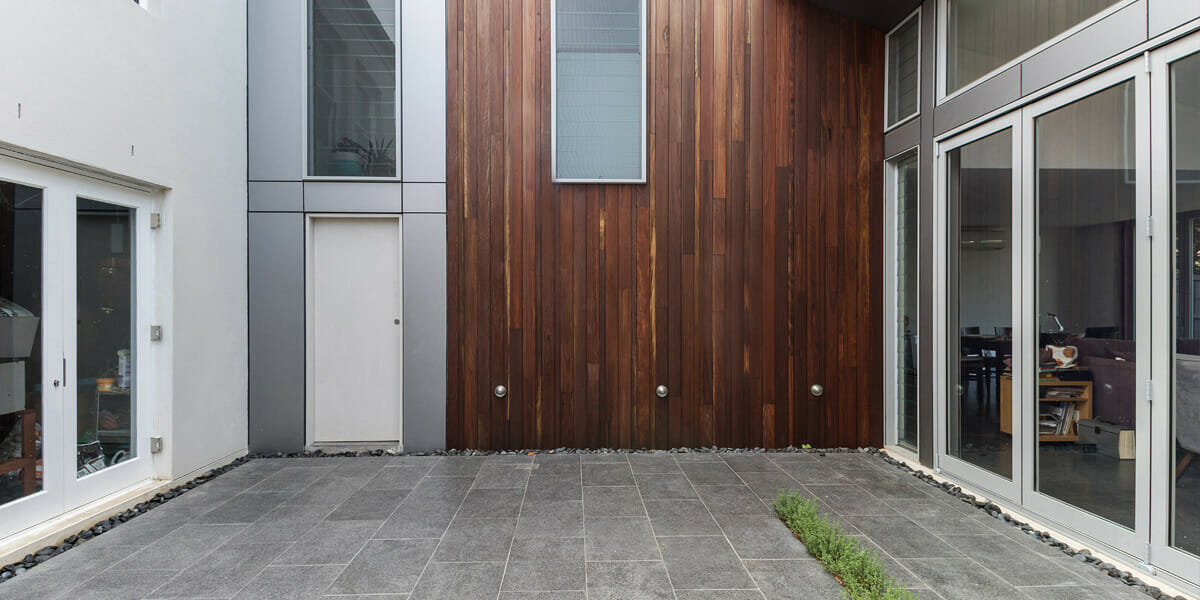
In saying that, you can still create a mini city oasis in your urban environment. For example, if you have lucky enough to have a small courtyard you can call your own, it’s possible to create a luxurious retreat that you can escape to when you need a break from the city chaos.

So in today’s article we will explore how you can turn even the smallest courtyards into an outdoor oasis as well three ways you can counter the most common challenges for city yards.

Ready?

Let’s start!


Defining elements of your courtyard retreat

Before building your courtyard retreat, we recommend thinking about how you will use it. For instance, is its primary purpose a retreat for alone time where you can achieve some peace and quiet, or do you want to use it for entertaining family and friends, or is it a place you want to escape to where you can commune with nature? Once you’ve decided how you’ll use your space, you can start designing it.

Now that you’ve decided how you’ll use the space, you can start identifying the key elements you will need to place within the space. If you intend to use the space for alone time, you’ll likely need somewhere to sit (or recline) and a relaxing ambiance that can be created with a gently trickling fountain, dip pool or water feature. Adding some soothing greenery that’s gentle on the eye is also ideal.

Armstone Landscape Your Outdoor 3

On the other hand, if you plan to use this space for entertainment, then you’ll need furniture for seating your guests as well as tables for food and drinks. If have a smaller courtyard, it’s best to choose furniture pieces that have multi-purpose functions. Good examples are seats with storage underneath them or bowls that can be water features in summer and fire bowls in winter. If you want your courtyard to be free of clutter when you’re not entertaining, foldable chairs are a perfect solution because they can easily be hung on a wall or placed flush against a wall when not in use.

If you plan to create a garden in your courtyard space, the primary element you’ll require is garden beds. For backyards that do not have a lot of space, raised beds are ideal as they provide ease of access to your plants, can double as extra seating and make cleaning the space much easier. They also have a way of visually elongating the space which is a bonus for smaller areas.

In the case that you are extremely limited with space, consider using pots and planters instead. Most plants and vegetables will grow in pots and their advantage is you can easily move them around to chase the sun or shade, which can often be problematic in a courtyard situation. Another alternative is growing a vertical garden along the walls of your courtyard and leaving the floor space for entertainment or seating purposes. For more in-depth ideas about vertical gardens, check out this article we wrote earlier.

Whatever you plan to use your courtyard for, the key is to keep it simple. You see, in a confined space, less is always more. So do your best to keep it free from any clutter and only add the bare essentials.

Armstone Landscape Your Outdoor 4

Solutions to the most common landscaping challenges

As we mentioned earlier, if you have a smaller courtyard, you may encounter a few challenges. To help you counterbalance them, here are a few helpful solutions:

  1. Nowhere to put all your stuff – This might sound obvious (but we all know sometimes the solution can be staring us straight in the face and we just don’t see it), but if you don’t know where to put all your stuff, we recommend first deciding if you want to use your courtyard as a living area or a storage facility. If you want to enjoy your courtyard instead of cramming it with things, then simply get rid of all the things! (Yes, it seems very obvious doesn’t it?) For instance, that bike you never ride or that rowing machine you never row can easily be donated or sold, and the rubbish bins can be stored elsewhere (or worst case scenario, disguised as seats). And while you may still have to hang out the washing, consider a line that retracts when not in use. Be ruthless with your decisions and remember why you are doing this – to create an enjoyment oasis for yourself to escape the cityscape!
  2. Your space is in close proximity to your neighbours – And probably vice versa if you’re living in a city dwelling. Part of creating a courtyard oasis is because you desire a personal refuge or retreat that gives you privacy. So how do you solve this debacle? Well, if your courtyard is overlooked by your neighbours (which is more common than not in urban environments), you can choose a variety of screening options to block out your neighbours while simultaneously blending with your relaxed oasis theme. Other options include installing tall plants such as bamboo, which grows well in planters, planting small trees if you have the space or even placing an overhead pergola or blind which can also double as a sun shade. Just a word of caution with bamboo – as its roots grow deep and reach far into the ground, make sure you have a professional check that it won’t interfere with any wiring or plumbing under your home or your neighbours home.
  3. The space feels too small – If your courtyard seems too small to transform, some tricks professional landscapers use to create the illusion of space include carefully positioned mirrors to make it seem lighter and brighter, vertical plantings that draw the eye upward and using colours to make the space appear bigger than it is – for example lighter colours elongate a space more than darker colours do. Alternatively, installing larger pavers (natural stone pavers are an excellent selection) is another way you can make the space feel bigger than it is. Check out our selection here. Another trick of the trade is avoiding intricate patterns as they can be quite distracting and can make the floor space seem smaller than it really is. Now, if your home has access doors that can be easily opened to create an indoor/outdoor flow with your courtyard, you can create a receding perspective by installing your pavers in such a way that they progressing get smaller the further you are from them. Also another trick to make the space seem bigger than it actually is.

So there you have it: a few simple ideas to transform your urban jungle into an outdoor oasis, no matter how small it is!

If you would like any help selecting the best natural stone pavers for your urban courtyard, you’re at the right place because Armstone is Sydney’s leading supplier of natural stone pavers. We source our products from the best suppliers around the world and stock a wide variety of travertine, granite, quartz, marble, limestone, bluestone and sandstone pavers and our expert staff can help you find the perfect flooring solution for your courtyard oasis.

Simply contact us online or at 1300 560 560. Alternatively, we have a live showroom in Glebe, Sydney where you can see our product selection up close and personal.

Either way, we look forward to hearing from you and helping bring your design to life.

How to Build the Ultimate Backyard Stone Fire Pit

Mica stone panels

Australian’s love spending time outdoors.

All with due reason: our summers are warm, our skies are clear and our air is clean.

Whether it’s at the local park or in one’s own backyard, people like to spend time soaking up the sun and enjoying the warm weather.

But what about winter?

That’s what we will be reviewing in this article!

You see, at Armstone we believe that a well designed backyard is the go-to-place in winter – a real communal gathering ground.

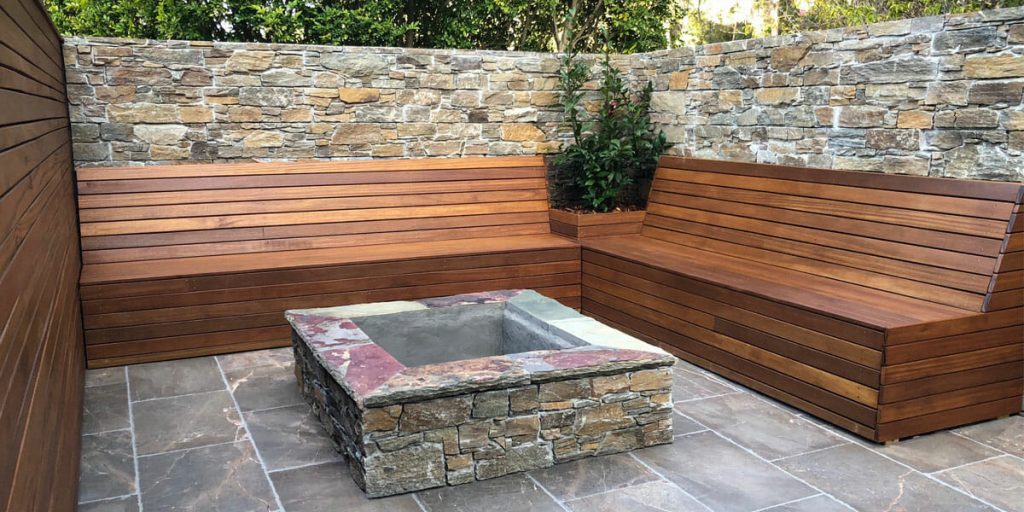
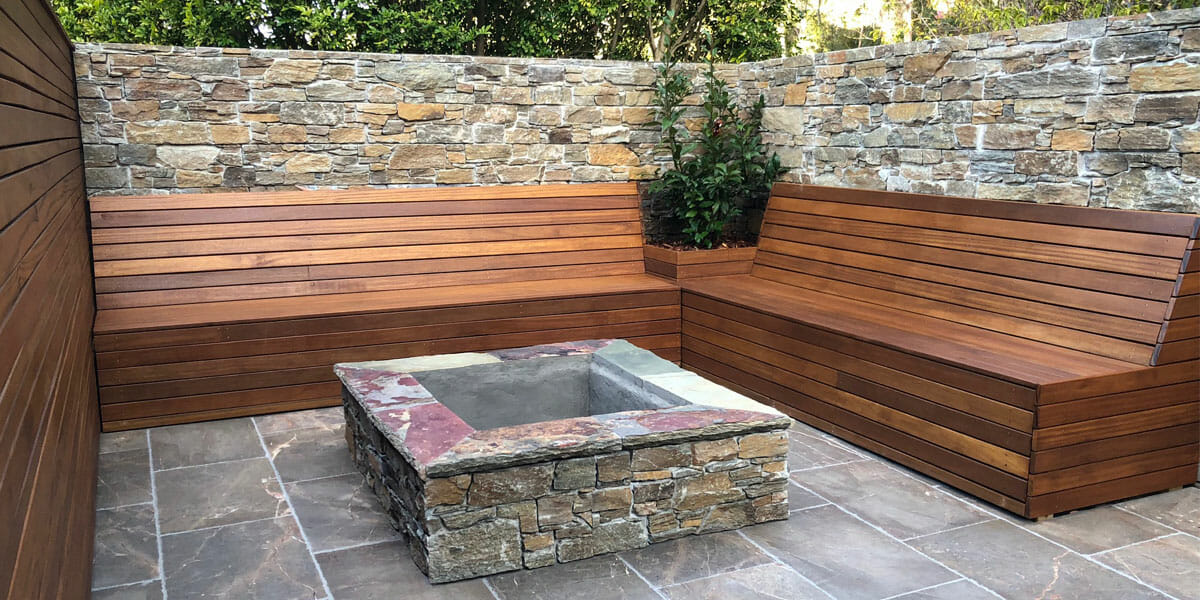
And the one accessory that makes this spot both cosy and comforting, is an ultimate stone fire pit. While it sounds tricky to build, it’s actually not as difficult as you may think.

So let’s melt into this!

Different Types of Fire Pits

firepit1

When it comes to stone fire pits and which one to choose, it boils down to a couple of things.

  1. The space you have.
  2. Your preferred aesthetic and what you want it to look like.

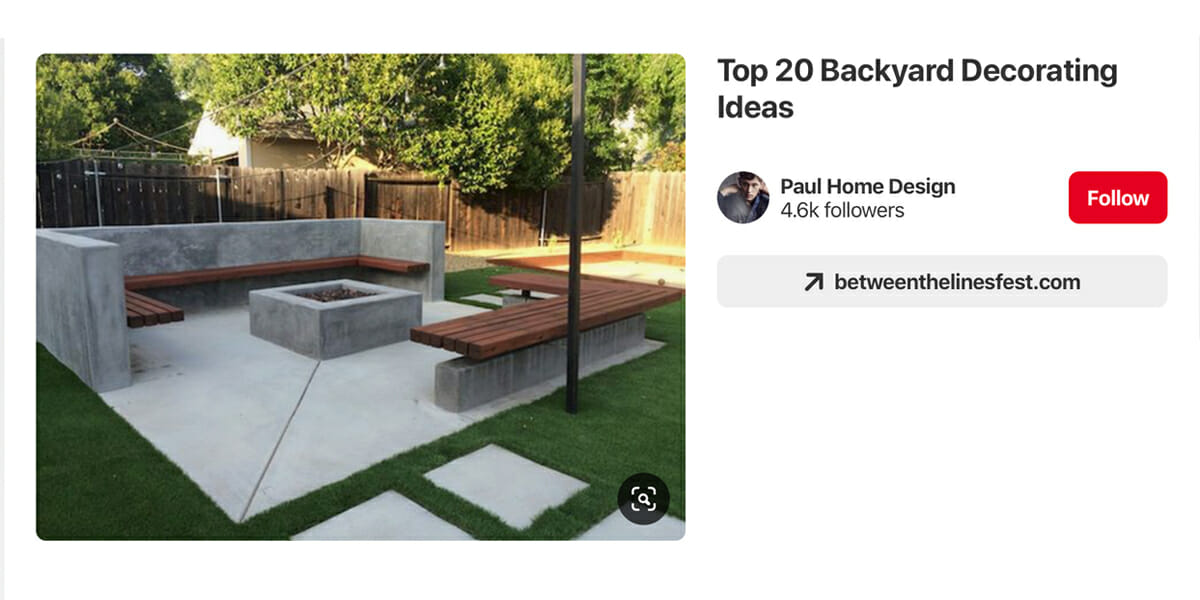
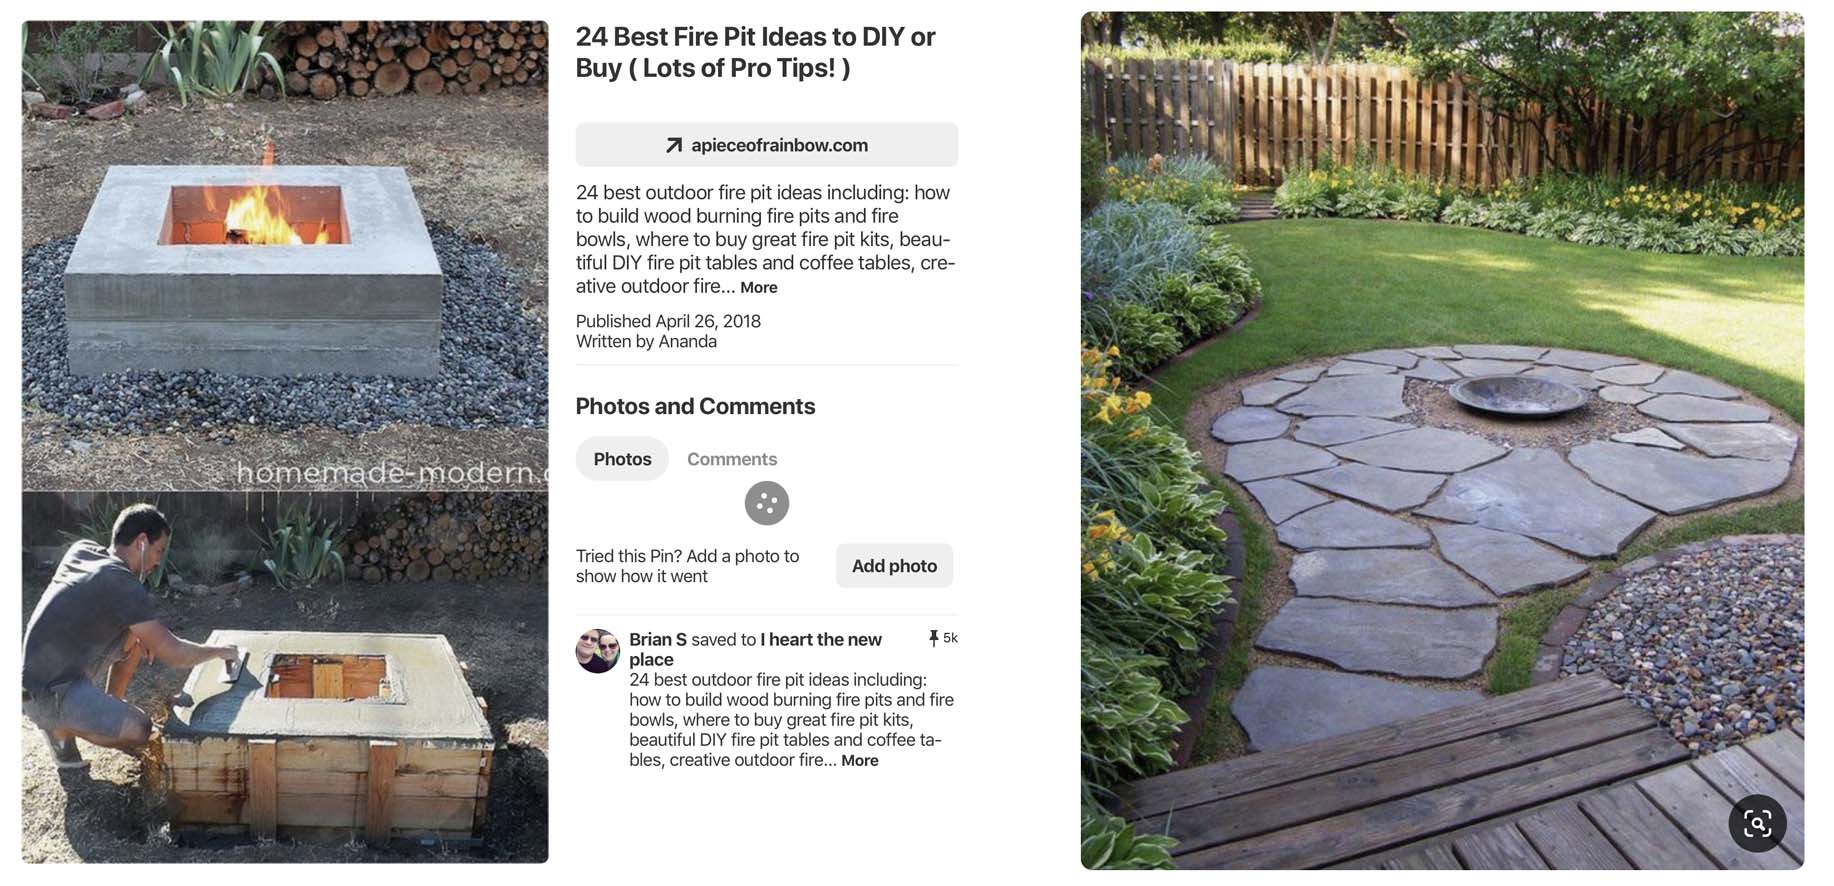
Whether it’s round, square, raised or in-ground – the options are endless.

At the end of the day it’s a very personal decision and regardless of what you choose, building your own fire pit is all about being organised, following some simple instructions and roasting the marshmallows with your favourite people, once it’s all done.

Starting Out

The first, and probably most important task, is…

Research!

We suggest you take your time here and review all your options and alternatives now, rather than install something that doesn’t work and spend time and money fixing later.

Here are some questions to prompt your research:

  • Where is the best spot to build the fire pit in the backyard?
  • How will you use the area around the pit?
  • Will it require a seating plan, if yes, how will you organise it?
  • Is the pit far enough from the house and low-hanging tree branches, utility lines and other structures, that it’s safe for an open flame?

You also want to consider the actual aesthetics of your fit pit and research these as well. Here are some questions to prompt this:

  • Do you want a square, round or inbuilt pit?
  • Do you want to burn wood or coals?

Finally, your last point of research must include checking what building licenses and codes are relevant to your neighbourhood about open flames and outdoor fires. Reach out to your local council and ask them to send you all the necessary information regarding these regulations.

How to Build a Stone Fire Pit

Depending on the type of fire pit you want to build, your tools and supplies will differ. However, there are a few basic items you’ll need regardless of your project. These include:

  1. Pavers
  2. Shovel
  3. Tape measure
  4. Level
  5. Steel rake
  6. Spray paint
  7. Glue
  8. Cement

Once you have decided on your stone fit pit, you also want to choose the right stone pavers to install around it. If you are unsure which paver will be best for your choice of fire pit, contact your local stone experts to find out how many pavers you will need, the best material and so forth. Make sure you know the exact size of the fire pit before contacting someone as this will determine their recommendation.

Choosing your paver really depends on the style of the fire pit. For example, crazy pavers, which have the flexibility to be installed in various random shapes, are perfect for round fire pits. On the other hand, rectangular stone pavers are ideal for square fire pits as they match that modern aesthetic.

Now that you’ve done your research, figured out the style you want and chosen your stones pavers, let’s have a look at a step-by-step way to build your backyard fire pit!

firepit3

Step by Step Guide to Building a Backyard Fire Pit

If you follow these 7 simple steps, you will soon have your own backyard stone fire pit!

Excited?

Let’s get started.

  1. Level the Perfect Spot

First and foremost you want to ensure that the ground you’re building on is levelled. You can achieve this with your garden tools by excavating the area to a depth of 15-20 centimetres. Make sure to clear any weeds and rocks from the surface as well.

  1. Mark Out the Circumference of the Fire Pit

Using the spray paint, mark out the borders where you will install the fire pit. This will show you the inner space where you will burn the fire itself. If you have the fire pit bowl handy, you can use this to mark out space. Alternatively, you can layer the space with fire bricks.

  1. Pour the Cement

The area between the edge of the prepared space and the marked line is where you want to spread the cement. This is the area where you will install the wall. Use the spray-painted line as your guide.

  1. Lay the Pavers

Laying the pavers can be quite tricky. The hack here is to lay them one level (or layer) at a time. Remember to check that each layer is level before starting on the next one. If you are using a fire pit ring, place it in the pit and build the wall around it. If necessary, you can fill the gap between the fire pit ring and the wall with crushed stone or gravel.

  1. Add Stone Capping

Once your fire pit is at the desired height, you’ll need to use stone capping to finish it off. Essentially, this means putting a layer of flat pavers on top of the wall. Choose flat stones that fit nicely together and look aesthetically pleasing. Work all the way around the fire pit wall, lay the flat pavers and fill the joints with cement.

oyster and Mica panels

  1. Use Stacked Stones to Dress the Wall

Once you’ve built the fire pit, it’s time to dress it up and make it glamorous. An optimal choice for this is using natural stone wall cladding. These will give your brand new fire pit that natural stone-look wall. The plus side is that these have smooth backs which makes them relatively easy to install. Applying a bit of elbow grease, you’ll be able to build an elegant façade that will stand the test time.

  1. Add Seating

Once you have completed the structure, you can finish your area by adding seating! Whether you want to install comfortable furniture or lay some pavers, this final touch will create the perfect entertainment and relaxation area that you and your family and friends will enjoy for years to come!

firepit2 1

Perfect for Warming Up Winter

There you have it!

Your simple, step-by-step guide to building your very own stone fire pit!

When you’re ready to choose your stone paverswall cladding or capping stones, be sure to reach out to us at Armstone. We will gladly guide you with the best size, style and paver material for your fire pit.

Contact us over the phone or email here or visit us at our Glebe showroom in Sydney!

If you found this helpful, please pay it forward and share the article with a friend.

Thanks for reading!

4 Natural Stone to use when landscaping around your Pool

Chilla Marble pavers

Australia is a desert and it is notoriously known for its sweltering summers.

As such, most Australians have the ultimate dream: to build a pool in their backyard. Someplace where they can easily cool down, host parties and relax.

Sound familiar?

Maybe it’s your dream!

However, like many items of leisure and luxury, installing a pool can be expensive.

And, it can become even more expensive if you cut corners.

But if you do it right the first time, a pool can become your best home investment and accessory.

In this Armstone article, we will dive into some of the questions and considerations we recommend to our clients prior to investing in their pool and surroundings.

Firstly, when creating your dream pool, you want to examine everything from shape and size to aesthetics and practicalities. Here are examples of questions to think about:

  • What is your main purpose for the pool?
  • How much space do you need around it?
  • How will you access it?
  • What costs are associated with building it? How much time and money will you need to spend on maintenance?
  • What are the right pool paver materials?

As you can see, building the dream pool requires a lot more than just an idea and desire. At Armstone, we want to make sure that you invest your time and money wisely.

Below we will review how to choose the right pavers for your pool and the 4 natural stones we recommend for landscaping around your pool.


Dutoit Limestone Pavers 7
** DuToit Limestone Pavers

CHOOSING THE RIGHT PAVERS

Regardless of your chosen pool design, deciding which natural stone pavers to use for your pool surrounding will make a very powerful statement about your taste, status and success. Some factors to consider include: appearance, durability, non-slip finish, environmental factors like weather conditions and finally, the sealant.

Appearance

As a general rule of thumb, you want to choose pool pavers whose colours compliment your house and garden.

For example, if you have a dark timber deck, a bluestone paver will clash with the dark timber. As both are aesthetically beautiful on their own, together they will wash each other out. Instead, a lighter coloured marble or limestone paver will complement a darker timber deck very nicely.

The same concept applies when choosing the colours and materials for your home!  Unless you want to make a statement with a deliberate clash and contrast, whether it’s glass, cladding, render or brick, you want your pool pavers to blend seamlessly with your surrounds.

When it comes to appearance, it’s also important to consider the paver style against the aesthetic of your house’s general architecture. If you want to match the style of your home to your pool, choosing the right profile of the pool coping is very important.

If you want to be more arty and creative, you can use crazy paving to break up spaces and add a unique style to your home or garden.

Durability

The pool surrounding is a high-traffic area, especially in summer. So it goes without saying that whatever stone pavers you choose, they simply must be durable!

On the topic of durability, remember that the pavers will have chlorine or salt-water splashed on them regularly so it’s important to choose natural stone pavers that won’t deteriorate from such splashes.

Next, there will be occasions when food or leafs from trees will drop on them, or even sunscreen or pool chemicals will be spilled on them. As such, you want to select stone pavers that can withstand such circumstances: pavers that will remain sturdy, untarnished and will stand the test of time.

Limetta Limestone Pavers 2
** Limetta Limestone Pavers

Non-slip finish

All that water in the pool tends to find its way out, whether it’s from people jumping in or out, or just splashes from the pool due to wind and changes in the weather. Undoubtedly, having slippery pavers is exceptionally dangerous, so make sure you check the paver’s non-slip rating before making your investment. This is usually identified with a P in front of it. For example, P3 is very slippery. You want to aim for pavers with ratings of P4 and P5 for pool surroundings.

Weather conditions

As they are installed outside, Natural Stone Pavers will experience all weather conditions. As such, you want to consider how they’ll cope with rain, storms, extreme heat and so forth. For instance, will the paver get too hot on a 35-40 degree summer day? Will it be unbearable to walk on? Will it reflect too much of the sun’s glare and make the eyes sore? Maybe the stone is extra porous and not ideal for pool surroundings because it will dissolve over time?

Some of these seem a bit far-fetched, just trust us when we say that we’ve seen people install the wrong pavers around their pools and watched them spend a fortune in fixing a problem that should never have been a problem, to begin with!

So it’s best to ask even the most ludicrous question now, rather than patch-work the problem later.

Seal the deal

Finally, natural stones can be porous and sensitive. This is why it’s important to protect them with the right sealer. Your pool is an investment, and an expensive one at that. You want to ensure that it stands the test of time so that you can enjoy it for many, many years to come!

THE TYPES OF STONE TO USE:

Now that we’ve reviewed a few vital considerations, there are several options of natural stone that are best suited for pool surroundings. These are: marble pavers, limestone pavers, granite pavers and bluestone pavers.

Let’s look at them individually below:

1. MARBLE PAVERS

Frostine marble pavers 5
**Frostine marble pavers

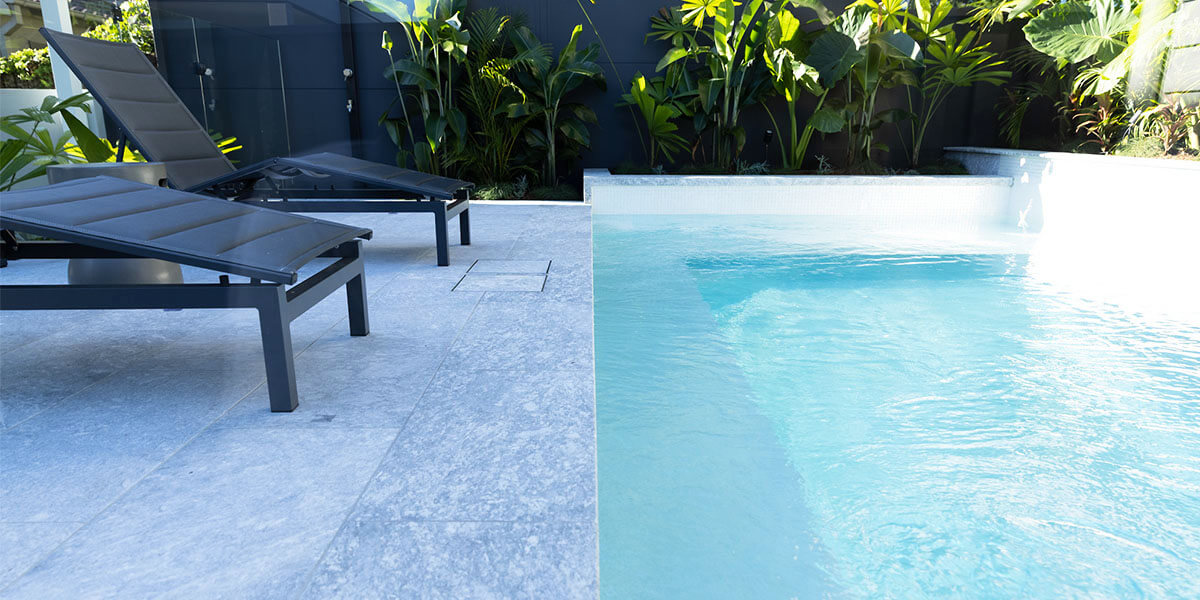
A beautiful, light coloured stone, marble has many advantages as a pool paver. Though it’s popular for its aesthetic, it is a very hard-wearing stone which means that it will last for years! It also doesn’t absorb a lot of heat, making it an ideal paver for harsh hot summers where the stone will be a cool welcome for your feet.

2. LIMESTONE PAVERS

Melba limestone pavers
** Melba Limestone Pavers

As one of the world’s go-to building materials, limestone is known to retain its form regardless of the conditions that come its way. It has an earthy colouring which makes it suitable for an outdoor environment. Limestone pavers can withstand heavy foot traffic and extreme weather conditions and are available in a variety of colours and textures! It’s no wonder that they are such a popular pool paver.

3. BLUESTONE PAVERS


Nulla Bluestone Pavers 4
**Nulla Bluestone Pavers

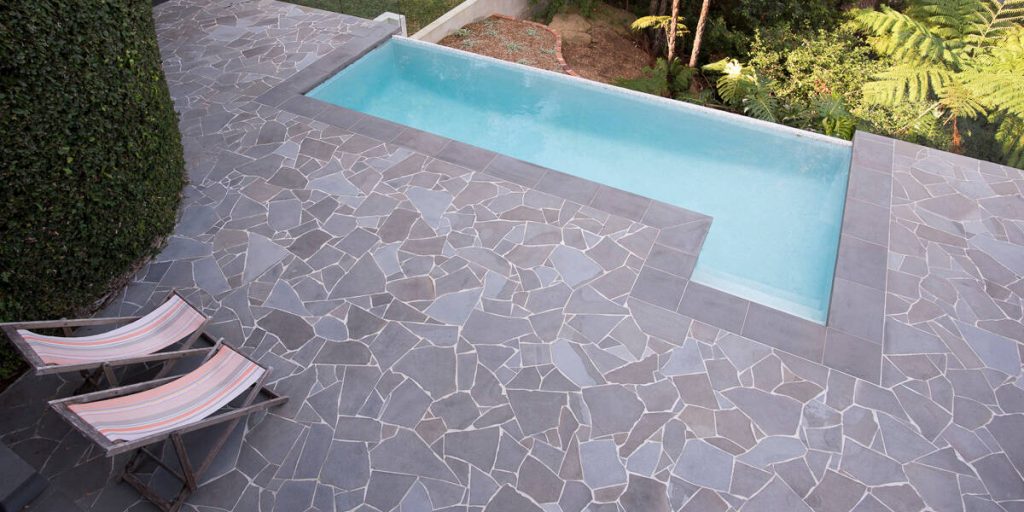
Dense and hard-wearing, bluestone (also known as basalt) is a practical option for pool paving because it is salt resistant. Besides being very durable, bluestone is available in a variety of shapes and styles ranging from tiles to cobblestones! As such, it’s a very versatile paver for your home and garden. In the photo above, the paver has been laid in a ‘crazy’ paving style making it a feature for the pool surrounding.

4. GRANITE PAVERS

Raven Granite Pavers
** Raven Granite Pavers

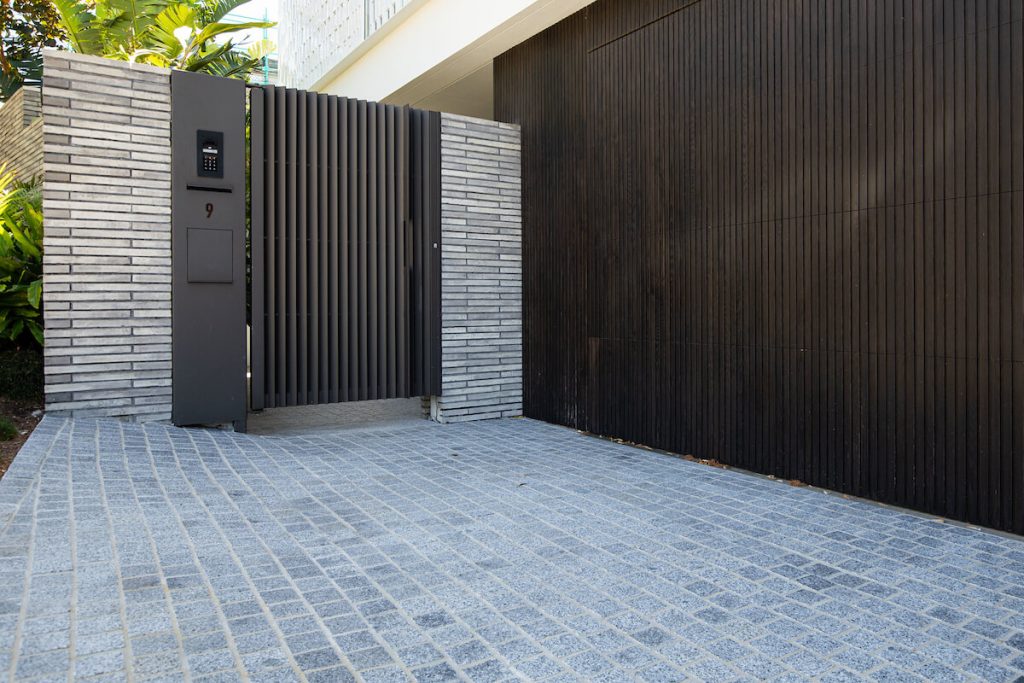
Non-slip and with a flamed finish, granite is ideal for pool settings. It’s elegant and works very well with contemporary architecture. It’s one of the densest natural stones which is why it’s so popular as a pool paver. Granite sports a speckled finish which makes it an appealing stone for pool pavers because it hides stains. In the case that an accidental spill or stain occurs, you can easily hose down this paver because it has a low-porous rating.

If you want more information on How to Choose Pool Pavers and Pool Coping, follow the link before.

Take your pick

At the end of the day, remember that building a pool is an investment for your home. So it’s vital to choose a stone paver that has the best aesthetics, durability and longevity for your lifestyle.

Now that you are better equipped with choosing the right stone for your pool, check out our 5 Tips On How To Choose Pool Pavers and Pool Coping.

Armstone is the leading provider of premium natural stones, including travertine, bluestone, sandstone, limestone, marble and granite pavers. We have been trading for over a decade and are very passionate about helping our customers create spaces that bring them joy and happiness.

If you need some help deciding which natural stone best suits your lifestyle and home, contact us for information and expert consultation.

PS. Below video will help you understand why is it important that your trusted stone suppler works closely with Installer.

The Best Poolside Material: Natural Stone and Pavers

Pianura Crazy Paving

The area around your swimming pool can typically become the focal point of your backyard. In saying that, it is also imperative that the poolscape area is well installed and maintained so that it stands the test of time and is also safe for your family and friends to enjoy.

If we look at the history of swimming pool decks,  traditionally most in-ground decks were made from concrete. Though concrete is a sturdy material, new materials like natural stones and porcelain pavers have attracted popularity.

So in today’s article we will share the five key points to consider when choosing the right material for your poolscape.

Melba 2

** Melba Limestone Pavers

What to Consider When Choosing the Right Material

1. Aesthetics

As with any home improvement project, considering the overall aesthetics and style of your backyard (and home), is the best starting point. So prior to selecting the specific materials you want to install, we recommend thinking about the colours, tones and other style related aspects to your backyard such as plants, furniture and architecture. Once you have come up with the draft idea of how you want everything to look, it will be much easier to find the materials and complete the installation process. Also, your final product will integrate nicely with the rest of your home.

2. Durability

As your pool is going to receive a lot of foot traffic, it is very important to choose a sturdy material. When choosing your material also consider how much maintenance it requires, the costs associated with this maintenance, how often it needs to be maintained and if the material will be able to withstand prolonged contact with water. For example, some materials like sandstone are prone to erosion and not ideal as poolside pavers.

3. Safety

As poolscapes are typically wet areas, it is extremely crucial to choose materials that are able to handle water and are not slippery when wet. Some questions to consider are: do you live with small children or elderly people who are more prone to having a slipping accident? Do you like to host parties with many guests where safety is an important consideration? These are all very important questions to evaluate when choosing the right poolside material so that once your pool is installed you can enjoy it safely.

4. Heat absorption

Pools are usually used in the summer when temperatures are high and the sun shines constantly. Any material left directly underneath the sun will eventually get hot. However, some materials get hotter than others and so you want to be mindful when choosing a poolscape paver because you don’t want yourself, your family or your friends to hurt their feet while walking on the stones. The rule of thumb is that the darker the stone, the more heat it absorbs. Lighter colours reflect heat and are therefore cooler underfoot.

5. Coping

Another important consideration for your poolscape is installing pool coping. Why? Because coping separates the swimming pool shell from the surrounding surface area and in doing so helps protect the pool structure by stopping water from getting behind the pool shell. It’s important to think about whether you’d want the pool coping of the same material as the one you’re using at the edge of the pool or if you want to contrast it with something different.

Now that you are better acquainted with what to consider when choosing your poolscaping stones, feel free to check out the 5 things to consider when choosing pool tiles here.

Let’s continue and check out how to use natural stone for patios and paths.

Natural Stone for Patios and Paths

Frostine Marble pool Pavers

Stone is a beautiful, natural-looking material with extremely versatile properties, meaning that it can be installed for various purposes including patios and pathways. Natural stones are unique in that they really enhance any outdoor landscape. They have enough texture to be slip-resistant and are available in a wide array of shapes and sizes; such as square, rectangle, triangle, and irregular – which makes them versatile enough for any purpose and location.

Along with this, there are plenty of stone varieties to choose from including sandstone, limestone, granite, bluestone, cobblestone and many others. The one downside of installing natural stone for your patio or pathways is that some stones easily absorb water which can be a problem for erosion and many others are dark in colour, which makes them prone to absorbing heat rapidly and becoming hot underfoot – a huge issue for Australian homes where our summers can reach excessive heats. Another important consideration with natural stones is maintenance. Here is an article with some tips for cleaning natural stone pavers.

Pavers for Paths and Patios

If you are looking for an alternative paver for your patio or pathways that resembles natural stone but is more durable, we strongly recommend considering porcelain pavers as an alternative! Compared to a concrete substitute, porcelain pavers are designed to resemble cobblestones, granite, tile, and even traditional bricks.

Due to the technology with which they are made, they are also extremely sturdy which also makes them very versatile. Porcelain pavers also come in many different materials, sizes, shapes and colours, providing an infinite number of styles and pattern combinations for your poolside. If installed and sealed correctly with a permanent border or frame, they will sit stably and not shift.

Other paver materials for poolside patios include stone and aggregate. As they are able to move with the ground, pavers are quite durable and resistant. They are also less likely to crack in comparison to concrete and if you need to replace any stone in case of damage, it is much easier to do. 

If you have any other questions about poolside materials regarding safety, heat absorption, and durability, reach out to our expert team at Armstone. We have over 10 years worth of experience in this field and have helped thousands of customers turn their dream poolscape into a reality. We would love to help you too!

Alternatively, feel free to browse our products here.

Top 5 Driveway Pavers

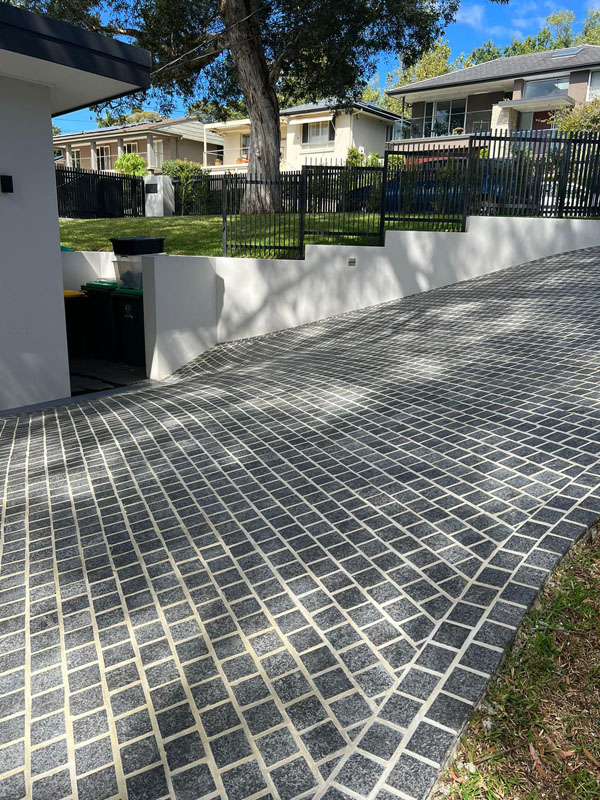
Mistral Granite Cobblestones

The driveway is an entrance to your home.

And this positioning makes for an elegant feature to introduce to guests and pedestrians.

Thus, a well-dressed driveway will add charm and timeless character to your property.

In saying this, it can also become a costly investment to install a concrete driveway.

And dressing it with cobblestones, pavers or something else.

This is why we encourage you to remember that you are adding long-term value to your property.

And you deserve to enjoy your home, the way you want to enjoy it.

After all, you’ve worked hard to reach this point in your life.

So it’s only fitting to do it the right way and create the aesthetic you feel you deserve.

Before we share with you the top 5 driveway pavers.

Let’s start with the most important part of your driveway project: the concrete slab.

Raven cobbles on mesh

Raven Granite Cobblestones

The Concrete Slab

Firstly, ensure you have a 120mm reinforced concrete slab for your driveway.

Considering basic physics like expansion and contraction due to temperature changes.

Be sure to install an expansion joint to allow the concrete to move freely.

Secondly, you want to research which adhesives to use for installing your paving on your new driveway.

As driveways require a totally different installation process to foot-traffic areas.

You must ensure that you use specific products that will be able to hold a lot more weight than a regular footpath or entertaining area.

Experts recommend using a glue with added flexibility that provides a stronger bonding.

This is important because of the high-pressure demands caused by the weight of vehicles.

And the vibrations they cause on the ground’s surface.

And a good adhesive should give flexibility as well as strength.

Next, you need to decide on the best grout.

We suggest using a flexible grout.

For cobblestones we recommend the product from Ardex called WJ50 and mixing it with the Ardex Grout Booster.

The WJ50 is sanded cement-based grout.

It is simple to use and has superior colour consistency.

It is ideal for joining pavers without shrinking, that have widths ranging from 2mm to 50mm wide.

If you want to improve the strength of the adhesion along with its flexibility and abrasion resistance.

We suggest combining it with a booster.

This is typically a water-based, synthetic polymer grout additive.

Now, to dress the concrete slab!

While you can select something from a variety of materials.

You definitely want to consider factors such as grip strength, density and lastly colour.

There are numerous options available on the market.

So it is best to choose one that will be perfectly tailored to your individual taste and lifestyle.

If you’d like expert advice on which products are best suited for your individual circumstances, give us a call .

Now let’s review the top 5 paving options for your driveway!


Top 5 Paving Options to Choose from for Your Driveway

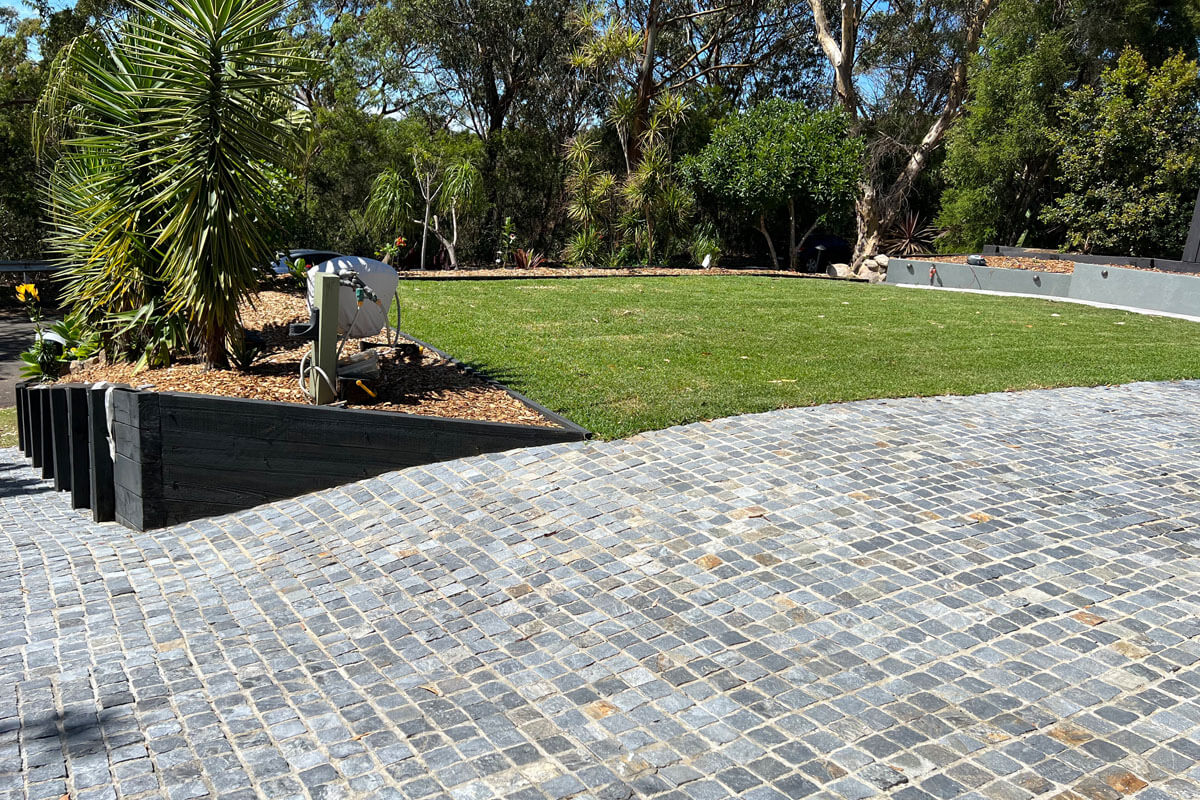
1. Cobblestones

Cobblestones are a timeless, versatile and beautiful paving solution.

Exuding old European character with superb density and grip strength.

Cobblestones serve as an unrivalled paving option for your driveway.

Cobblestones are generally made from very strong natural stone materials.

These include granite, quartzite, porphyry or bluestone.

These are the superior option when it comes to steep driveways.

Modern cobblestones are inspired by the century-old roads and walkways you’ve seen in Europe.

To create the traditional cobblestone look, they are composed of smaller pieces of stones.

These are set apart from each other in an organised way.

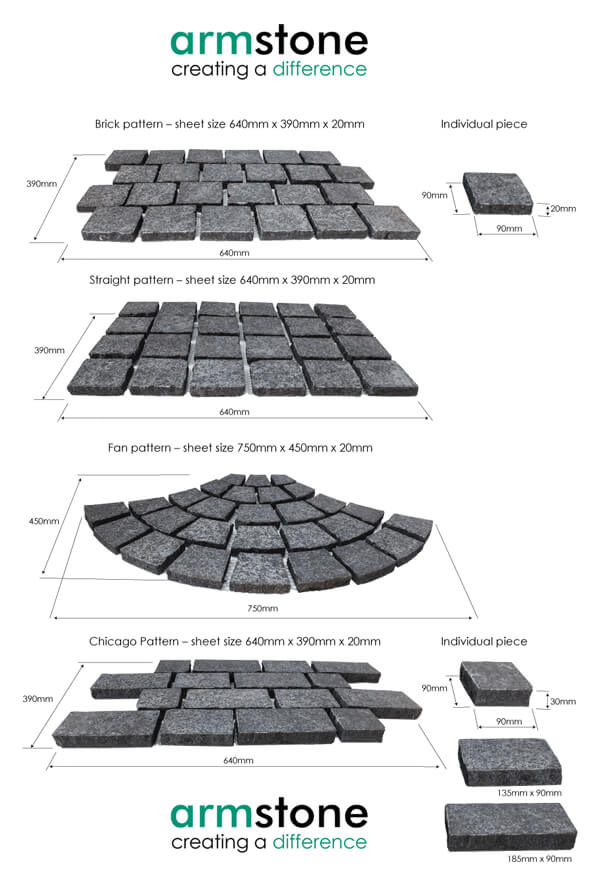
The styles have a variety of patterns ranging from Chicago, Brick, Herringbone, Straight and more.

Essentially, there are countless ways you can turn your driveway into a focal point for the front of your home.

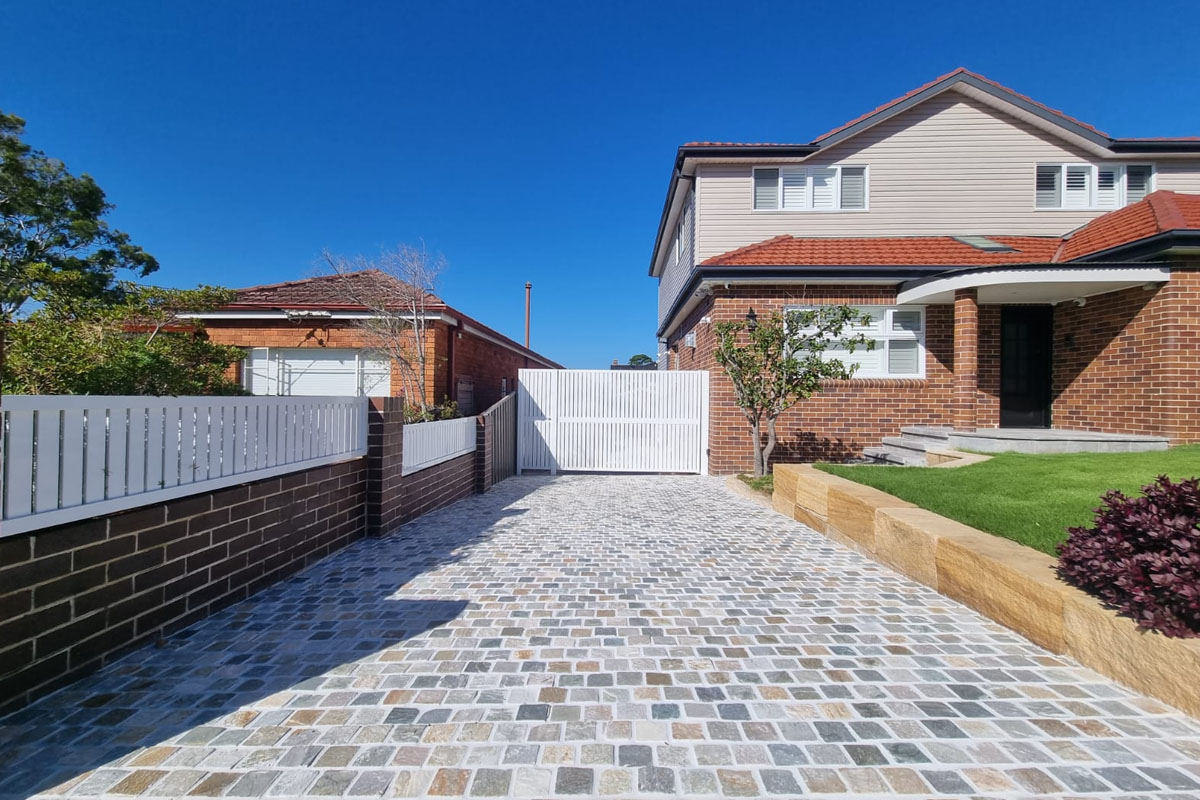
Bonza cobbles 1
** Bonza Quartz Cobblestones

The natural raw texture of cobblestones also helps with grip for your vehicle’s tyres.

This creates a safe environment for constant use.

With a wide selection of natural stone materials and designs for your choosing.

It’s super easy to create a beautiful driveway feature.

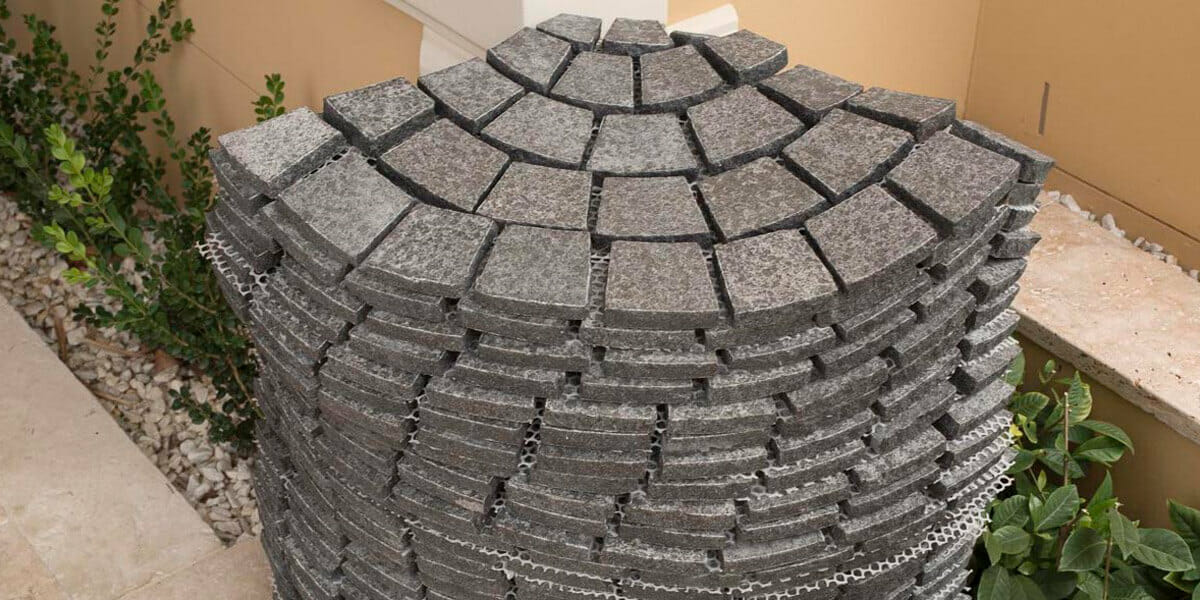
For curved driveways, or centre circular driveways.

Creating borders from cobblestones or using cobblestones in a fan pattern, works incredibly well.

Raven Granite Fan Cobblestones*Driveway Cobblstones in fan Pattern


Cobblestone Infographic


2. Natural Stone Pavers

Boasting with large beautiful formats and vivid natural colours.

It is not hard to see why Stone Pavers are a popular choice amongst Australian homeowners.

The most noteworthy materials for driveways are Granite Pavers, Basalt Pavers (Bluestone), Quartz Pavers and Porphyry Pavers.

The dense genetic makeup of these natural stone pavers provides a solid base for your driveway.

Because vehicles will add a considerably heavy load onto your natural stone.

If you decide to use a natural stone paver for your driveway.

It’s crucial that you choose pavers with the correct thickness.

We recommend 30mm for all the aforementioned pavers.

Raven Granite Pavers** Raven Granite Pavers

As stone pavers are completely natural products.

Like all-natural stones, they have small hairline fractures in them.

These are not always visible to the naked eye.

To reduce potential breakages down the track.

We recommend using thicker pavers.

As well as thickness and slip resistance.

Colour is another important consideration when choosing the best paver for your driveway.

For example, lighter-coloured natural stones (or anything lighter-coloured really).

Are easier to mark and even if they are sealed, they can be challenging to clean.

This is because sealers only allow you 24-48 hours to maintain the look of the stone.

As such, darker-coloured natural stone pavers.

Are a much more practical choice for driveways.

Stone pavers are a beautiful option for the driveway.

And if you pick the right type of paver, your driveway will stand the test of time.

Audrey Cobblestones on mesh
**Audrey Cobblestones on mesh

3. Structural Porcelain Pavers

Structural Porcelain Pavers are extremely strong, durable and hard-wearing.

With a multitude of colours and prints to choose from, you can create a fuss-free stone-look driveway!

If you’ve read any of our other posts, you would know all the specific benefits of using porcelain pavers.

To summarise, they have the ability to withstand permanent stains and are extremely strong.

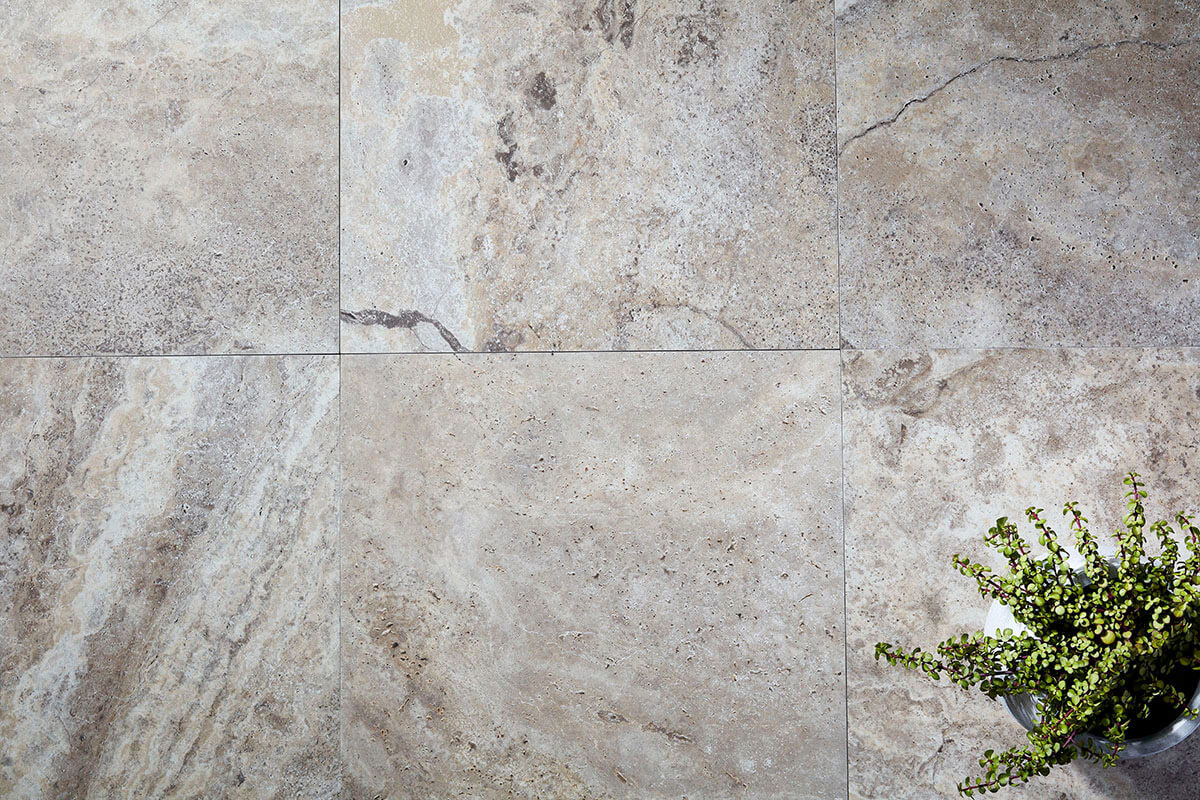
Elite Silver** Elite Silver Travertine Porcelain Pavers 

Porcelain pavers can be used anywhere and everywhere.

No need to seal these pavers.

They are cost-effective, and you can create driveways that look like Granite all the way to Travertine.

With so many benefits available the most noteworthy of which is the massive break load.

And the multitude of prints and looks available.

4. Concrete Pavers

Concrete pavers are available in a wide range of shapes, patterns, colours and styles.

Ranging from traditional rectangular pavers to squares or interlocking circular pavers.

There are many creative ways to dress your driveway according to your taste.

Compared to regular concrete, concrete pavers will improve traction.

And when using interlocking pavers, will also add strength for your vehicle load.

This is also a cost-effective solution to dressing your driveway and as such, repairing damaged or affected pavers is relatively easy.

Concrete pavers

5. Clay Brick Pavers

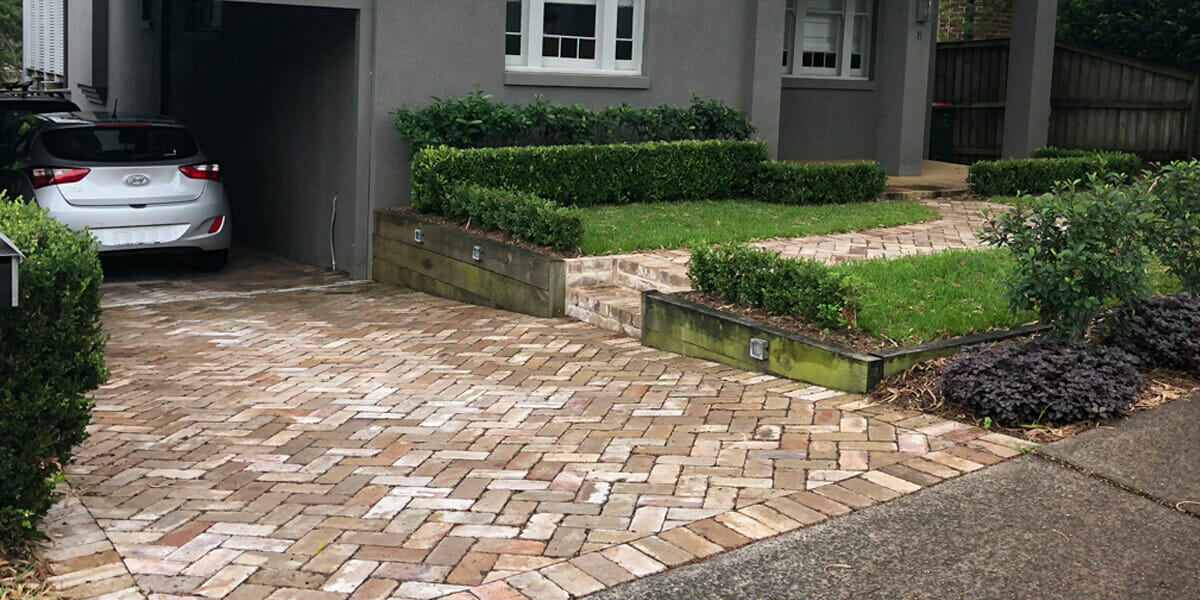
Clay Brick Pavers are made from baked clay and have been used by stonemasons for centuries.

Their versatility allows for different designs like weaves, herringbone patterns or even a running bond.

Whilst clay brick pavers are somewhat fragile compared to other types of paving options.

They can still be used for a driveway.

Combining a variety of colours, textures and characters, these pavers offer a myriad of choices for you.

As a natural material, clay is also an eco-friendly option.

It can be easily cleaned and re-used for other future projects.

Brick pavers 1

Conclusion:

All in all, you have some wonderful paving options available for your driveway.

The best way to determine what suits you best is to review your lifestyle and pick accordingly.

For example, if your driveway has many overhanging trees.

We would recommend installing Porcelain Pavers instead of Natural Stone Pavers.

If you have a smaller budget, you may choose to invest in Concrete Pavers instead of Cobblestones.

Every circumstance is different and at Armstone we can help you select the option that is best for you.

For expert advice and a tailored solution, call us on 1300 560 560.

Or visit our showroom in Sydney, Glebe.

We love this stuff.

As always, thanks for reading.

We hope you learnt something valuable.

It’s been a pleasure having you here.

5 Types of Outdoor Tables Perfect for Your Stone Patio

Armstone - Outdoor Tables

Historically, people gathered around a fire to eat.

As society developed with agriculture and outdoor fire pits became ovens in kitchens, families and friends would gather to eat around the kitchen table.

As such, tables became the centre of attention in any gathering and space, with the stone patio being no exception. So if you have a stone patio in your backyard, hands down your outdoor table will get most of the attention. Consequently, it’ll be the one piece of furniture that’ll set the style for the rest of your terrace.

In saying that, there is an infinite number of options and styles of tables to choose from and we can understand how overwhelming it can be to narrow down your options.

So, how do you choose the best table for your stone patio?

We’re glad you asked! This article outlines the five table options that will be ideal for different stone patios.

Tips for buying an outdoor table

First things first, before investing in an outdoor table, we suggest you consider:

  • Your needs – How often will the table be used? How many people do you want to be seated around it? Will you clean it regularly or do you have a busy lifestyle and prefer a table that requires less maintenance?
  • The location – Does your patio have a section that is covered or will it be exposed to the elements like the sun and rain and thus need to be sturdy enough to sustain any wear and tear from the environment? It’s also important to consider the weather in your area, for example, is it particularly wet, humid or extremely hot? All these factors will determine whether it’s better to invest in a table with timber, glass or metal finishings.
  • Your indoor design style – If you are looking to create a seamless transition between your indoor and outdoor aesthetics, we recommend considering the style of your interior living room and replicating it in your patio. Of course, if you prefer to keep the areas different, then you would opt to do design them with contrasting aesthetics.

Types of tables for your stone patio

Once you have some clarification to the above questions, it will much easier to determine which table will best suit your stone patio. There are five main styles, each with its distinctive features and advantages reviewed below.


1. Glass

Glass tables are timeless, classic and minimalistic and make for an ideal choice for your outdoor patio. As well as being stylish and iconic, their main benefit is their sturdiness. Due to the thickness of the glass, you can safely place hot objects on the tabletop without fear of scorch marks being left on the surface. As well as this, the glass can withstand the hot and cold and other environmental factors like heavy rain. Another advantage of investing in a glass table for your stone patio is that glass is transparent and as a result, can create the illusion of extra space: a perfect solution for smaller courtyards.

Nulla Bluestone Pavers

** Nulla Bluestone Pavers

2. Wood

Wooden tables are classic and versatile, so whether you are looking for a minimalistic or a rustic layout, you can only go right when choosing one for your stone patio. While they are extremely sturdy and can stand the test of time, they do require more TLC (tender love and care) than other materials. For instance, over time, constant exposure to the elements like water and humidity will erode timber’s shine and overall tone. As such, it’s recommended to regularly re-polish your wooden table to keep its original essence. Additionally, since timber is a fairly porous material, it is more prone to scratches and absorbing any spills or liquids. As such, be extra careful with acidic drinks like wine spills and clean them as soon as they happen. To avoid hot items causing scorch marks, use a coaster or wooden board to protect the table’s timber surface.

Sebian LimeStone Wall Cladding

3. Stone

Stone tables are elegant, sleek and timeless. If you want a table for your patio that can withstand environmental changes including direct sunlight, exposure to water or humidity and extreme weather conditions, natural stone tables are your best bet because they are the most resistant to these factors. Due to their grandiose appearance, they also tend to look better in larger spaces. However, stone is an extremely heavy material and as such, needs extreme care when transporting it or even moving it from one location to another. We recommend hiring professional removalists who have expertise with moving stone tables and if you intend to regularly change your patio setting, maybe reconsider investing in stone because it will become an inconvenience to move.

Jura Grey porcelain Pavers

4. Metal

If you’re looking for an outdoor table to have versatility, metal is the winning choice! As a material, metal is sturdy and resistant to most weather conditions. In saying that, be careful with extreme humidity or placing a metal table on a terrace without a covering because if exposed to constant rain and moisture, metal can rust and look unbecoming over time. To avoid rust, opt for a table made of aluminium.

Silver Travertine Pavers

5. Plastic

With modern life adding more stress, pressure and demands on many families, people have less time to upkeep their homes and gardens. As such, more and more people are choosing to invest in plastic outdoor furniture because it requires so little maintenance. Plastic outdoor tables are the perfect example: they are available in a range of beautiful and modern designs and colour, can be easily cleaned with a cloth, are easy to move should you choose to redecorate and can also withstand most weather conditions.

Armstone - Outdoor Tables (2)

So there you have it: five different materials for outdoor tables for your choosing to enjoy the beautiful Australian weather with family and friends.

If you have any questions about the best material for your outdoor table, reach out to our experts at Armstone online or at 1300 560 560. We have over a decade of experience with helping people bring their patios to life and would love to help answer any questions you have.

Alternatively, check out our natural stone pavers and products here or visit our showroom in Glebe, Sydney for more inspiration for your outdoor patio.

11 Considerations When Creating Outdoor Living Spaces in a Small Backyard

2 4

Australia’s warm climate is why outdoor gatherings are synonymous to our lifestyle.

Whether they’re low key gatherings with family and friends or big celebrations, having a deck, balcony, or outdoor kitchen adds functionality, variety, and enjoyment of your home and outdoor activities.

While bigger yards give you more space to work with, so long as you design your space by taking a few important things into account, you can still enjoy the benefits of outdoor living spaces in a small house.

In today’s article we explore the 11 most important aspects to consider when designing your outdoor living space for a small backyard.

1. Define the purpose

As with any project, whether you’re renovating your home or designing your backyard, the first step in the design process is to define how you intend to use the space you’re upgrading. Defining the purpose helps you prioritise the important elements to install in the space. For instance, if you intend to use your small courtyard for entertaining guests, you’ll need space for a barbecue, seating and potentially a fire pit. If, on the other hand, you intend to use the space as an outdoor escape from the daily grind, you might want to install a water feature, swimming pool and swing. Can you see how a slight shift in purpose can change the entire ‘to-do’ and ‘to-buy’ list? Of course you might need to make compromises along the way, but deciding how to utilise space helps with identifying what’s essential and what’s not.

2. Find the space

Next, it’s important to choose the right area for your backyard set up. You might already have an area in mind, but don’t limit yourself to the space behind your house. For example, if you live in a townhouse or unit, you could transform the pathway areas on either side of the house into small – yet comfortable and functioning – outdoor living spaces. You can also utilise walls and transform other vertical surfaces into feature garden walls and add extra character to your backyard. If you need any ideas or inspiration, check out this article.

3. Create a focal point

Another way of making use of whatever limited space you have, is by creating a focal point in your new outdoor space. Focal points are helpful because they add interest to the area while simultaneously bringing all the elements together. Items that can act as focal points include dining tables, coffee tables, fire-pits, sculptures, stepping stones, trees or fountains. The importance of choosing your focal point at the start is that it can help you work in your remaining elements around it to create a cohesive space.

Avatar Bluestone Stepping Stones

**Avatar Bluestone Organic Shape Stepping Stones

4. Use smart layouts for furniture

You may have heard the saying: “work smarter, not harder”. Fortunately, this phrase applies for design purposes as well and can be a handy way to make the most out of your small courtyard and furniture layout. For example, it’s best to keep doorways clear in narrow spaces and utilise chaises, club chairs, and other items in such areas. Additionally, if you want to block out neighbours from seeing into your balcony or yard, use boxed hedging and pot plants to cover your space from prying eyes and install a foldable umbrella to create pockets of shade in sunny spaces.

Silver Travertine Pavers

** Silver Travertine Pavers

5. Create designated zones

Zoning smaller spaces can seem counterintuitive, however creating designated areas can be a highly effective use of space for small backyards. By integrating smaller segments and intimate zones in larger open areas, you create the impression of spaciousness. Breaking up the zones with planters, small walls, a variety of ground surfaces such as pavers, stepping stones or bricks and positioning the furniture in unique formats all adds functionality to the space. So whether you want to sit alone and read quietly in one area or socialise in another, the one space can easily provide you everything you desire.

6. Use movable features

One way to make use of a small space to its fullest potential in terms of functionality and spaciousness is by utilising portable and  movable items as much as possible. These items can provide you the purpose you need and simultaneously not become an eyesore when not in use. For example, if you have a small backyard and during the week you enjoy sitting alone and enjoying the fresh air but on weekends you enjoy entertaining your family or friends, you can accomodate both lifestyles by investing in a portable fire pit, barbecue, or stove as well as foldaway tables and chairs. All these items can be easily stored in the garage when not needed.

7. Landscape in layers

When you have limited horizontal space, one of the tricks of the trade in creating a sense of spaciousness is by utilising vertical areas and landscaping in layers. How do you do this? Very simply with planting the tallest plants at the back, flush against the fencing and layering the smaller plants closer to the front row. Remember when you learnt about painting perspective in art class? You can utilise these universal principles in landscaping and create the illusion of more space.

8. Go minimalist

An easy way to utilise as much space in your small backyard is through minimalism. Choosing one or two key items of furniture to be the focal points and adding smaller items around it, helps avoid clutter and keep the place tidy. To keep your space as minimalistic as possible, we recommend avoiding complex designs and too much colour in your furniture choices. Pick one or two colours and use simple additions like a pot plant or a lantern to add variety to your space. With small spaces, remember less is always more!

9. Use vertical spaces

In smaller backyards, vertical spaces should be considered valuable real estate, so we recommend making the most of them. Lattice walls, pallet fences, and even wall fountains can make attractive decor elements in small inner-city spaces. Utilising your vertical spaces can help you enhance your outdoor aesthetics without the extra decorations taking up too much room.

10. Add a spot of colour to neutrals

An interior design trick of the trade is how to use colour in such a way that adds a sense of expansiveness to the area. The best way to do this is by choosing 1-3 neutral colours for your furniture, walls and flooring and then adding bright colours to accentuate a focal point. Too much colour for bigger items can make smaller spaces seem more cramped and cluttered. That’s why it’s best to avoid investing in big colourful objects and instead add a few colourful elements sparingly around the patio to liven up the space.

11. Apply smart furniture strategies

Armstone - Outdoor Living Spaces (2)

No matter how you will be using your backyard, furniture is probably the most important element in your outdoor living space which is why it’s important to prioritise comfort and choose items that have multi-purpose functions. Below are some of the staple furniture pieces to consider:

  • Multi Purpose Furniture – Make the most of your limited space by investing in furniture pieces that offer double the functionality. For example, if you’re adding tables or benches to your patio, invest in ones that come with added storage drawers so that you can put things away when you’re not using them and keep the space neat and tidy.
  • L-shaped Pieces – L-shaped furniture allows you to make use of those awkward corners that are neither here nor there and has a huge advantage of helping you create more room on your deck or patio.
  • Small Tables – Sometimes compromising the size of your table is the best option. After all, you can always use the kitchen table for catering to your guests and simply use the outdoor table as a placeholder. This might be a long shot to say here, but when using your patio, you probably would rather sit in a big comfortable chair to enjoy your weekend coffee rather than have a clunky table block the view of your yard.
  • Tall Furniture – Remember how we recommended utilising vertical spaces? Installing high chairs and tables will help create long lines and free your space from looking cramped and cluttered.

Make a plan before you start

Even smaller properties can have aesthetically attractive, functional outdoor living spaces. The only caveat is that it takes some planning to get them right. The main way to do this is by creating zones, avoiding too much colour, and opting for minimalism where possible. Utilising all your space – especially the vertical real estate – and choosing your furniture pieces carefully can also help you create the illusion of spaciousness. Applying these tips will help you can make the most of whatever outdoor space you have available, creating a wonderful environment for entertaining family and friends or simply relaxing on evenings and weekends.

If you need any help bringing your backyard to life or choosing the best pavers, pool tiles, wall cladding or stepping stones for your space, reach out to our natural stone experts at Armstone online or at 1300 560 560. We have helped many people bring their dream garden and courtyard to life and look forward to helping you too.