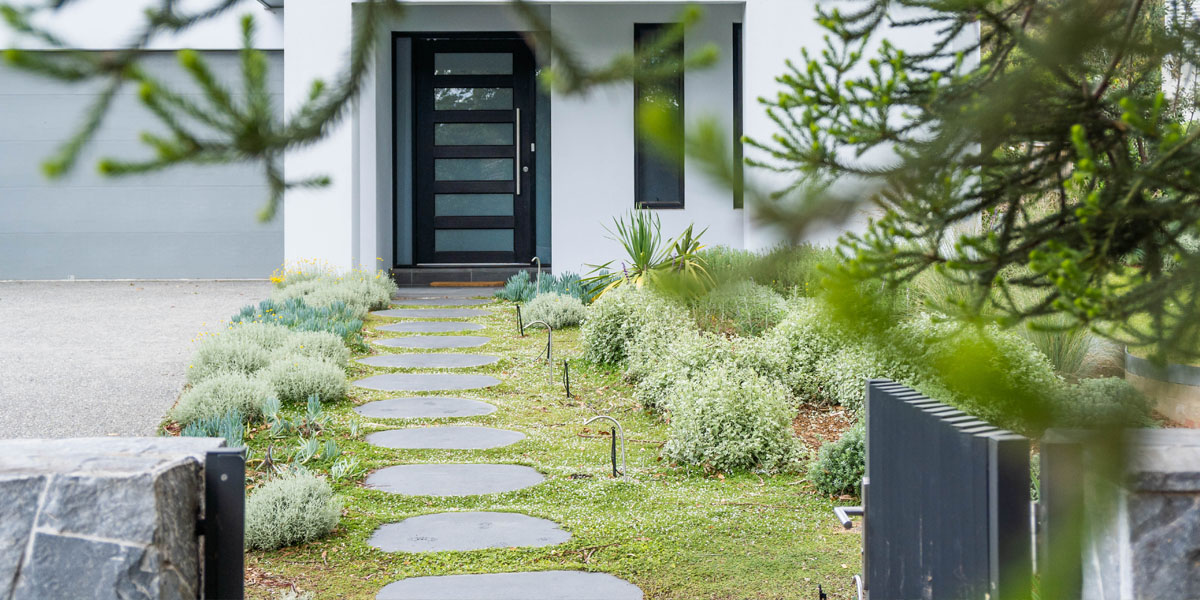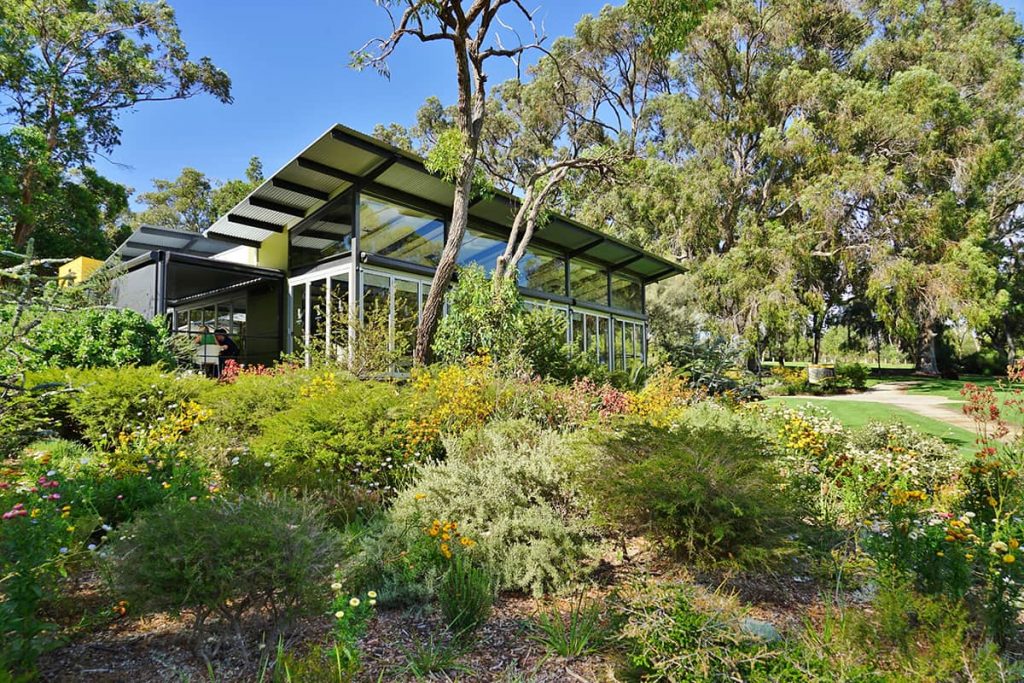
How to Create an Australian Native Landscaped Garden

armstone How to Create an Australian Native Landscaped Garden 3

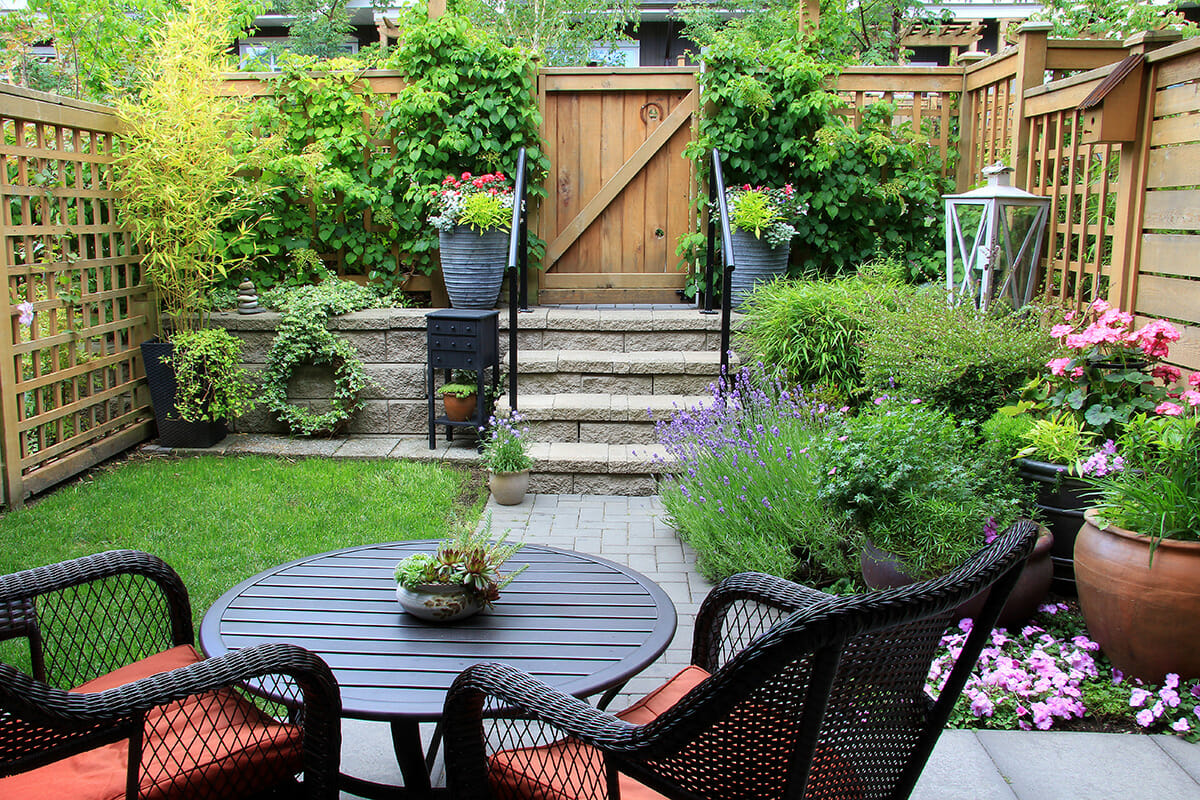
If you live in Australia, choosing Australian native plants for your garden is the logical and sensible thing to do, because these plants are ideally suited to the Australian climate. Naturally you can expect introduced species—those that do not originate from Australia—probably won’t thrive quite as well without investing more time and care into their maintenance.

Building a native Australian garden is also a good way to help preserve our native plant species, natural heritage, and possibly also provide a refuge for native birds and wildlife.

Landscaping is both an art and a science, however, so this is not a project to be undertaken lightly. You can choose to hire a professional landscaper, or to do the work yourself. This step-by-step guide is suited for those who prefer the latter option, so get ready to learn the ins and outs of landscaping.

Step 1: Define how much space you have to work in

Before you can do anything else, you need to know very precisely how much total area is available for your project. It’s not essential, but it’s best to get help with this step if possible, because it will help you avoid making mistakes. The exception is if you use laser measuring instruments to collect your measurements, because these are easy to operate solo. Metre-wheels are not recommended for measuring unless you’ll be covering a vast area, because they’re not very precise and it’s also easy to miscount, resulting in you having to start over.

No matter what shape your garden is going to eventually have, your initial area measurement should be rectangular. Even if you’ll be designing your garden using landscaping software, at this stage it’s going to be easier to draw your rectangle by hand on a sheet of plotting paper. Make sure to note what scale you are using (that is, how many millimetres on the paper represent one metre in reality).

Finally, determine how much of the rectangle won’t be included, and draw the shape of the boundary between the two zones. The non-garden zone is the “void”, and that simply means an area that won’t be modified by the project.

Knowing the size of the area will help you determine how many plants you can have and what types, and also helps you calculate the volumes of other materials you might need.

Step 2: Do your homework

One of the most enjoyable parts of a large scale project like this is the planning stage, and by conducting a bit of research into the best plants for your area, you can start dreaming and visualising what your garden is going to look like.

Start by visiting your local library or bookstore. That advice may surprise you in this modern era, but Internet articles are not usually as detailed as actual books, and you can generally be more certain that the information is reliable. Read about the plants that are suitable for your environment, and then head to your local plant nursery for more specific advice. Another reason you should arm equip yourself with knowledge first is because this will help you determine if the nursery worker actually knows what he or she is talking about, so you won’t be sold something you don’t really want!

Now you can make a list of the plants you’d like to include, and start thinking about how you’re going to arrange them in your garden. Once you’ve chosen what you want, you’ll also need to consult your nursery or hit the books again to find out what soil conditions are required for each species you’ve selected.

Step 3: Do a soil test

Strictly speaking, this step is optional, but if you really care about getting optimal results in the long-term, it’s a really good idea to get your soil tested. The basic level of testing required is to get the pH level of the soil, and if you can afford the extra cost, it’s not a bad idea to also find out the nutrient levels. Fortunately for Australian plants, nutrients are not normally a major consideration, as they’ll typically grow quite well in poor soils.

To collect your samples, get some tent pegs and hammer them into the ground at one metre intervals around the perimeter of your rectangle. Uses some string to connect the pegs that are opposite each other. When you’ve finished you’ll have a grid. Make a map of your grid and give each square a number. Now just take a small sample of soil from at least three squares on the grid, making sure to label on your container which square the sample was collected from. Collecting from more squares is better, but will also increase the cost of your testing unless you’ll be performing the test yourself.

Now just send the samples to a testing lab and wait to get the results back. Check the pH levels returned against what levels you need for the plants that are going in each zone. If adjustments need to be made, consult with a soil specialist.

Step 4: Detailed plan
Native 3
Native 3

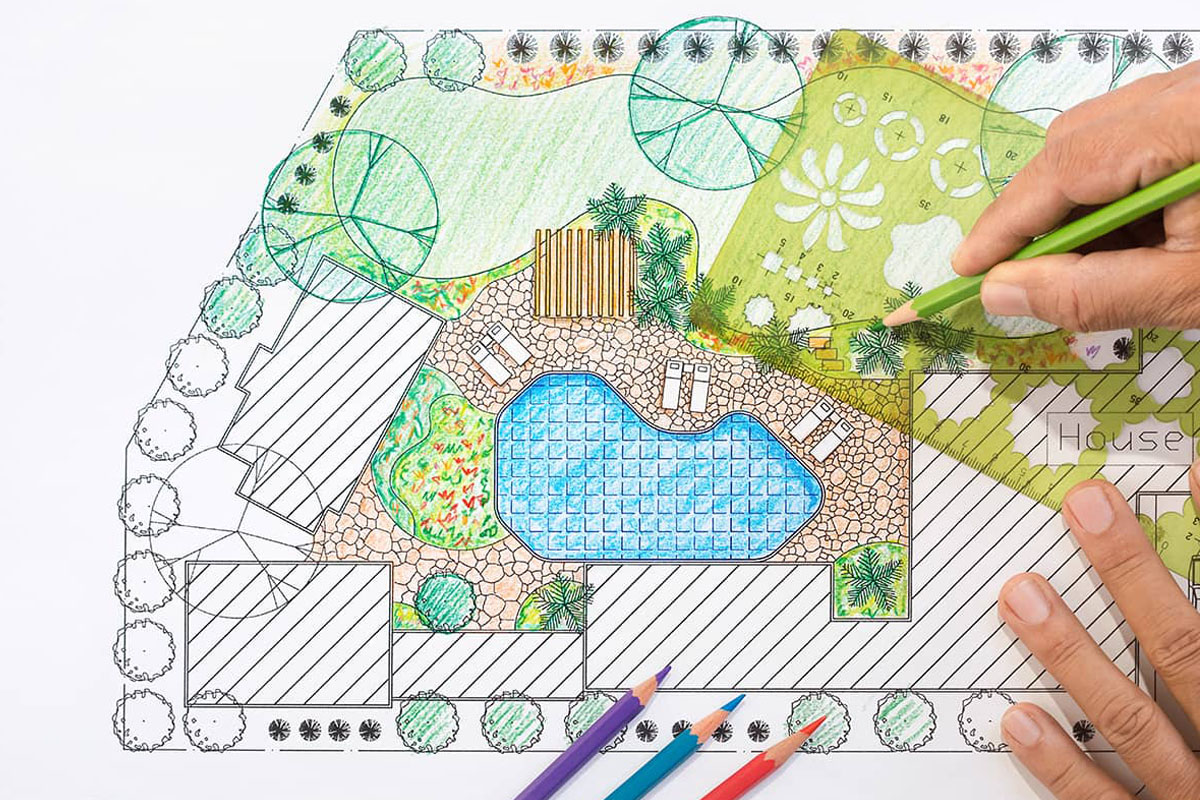
Now that you’ve covered the basics, you can get down to the real work of designing your new garden. You can buy software to help with this task, which makes your chart very tidy and precise. Drawing by hand is more flexible, however, because the options in software are limited to those things the programmers knew about before they created it. Also most landscaping software available in Australia was really designed for overseas markets.

Your map is divided into four different asset classes:

  • Hard points – decorative features like fountains, pools, stones, bridges, etc.
  • Soft points – plants
  • Wet channels – rivers, creeks, streams, etc.
  • Dry channels – paths

Your “soft points” should be categorised into:

  • trees
  • shrubs
  • vines
  • grasses
  • flowers

These are all self-explanatory. Obviously you’ll further sub-categorize these by the individual species you intend to install in each area.

Finally you’ll have to plan for a process known as “contouring” or “terraforming”. In simple terms, this just means adding to or subtracting from the elevations in different sections of the garden.

There are two reasons to think about this. The first is aesthetics, because having different levels can make your garden look more interesting. The second reason is more practical, and involves considering drainage and the amount of sunlight hitting each sector. Elevated areas will get more light, while recessed areas will get less.

Step 6: Order everything

With the plan firmly established, you can now order all your materials and equipment. There is a very specific order in which you should schedule delivery of these items.

  • First, all the equipment and materials needed for terraforming
  • Second, hard point items and materials required for their manufacture
  • Third, items to be used in the construction of dry channels
  • Fourth, any fertilizers or other chemical additives required
  • Fifth, additional topsoil if required
  • Sixth, grasses, shrubs, and trees
  • Seventh, all other plants

Note that you need to schedule the delivery to fit with your construction schedule, so that everything you need for subsequent steps arrives in time, but not early enough to cause storage problems for you.

Step 7: Commence terraforming

If you’re not completely confident in your skills, you may want to hire excavation experts to take care of any major excavations or other digging. Look for weak areas that may collapse and shore them up securely.

Step 8: Mark out the paths for your channels

There are plenty of methods you can use to mark these. The most common way is to use a non-toxic powder (flour, calcium carbonate, etc) to lay down a line, and then use stakes and string along the line to make it durable. Obviously don’t use any kind of salt for marking lines.

Step 9: Perform any necessary digging for hard point installation and channel establishment
Native1

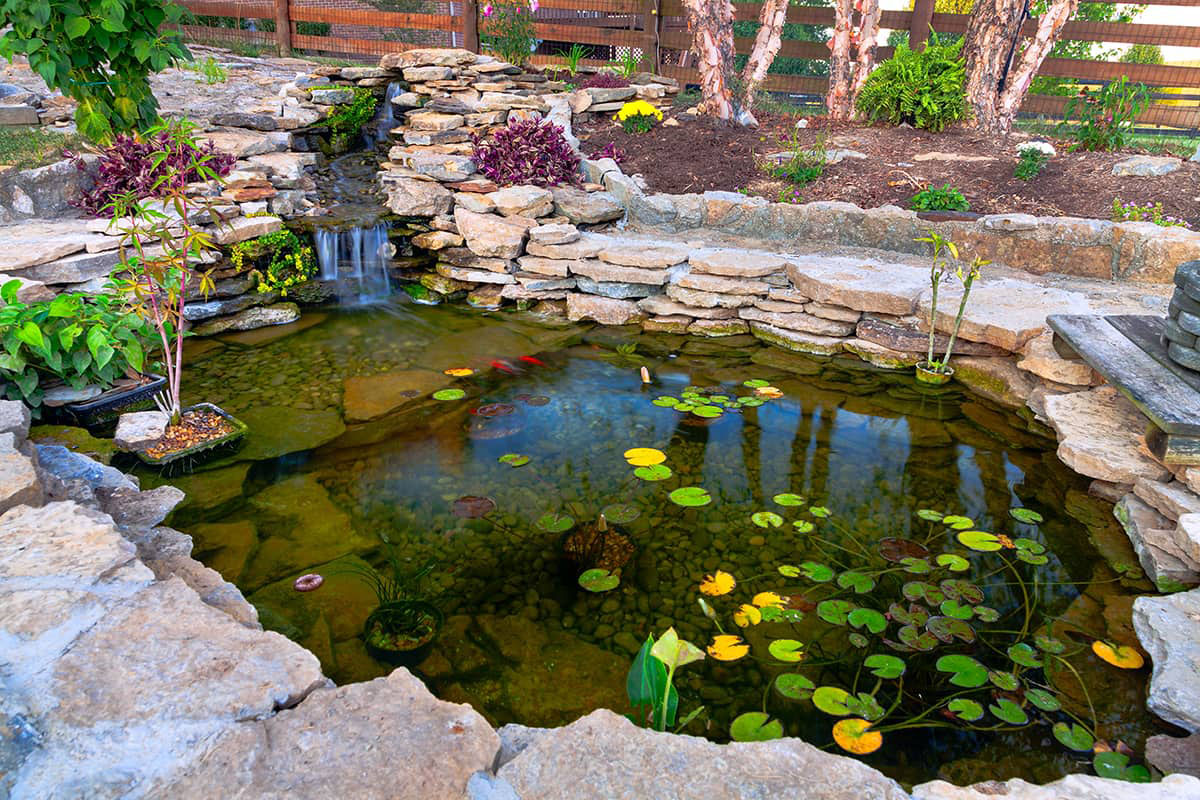
Certain types of hard points like ponds and fountains may need some excavation work done. Most dry channel paths will be strengthened by excavating them to a depth of about six inches, and filling with a suitable substrate. You can also dig out the course of any artificial wet channels you are creating.

Step 10: Dig holes for tree planting

If you’re using a mechanical post hole digger to dig the holes for your tree planting, you should do that before installing the hard points, so they won’t be at risk of damage. Keep an eye on the weather forecast, because you don’t want your holes filling up with rain. Also be aware that as long as these holes remain unfilled, they are a hazard to children and pets.

Step 10: Install the hard points

Your garden will be taking shape now. Installing all your lamp posts, park benches, bridges, fountains, and so on will give you a clear sense of whether it’s all going to look the way you expected.

Step 11: Complete your dry channels
Native2
Native2

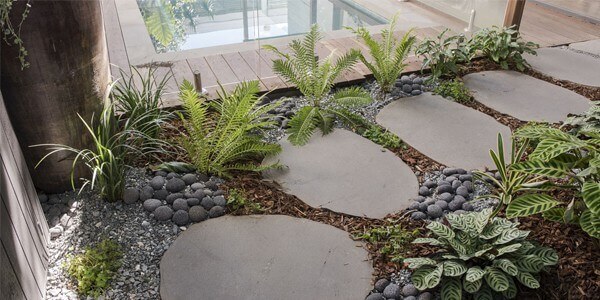
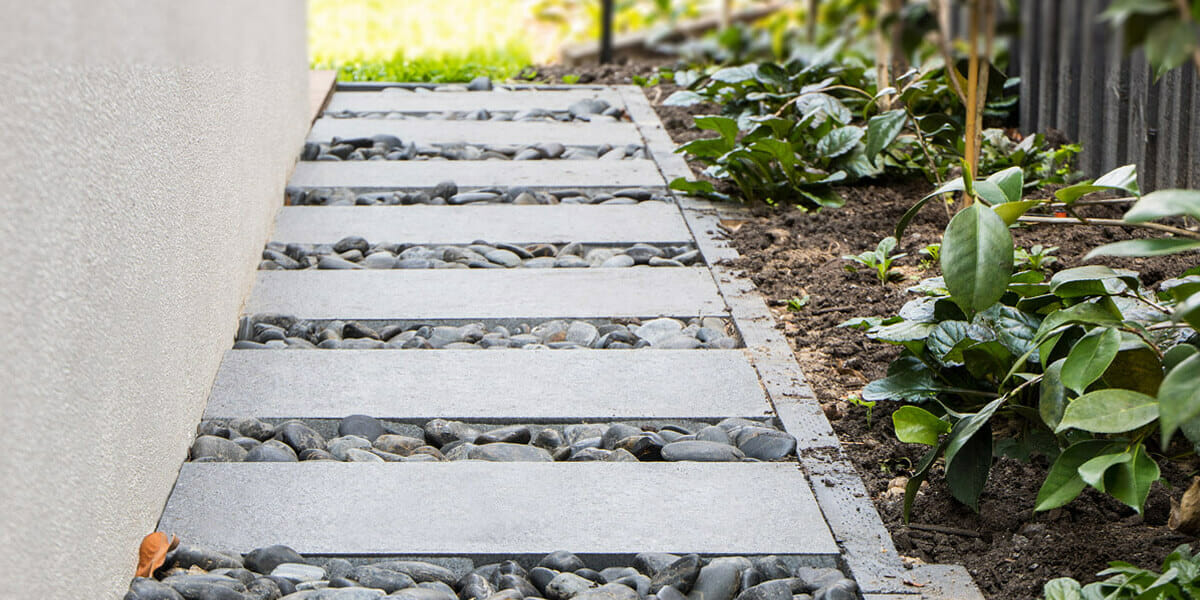
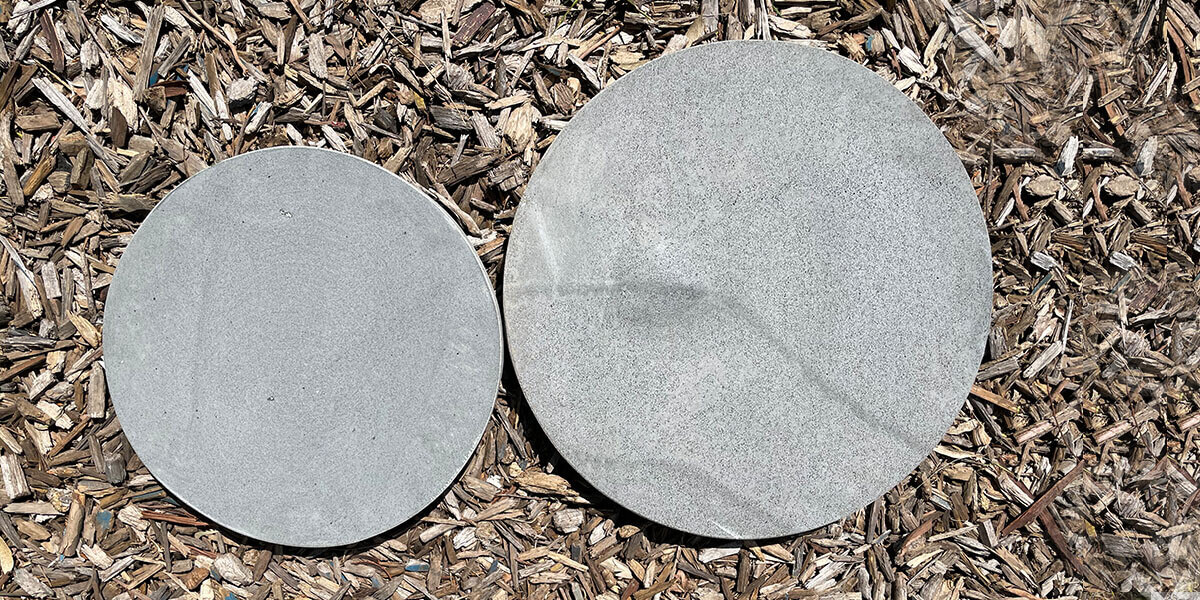
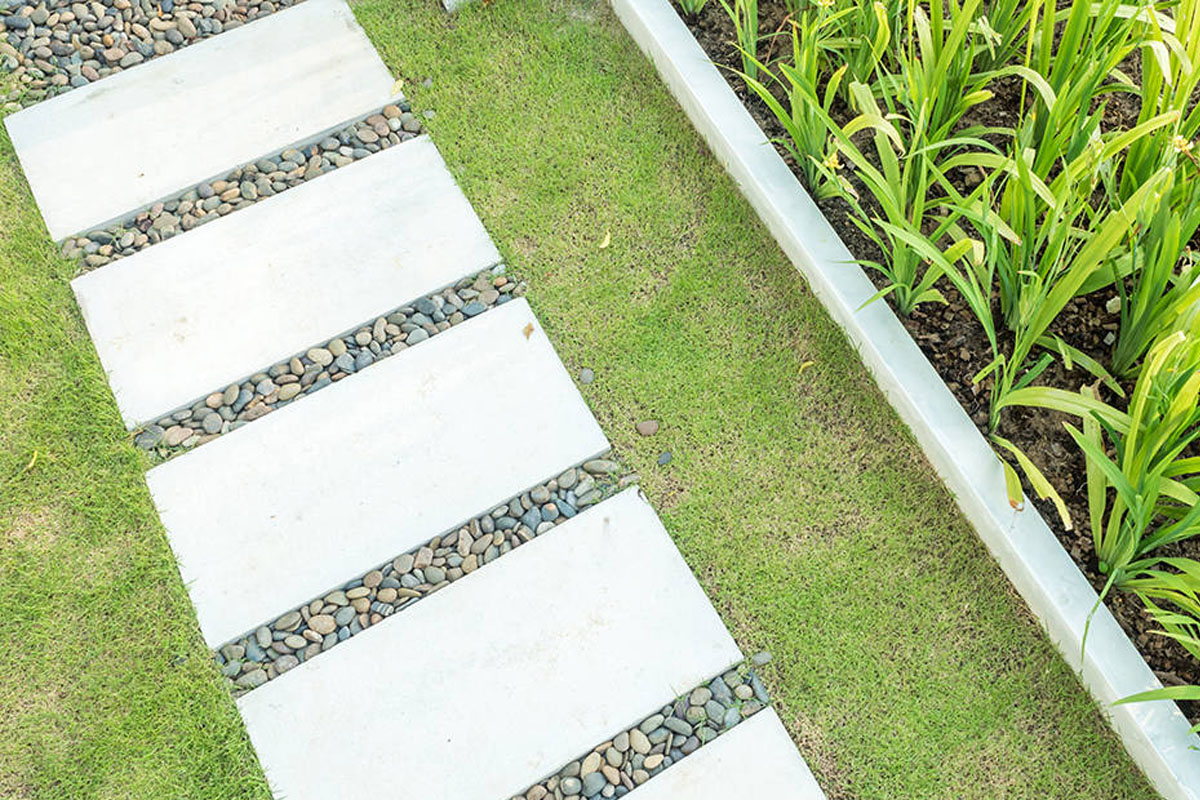
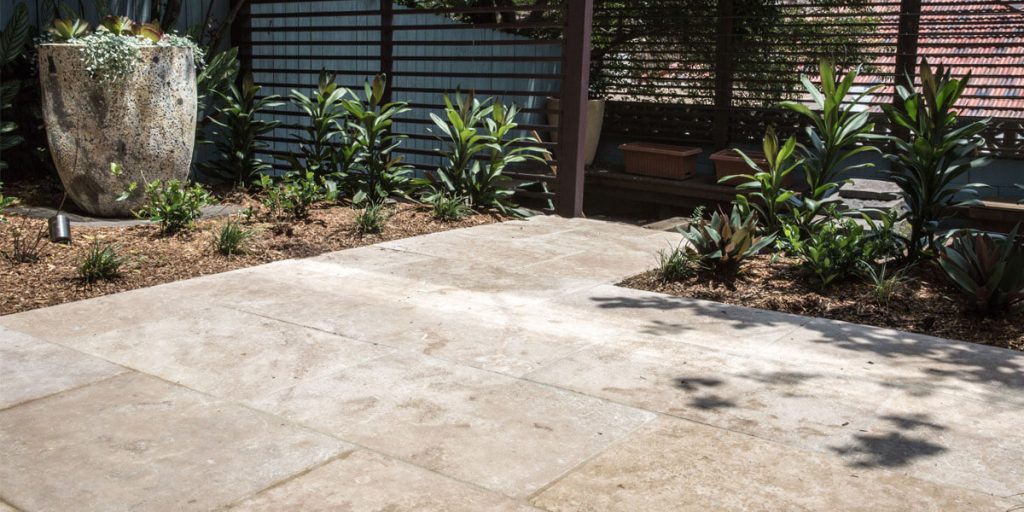
All of the seriously hard work has been done by this stage, so you can make access to your garden easier from here on by adding the permanent surface of your dry channels. You may choose to use garden pavers, stepping stones, and pebbles.

Step 12: Prepare your soil if necessary

The great thing about native Australian plants is they don’t need mollycoddling, so you might not have to do much, or even anything. If your soil tests revealed any serious deficiencies or adverse pH conditions, you can now apply any necessary remedies.

Step 13: Install your plants

Trees go in first, followed by shrubs, and then native grasses. Save any delicate flowers for last, so they won’t get damaged.

Step 14: Water generously

If it’s not about to rain, you should provide some hydration to help your plants get off to a good start.

Step 15: Tidy up

All you need to do now is clear away any clutter left over from the construction process, and apply any last minute touches that will give your garden that little something extra.

If you followed the above steps, you should now have a perfect Australian native garden. That’s something you can feel proud about, because it will be a beautiful low maintenance addition to your home. Your garden adds value to your property and should provide you with years of pleasure as you enjoy the benefits of a properly landscaped garden.
Cleaning and Maintaining Your Stone Pavers

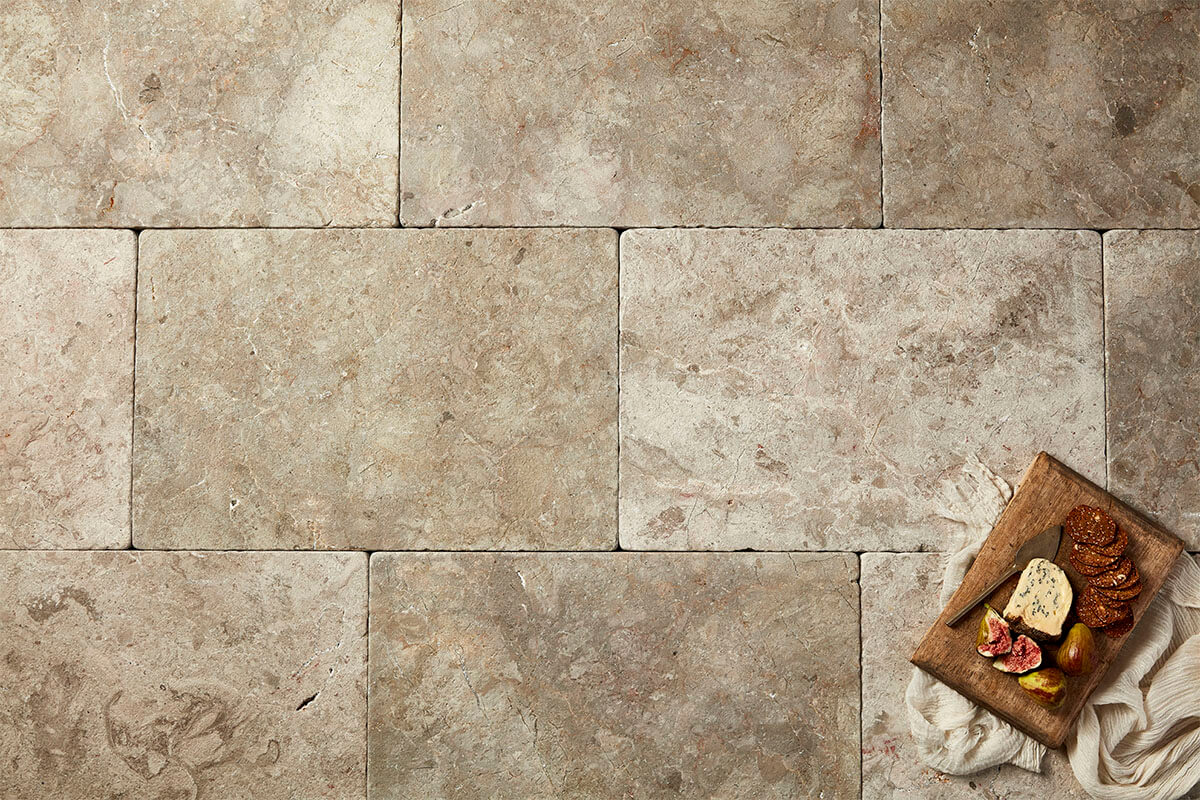
Cinnamon Travertine 3

As with anything in your home, natural stone pavers will age over time and deteriorate.

So whether you’ve invested in the highest quality, strong and durable stone pavers money can buy, or just the run-of-the-mill-budget product, they are still subject to daily wear and tear. This is especially true for the pavers installed in high traffic areas like driveways, walkways, gardens and pool surrounds where they are likely to accumulate dirt, grime, oil and water and endure plenty of stomping and stamping.

This is why maintaining and cleaning them properly will help them stand the test of time.

In today’s article we will detail three tips to help your stone pavers stay in prime condition.

Before we begin, check out the cleaning products we recommend for your stone pavers here.

Limetta Limestone Pavers 4

Three top tips to take care of your pavers

1. Weed the rubbish out

This might not be news to you as a home-owner, but unfortunately there is no such thing as a weed-free surface (unless you’ve laid your pavers on concrete or dry screed). As such, weeds will sprout no matter where or how you lay your natural pavers or treat them. So the best way to take care of the weeds around and in the cracks of your pavers is by weeding them, frequently.

When it comes to weeding around your pavers, be mindful when pulling at the plants because (though most weeds) can be easily removed from the surface, some may have put their roots into the stone’s joints. If this is the case, removing the weeds will also bring sand up to the surface from the foundation and it’s imperative that you replace this sand as soon as possible.

Once you have weeded the area, keep it weed free for as long as possible. This is easier to do in high-traffic areas because regular traffic generally limits the ability for weeds to grow. On the other hand, for lower-traffic areas, we recommend brushing the area regularly with a decent outdoor brush. This preventative measure helps get rid of weeds before they have a chance to fully sprout.

As a final point, sometimes keeping the area weed-free may require chemical intervention. Nowadays, you can find many weedkiller options that are gentle on the environment. Rather than buying any generic anti-weed product, here we suggest choosing the products that work specifically on the weeds the grow between stone pavers. Generic products have a higher chance of discolouring your pavers, whereas stone specific anti-weed products are designed to keep the structural integrity of your stones intact without causing further damage to them.


Grampian 1

2. Clean clean clean

Once you’ve cleared the pavers from any weeds, the most effective cleaning method is a simple combination of soap and warm water. What makes this even better, is that you don’t need to go far to find the best soap for this process as it’s already in your kitchen! You guessed it: dishwashing detergent! In saying this, we still recommend that you always read the label before using the product because not all dishwashing detergents should be used on natural stone pavers. For instance, if the label warns you about using the product on limestone or marble, it is best to invest in a specific stone washing product instead.

To get started, you need a bucket and a stiff outdoor brush. So long as the bristles are strong, rough and thick, you can use the same brush that you used to sweep the weeds away. Mix the soap with water and then pour the soapy mixture onto the paving surface and scrub to your heart’s content. Once you’ve thoroughly cleaned the area, wash off the loosened dirt with clean water and repeat this process until you’re satisfied that all the loose grime is washed off.

A word of warning with washing away the loosened dirt: a hose may seem like a preferred (and even logical) method to do this. Just remember you’ll have to repeat this process several times and that a hose’s pressure could be too strong for the paver’s joints. As such, be super careful that the joints are not removed or loosened while hosing down the dirt.

One final note on washing the pavers with soap and water, make sure there is absolutely no residue left behind otherwise next time it rains you’re going to have a very soapy and slippery surface on your hands (or under your feet) that will pose a danger for everyone.

An alternative to washing the pavers with soap and water is investing in a pressure-cleaner. Brands like Gerni and Karcher have become more affordable and may be a wise investment if you intend to clean your pavers frequently. While pressure-cleaners are great for removing mould and dirt, remember they use high-pressure. As such, be careful not to get too close to the ground as they can have the opposite effect and damage your pavers in the longterm.

3. Sealing the surface

Weeds are gone, surface is clean, now it’s time to seal it down! While sealing your pavers doesn’t guarantee that you’ll never need to clean the area again, it gives the pavers a nice shine and makes them look new again. Another benefit of sealing your natural stone pavers is that the sealant protects the stone from accidental spills and stains, thus extending the pavement’s life and ensuring the joints stay in place.

Invest in your pavers with Armstone

There you have it!

Using these 3 simple steps, your pavers will retain their appearance and quality and stand the test of time.

If you have any questions about the best cleaning products or methods for your natural stone pavers, or you would like to invest in high-quality stones for you home renovation or construction project, reach out to our paving experts at Armstone today.

We love this stuff and would love to help you make the right choice for your home project.

Stone vs Porcelain Pavers

Ivory Porcelain Pavers

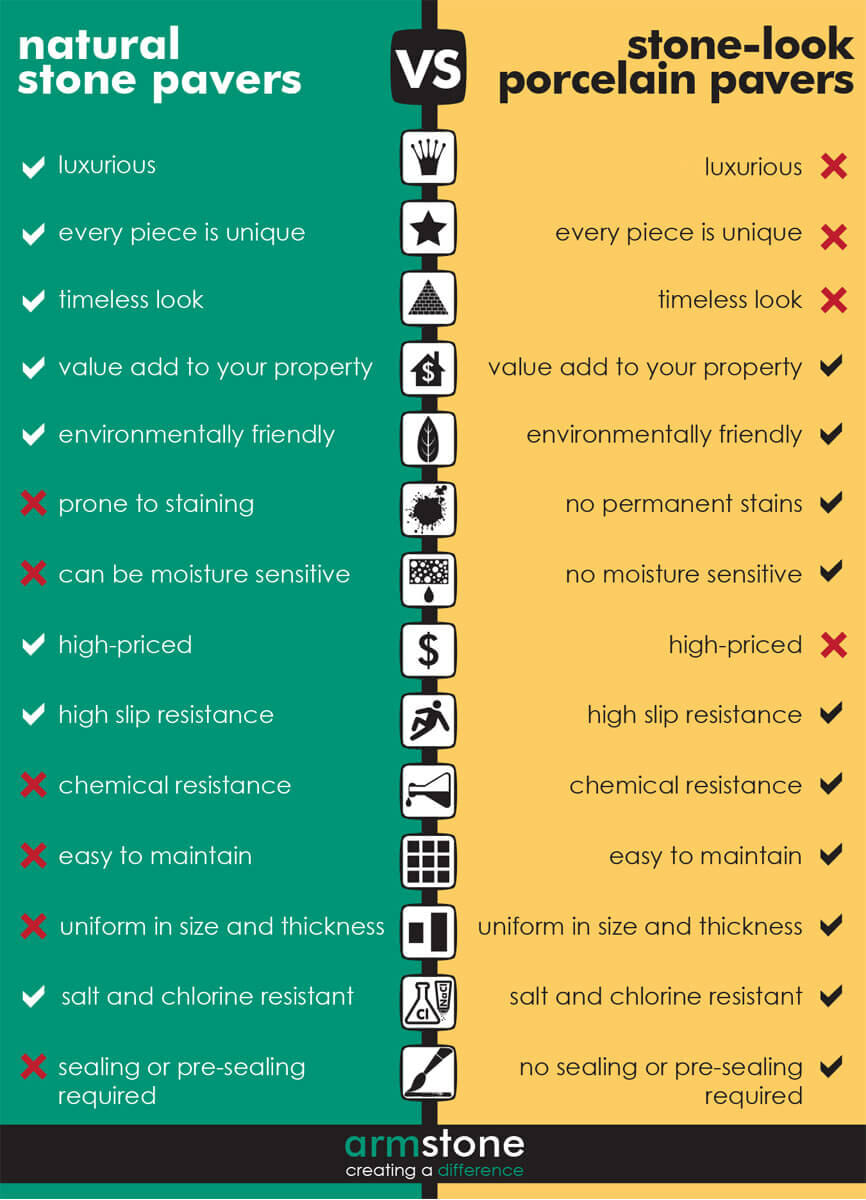
When designing your outdoor landscape, there are two options for solid, beautiful and functional paving.

These are Natural Stone Pavers and Structural Porcelain Pavers.

In this article, we are going to look at the advantages and limitations of both.

Before we dive into the article, there are a few factors you would want to consider when choosing your outdoor flooring.

These depend on your personal circumstances and will help you make the best choice from the information in this article.

The questions to think about are:

● What kind of lifestyle do you lead? Are you always busy or on the go?

● What are your pool surrounds? (Do you have trees, pets, children, BBQ’s, parties?)

● Will the pool area be undercover or open?

● Will the pavers be used around the pool?

Firstly, let’s start with Structural Porcelain Pavers

Most people have some knowledge about Natural Stone Pavers.

However, Structural Porcelain Pavers are a newer addition to the market and so knowledge on these may be limited.

We’ll wager a guess that you’ve probably heard about ordinary porcelain tiles?

If so, you’re probably using that knowledge to form an opinion about the performance of Porcelain Pavers.

So that you have all the information necessary, let’s first look at …

Frostine Marble Pavers**Frostine marble pavers

What are Porcelain Pavers made of?

Porcelain Pavers are made of structurally compressed clay.

It is so well compressed that it doesn’t have any weak fracture points.

As such, it is a very strong paver with a high break load.

Our Armstone®’ Porcelain has a Natural Stone embossed print that doesn’t wear off.

The pavers are available in a wide assortment of colours, textures and patterns.

These to ensure your outdoor setting looks as close to natural stone as humanly possible.

IVORY PORCLEAIN


**Ivory Travertine-look Porcelain Pavers

Stone Pavers VS Porcelain Pavers

There is a world of difference between structural porcelain pavers and outdoor porcelain tiles.

Structural porcelain pavers are a strong, efficient and practical outdoor paving solution.

They are specifically designed to stand against all types of natural problems or human errors!

As with any man-made product, there are various makes and models for structural porcelain.

As such, if you choose to invest in this option, we strongly recommend doing your research to find a quality product.

If you have technical questions about porcelain tiles for your swimming please, speak to us for more information.

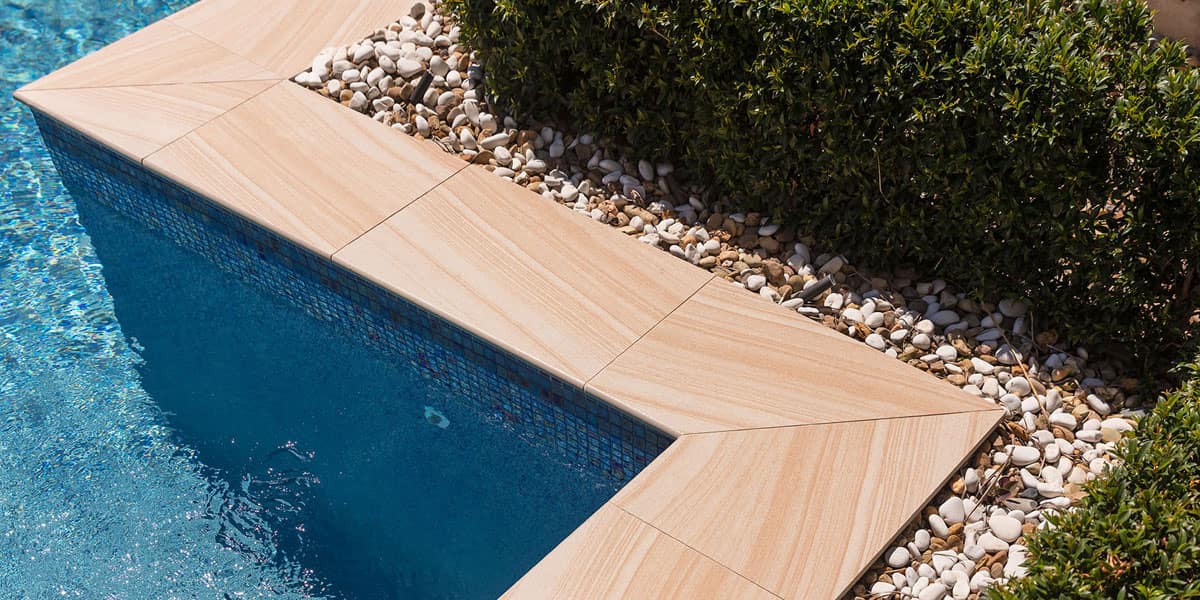
Sandstone Porcelain Pool Coping**Cattai Sandstone-look Porcelain Pavers

Now that we’ve looked at Structural Porcelain Pavers.

Let’s check out Natural Stone Pavers.

Though natural stone is always a beautiful and timeless choice.

As with all-natural products, there are conditions that go hand in hand with such natural beauty.

Do I need to Maintain my Natural Stone Pavers?

Maintenance is probably every human’s nightmare!

(Unless you are like Monica from the show Friends)

(Or one of the lucky few retired or semi-retired individuals living life in your beautiful garden).

Depending on your pool surroundings.

Even the densest and most durable stones (like Granite) can be challenging to keep stain free.

This makes natural stone very time consuming to maintain.

Especially so if you have trees or pets or overactive kids.

To start with, let’s look at trees.

Now tree’s tend to drop leaves almost all year round.

These leaves have “tannin” in them.

And when they progressively start to decompose, they release “tannin”.

What is ‘tannin’ and why do you need to know about it?

Basically it’s a derivative of gallic acid and is found in galls, barks and plant tissues.

It can also stain natural stones making maintaining your pool pavers a cumbersome experience.

Casalli marble pavers

** Casali Marble Pavers

Will the stone Sealer make it Stain Proof?

You might think that sealing your stone pavers with sealant will fully protect them from stains.

Unfortunately this is not the case.

Because acid substances like “tannin” will go through the sealant and will seep into the pores of the stone.

Of course, the less porous the stone, the less likely this will happen.

And, to a degree, the sealant will protect it.

A sealant also reduces the amount of water absorption in the stone paver.

This allows you more time to clean and remove these contaminants before they leave stains.

The Stone sealer provides a stain resistance barrier, that allows time to wipe up any spills.

This is explained extensively in our literature as reaction time.

At the end of the day, if you’ve used an A grade product.

And sealed your stone with good quality expensive sealant those things will help.

But, and it’s a bit but.

An important thing to remember is that acid doesn’t discriminate.

It will go through the sealant and create a stain where it can.

This means you have to be on top of the maintenance, all the time.

Depending on the type of stone paver you’ve chosen to invest in and install.

As well as how long the acidic culprit has been sitting on the stone.

The situation can progress from challenging, to clean, to impossible, all the way to clean again.

It really depends on your diligence with maintenance, the sealant quality and also, the type of stone paver.

Unfortunately, leaves are not the only things that can cause stains for your stone pavers.

Anything acidic including pet pee, bat poop and wine, will cause this issue!

I’m guessing that as you read on.

You are realising that assessing the questions at the beginning of this article are critical in making the right long term decision for your home or project.

Another aspect you want to consider when selecting your stone pavers.

Is that some products are too slippery for open areas and not suitable for open entertaining or pool paving.

This really depends on the finish of the product.

Your main question then needs to be:

“Will this stone pavers type and finish, be the most suitable choice based on my circumstance and for my pool area?

If you need assistance with making a decision.

At Armstone® we will give you the most ethical and factual advice on which materials will suit your lifestyle and pool area.

Talk to us today for a professional product consultation!

Melba Limestone pavers

**Melba Melba Limestone Pavers

The stunning character and depth in products from the earth are second to none.

And with the right area and correct application, it can be heavenly to see true art unfold in front of your eyes.

Natural stone products are simply impossible to recreate.

From the beauty of limestone pavers to bluestone pavers, only mother nature can create this kind of art.

Like anything in life, the amount of care and time you invest in your natural stone product determines how it ages.

So if you take the time to care for the product, it will love you back equally.

Many quality natural stones will stand the test of time, given that you care for them correctly.

What does correct care entail?

Good question!

This includes:

● Installing your pavers with quality installation products,

● Ensuring the substrate is ideal for the applications you have chosen, and

● Checking that the stone has been correctly sealed/pre-sealed.

Depending on what stone you opt for, a professional stone supplier should know what is required..

Some of the luxury stone pavers that you can add to your garden are simply jaw-dropping!

They also show-off your unique taste and expertise to the rest of your friends and family.

Siri Marble Pavers Armstone


**Siri Marble Pavers

By now, you may now see why natural stone pavers are not always the best options for outdoor entertainment areas and pool surroundings.

Though they may not easily fit your busy lifestyle.

Minimal time for maintenance and high desire to enjoy your outdoors in a fast-paced life, there is still hope!

Let’s check it out …

A Fully Functional Solution –Structural Porcelain Pavers Are The Way To Go

So it’s summer and you’ve just planned a lovely vacation for your family.

Except you’ll be away and have no one to look after the pool!

And your beautiful, big gumtree is shedding its vibrant green leaves!

What will you do?

Go on a holiday, of course!

Why?

Because you know full well that when you return.

Your structural porcelain pavers can be easily cleaned with high pressure or a chemical solution with no adverse effects!

Silver Porcelain Pavers
Silver **Travertine-look Porcelain Pavers

Porcelain Pavers never permanently stain!

First let us say this.

A porcelain paver is in no way shape of form, an inferior sibling of stone pavers.

You aren’t making a concession here, you are simply picking the right paver for you.

A porcelain paver is the right paver for you because:

● They’re made of commercial-grade slip resistance making them ideal for use in wet areas!

● Can be laid on any substrate (sand, grass, pedestals)

● The whole family can safely enjoy the outdoors you don’t need to worry about accidental stains from pet, kids spilling OJ or adults knocking over a glass of wine.

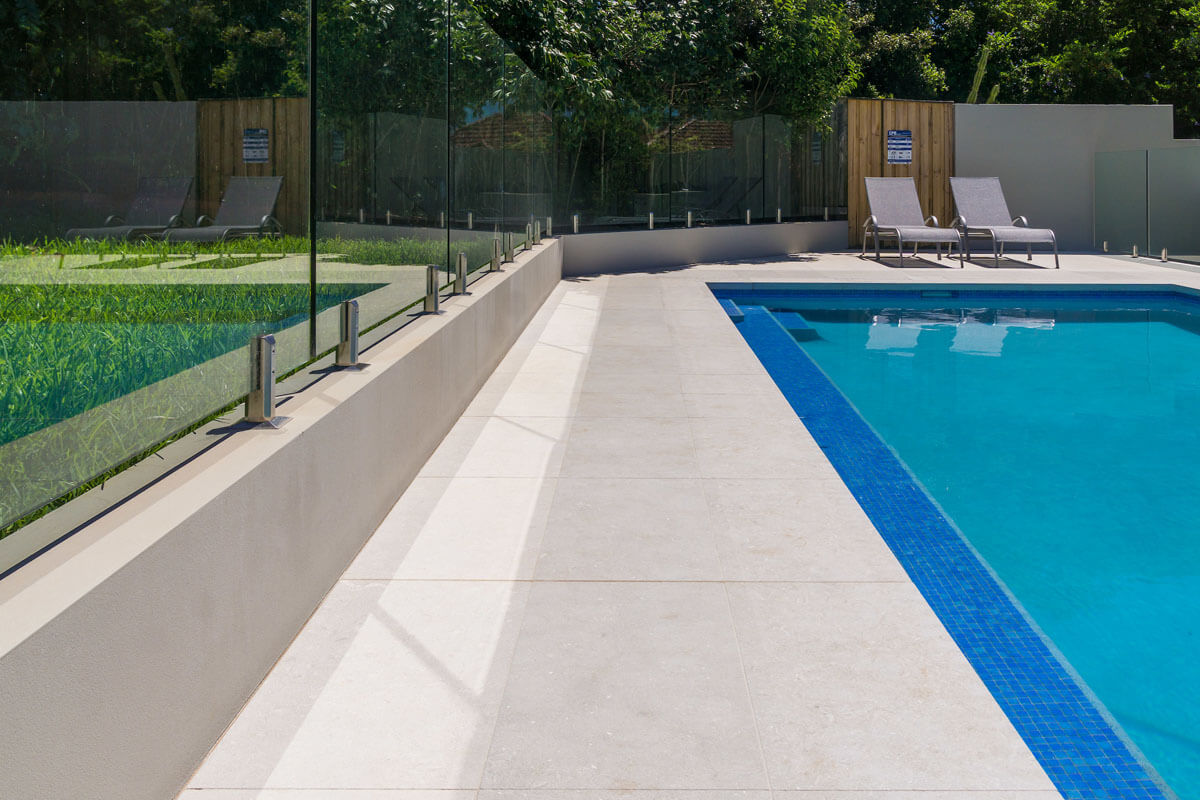
So if you are opting for a fully functional (and quality) pool paver that requires low maintenance, a quality porcelain paver is the best option.

Natural Stone Pavers Vs Porcelain Pavers

Now that you have a good foundation of what products may work best for your circumstances.

We would love to invite you to browse through our range of porcelain pavers and stone pavers.

And see which of these options will suit you.

If you want to know any more information, reach out to the natural stone experts at Armstone online or 1300 560 560.

We would love to help guide you in the right direction, answer any questions about your renovation.

Or connect you with RBG Landscapes as a potential installer for your home project.

And if you’d like to hear directly from Arman and Rhys, watch this video.

30 Small Backyard Landscaping Ideas

banner bg

With a growing population and available land becoming smaller, many Australian homes are being built on smaller blocks of land which means backyards have much less space than before.

Though smaller gardens are much more challenging to work with from a design perspective (because they have less land mass and space within which to add grand views and focal points), you can still transform your small backyard into a beautiful place to rest, recover and relax.

When working with a smaller garden, you can implement plenty of tricks and hacks to make it appear larger and still allow you to incorporate all of the elements you want in a garden, like plants, water features, furniture, and so forth.

In today’s article we share 3o small backyard landscaping ideas. So if you just follow these few rules, along with some clever planning, you can transform your yard into a fun, useful, and attractive spot to relax and entertain outdoors.

Let’s dive in!

Avatar bluestone stepping stones

** Avatar Bluestone Stepping Stones

BEFORE YOU BEGIN

As with any construction job or renovation, it’s important to make a plan that includes what you want to do and how you plan to get it done before starting the landscaping for your small backyard. As excited as you may be to get started, we strongly recommend that you do not skimp out on the plan, as this will ensure that the design comes together perfectly.

If you’re new to this, we have put together a 6 point check list on what to consider for the planning part of your garden renovation.

  1. ASSESS YOUR YARD

    • Measure the size of your yard to determine how much space you have to work with.
    • Check the climate in your yard and how much sunlight or shade it gets during the day and where those predominant spots are located.
    • Check the surroundings to identify and note want you want to conceal (a wall, fence, or utility box) or highlight (a nearby tree, view, or other surrounding landscape).
    • Check if the soil in your yard is made of clay or sand and whether it supports other plants or is more prone to weeds.
  2. DETERMINE WATER SUPPLY

    • Do you have a place where to attach a hose to water the plants? Is it accessible? We recommend investing in a self-coiling hose with a nozzle that is a good size for your yard. If you can find one that will automatically turn off the water once you’ve finished watering the garden – even better!
    • If you don’t have anywhere to attach a hose, invest in a large watering can.
  3. DESIGN YOUR YARD

    • Decide what you want to include in your yard (fire pit, patio, vegetable path) and where you want it placed in the garden.
    • Use square centimetres (instead of metres) to design your yard, as fitting all the things you want in a small backyard will require very precise measurements and layout. For example, the difference of several centimetres here or there will determine whether or not you can add a water feature or fire pit. It’s like the saying going: “If you count the cents and the dollars will take care of themselves.” When working with small details you can find ways to make the space even more useful, diverse, and attractive.
  4. CHOOSE A PURPOSE

    • Do you want your garden for decorative purposes or would you like it to be functional as well? For instance, do you want to grow herbs, fruits and vegetables in it?
    • Do you want your garden visible at all times, even when you are indoors? Or do you prefer it to be hidden from view while inside and only visible when outdoors?
    • Do you want your garden to be an attractive retreat where you can sit and read at a small table or while laying in a hammock?
  5. USE HIGH-QUALITY MATERIALS

    • When it comes to designing your backyard and installing everything, you really want to get it right from the get go. As such, investing high-quality materials may have a higher outlay, however the longterm benefits mean that the products stand the test of time and add beauty to the space.
    • A trick of the trade in creating continuity between your indoor and outdoor design is by matching your paving materials to your interior flooring. For example, you can mimic the colour and texture of your indoor natural travertine tiles, by installing travertine porcelain pavers outside.
    • If you want to get creative, use accent materials such as coloured glass tiles for illumination at night. These look especially beautiful when integrated with a good outdoor lighting system.
  6. ORGANISE AND TIDY YOUR YARD

    • Before starting any construction, declutter your backyard by discarding or removing any unnecessary items.
    • Create a storage area where you can organise and access all the items you need.
    • Clean the whole yard, including raking fallen leaves, washing the wall and fence, and so on.
    • Store your bike, outdoor mop, bucket, and broom, and so on in a shed. If you don’t have (or want) a shed, at least reduce the number of items stored in your yard, and preferably keep them somewhere out of sight to create a sense of spaciousness in your garden.

SMALL BACKYARD LANDSCAPING IDEAS

While you are planning everything for your new and updated small backyard, consider incorporating these landscaping ideas. There is something for everyone, so whether you want to build a powerful and exciting space or something modern and minimalistic in nature, these ideas will help you create a beautiful and functional space for all to enjoy.

1. Sink large elements below ground

Instead of building large items like spas, ponds, pools, patios and decks above ground level, you can create the illusion of expansiveness by sinking them into the ground. This way they do not obstruct the view of the garden by taking up space above the ground.

2. Use double-duty features

Save space by investing in outdoor features that have a dual function/purpose. For example, a short raised wall can serve multiple functions: it can be a water feature, a fire-pit and a seating space, all rolled into one! Additionally, glass candleholders that serve as garden art during the day can be turned into lights at the night.

Mica stone panels
This Mica Stone Panels cladding serves as a fire pit, seating area and landscaping feature.

3. Create a private far away seating area

One way to give a small space a sense of spaciousness is by adding depth. You can do this by creating a stone pathway that leads towards a secluded seating area at the back of the yard with a stone bench and maybe a little pond under a small tree. Along with adding something interesting to the space, it can be a private and secluded spot to relax in.

4. Use mirrors

Mirrors reflect light and create depth, making a small area look so much bigger. They’re also a great way to dress up a wall or fence.

5. Build a spiral herb garden

If you like fresh herbs (but lack the space to plant a full garden) make use of spiral garden. You can build the spiral from blocks of wood or stone, fill it with soil and plant your herbs between the lines. Spiral herb gardens are a productive, energy-efficient and space saving way of growing food. They also make a beautiful focal point in your garden.

6. Have multiple focal points

Another way to give your small backyard a sense of expansiveness is by installing a variety of small focal points throughout the garden. This way, when people unexpectedly discover things like a statue amongst the plants or a hidden hammock or seating area, they’re surprised and get the sense that they’re no longer in a small backyard.

7. Boost the backyard interest

One way to make the most of your small garden is by mixing unexpected elements to create dramatic visual relief. For example, you could combine paving or stepping stones throughout your lawn and add container plants near the patio or home entrance. This diversity will help draw people’s attention away from the size of the space and help them focus on the interesting aspects instead.

8. Create a destination

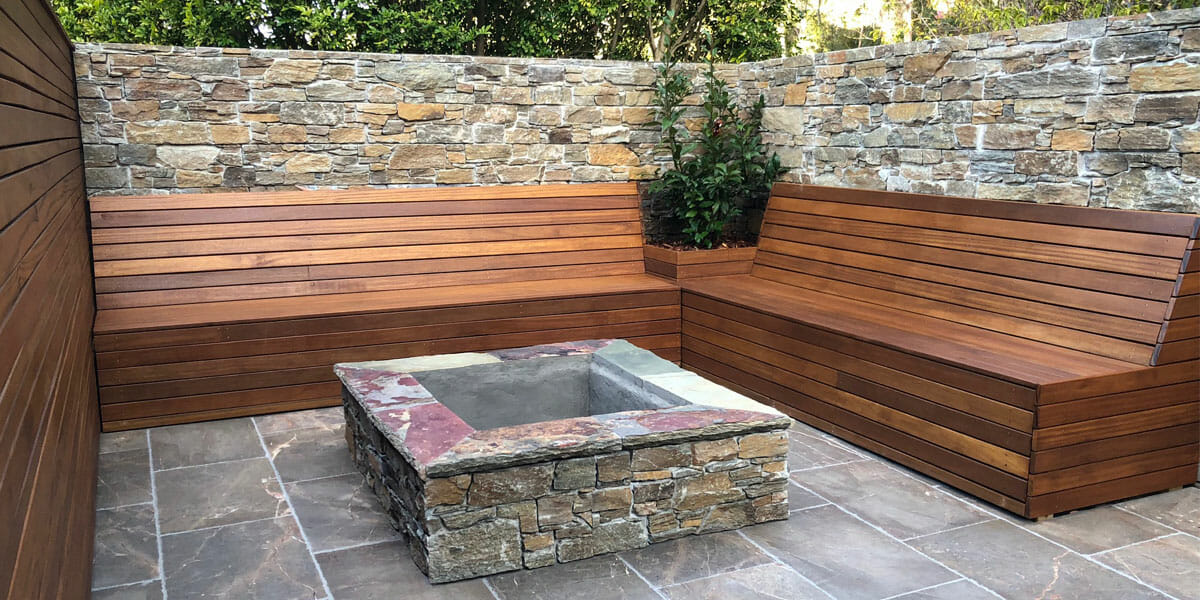
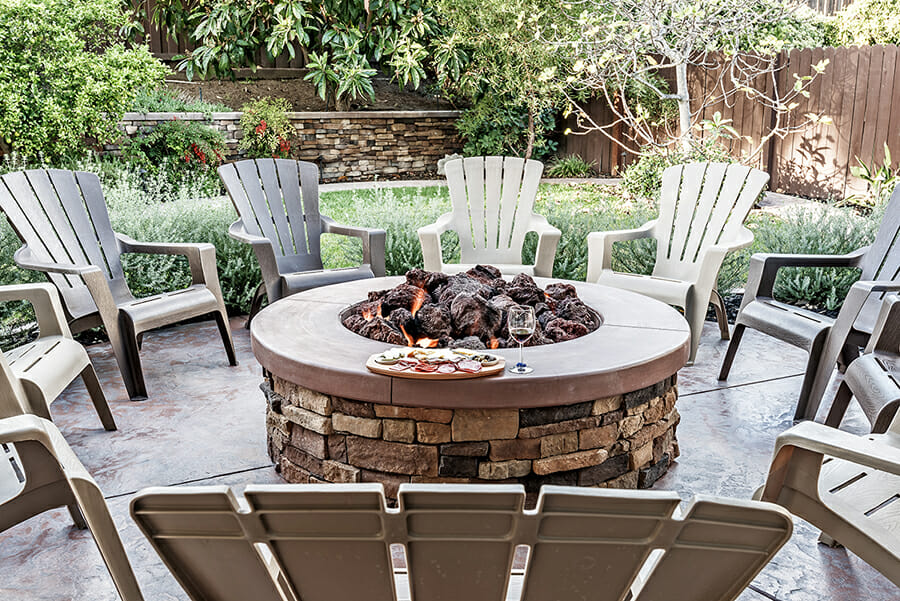
If you like to keep cosy on a wintry night, you could make a fire-pit with chairs or a natural stone wall for seating, as the highlight of your small yard.

Armstone - Backyard Stone Fire Pit (4)This small fire pit is an excellent addition to a small backyard.
9. Take advantage of foliage and texture

Planting big, bold tropical trees can give a small space a lush feel. For example, palm trees with their wide leafs can broaden your yard and their unusual shape can make the entire space look ‘cool’ and exotic.

10. Take advantage of dead landscape nooks

Another way to make the most of your small garden is to transform those unused corners into unexpected focal points of interest. Whether you add a centrepiece tree, large container, flowers in a pot or a statue, you will instantly make the dull corner come to life!

11. Remove the clutter

Reducing visual clutter creates a sense of calm and order, as well as generating pockets of free space. You can remove (or organise) the clutter in your garden by storing things that you don’t use often (like bikes or gardening equipment), arranging a garden sale for any old items of furniture or plants, and re-arranging the patio so that it makes the most of the small space.

To keep the space visually clutter-free, we recommend choosing one or two colour palettes for landscaping your small yard. Then choose plants and flowers that match these colours so that the space is not overrun with too many contrasting tones and colour varieties, as this can make a small space look even smaller. For example, if you have a pathway to a patio or pool, you could line this area with hydrangeas and boxwood. The purple and pink hydrangea flowers will compliment the lush green boxwood, and blend beautifully with a path made from bluestone stepping stones.

Avatar bluestone stepping stonesAvatar bluestone stepping stones (available at Armstone) make a beautiful path with surrounding foliage.

12. Choose the best plants

When working with a small space, you want to add plants that won’t overwhelm the space or  take over the garden. Here we suggest planting dwarf varieties and well-behaved conifers that are easier to maintain.

13. Use the rules of perspective

Designing your small backyard around the rules of perspective – where parallel lines appear to end at a ‘vanishing point’ and distant objects look smaller than those placed closer to you – can make your garden seem bigger than it actually is. For example, you could place a pergola towards the back of your garden to frame the view and add a pot of flowers further up to act as the focal point. The flowers will draw the viewer’s focus, thus elongating the entire space.

14. Break up the mundane

If you have a reasonably flat small garden, break up the dullness by adding raised decks, walls, and plantings. These will create  spatial and textural effects, bringing life and variety to your small garden.

15. Make room for a patio

Even with a small backyard, you can still install a patio to entertain your guests outdoors. You can do this by either transforming the entire garden into a patio or creating a compact space that can be converted into an entertaining area with a dining table and chairs. You can add greenery around either area by planting a border of flowers and shrubs to bring the garden to life.

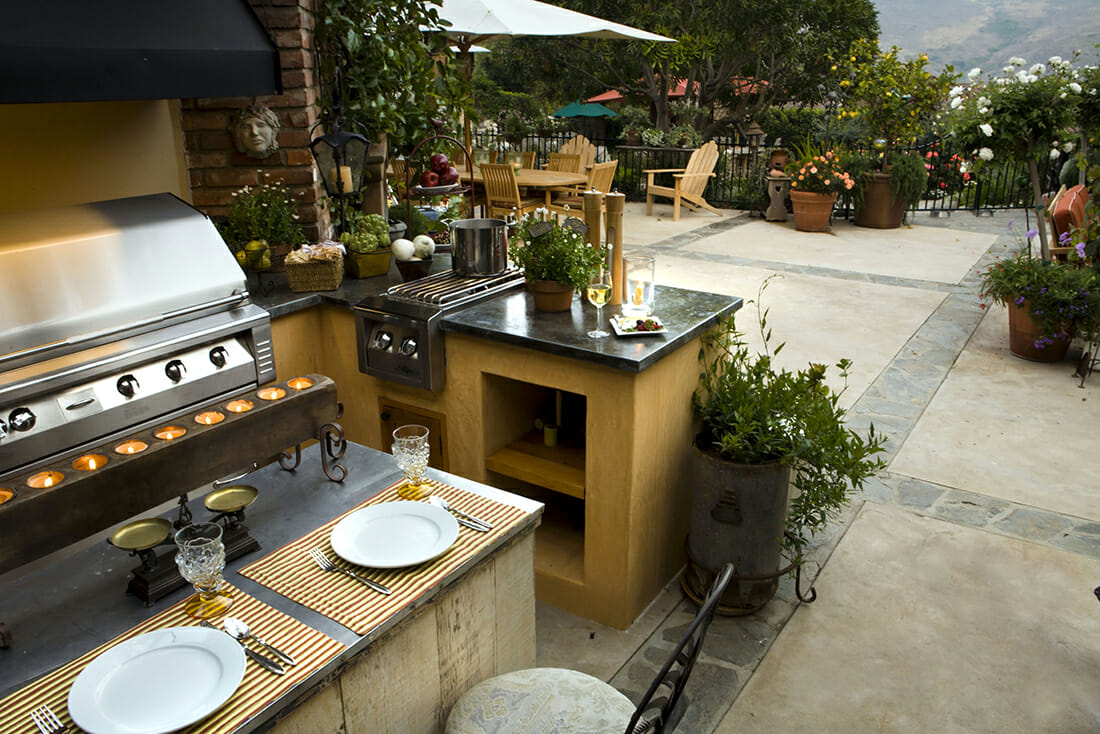
Armstone Landscape Your Outdoor 2A barbecue and patio idea. 

16. Create a European-style courtyard

Alternatively, you can create a more intimate entertainment area by building a European-style courtyard with chequered grass and stone squares. Make the space cosier by including plenty of plants in your chosen colour scheme and transforming the space into something magical. For example, you can add plants in shades of chartreuse and purple, or sap green and pink.

Armstone - Outdoor Living SpacesA cute seating area in a small space with selective flowers to spruce up the ambience.
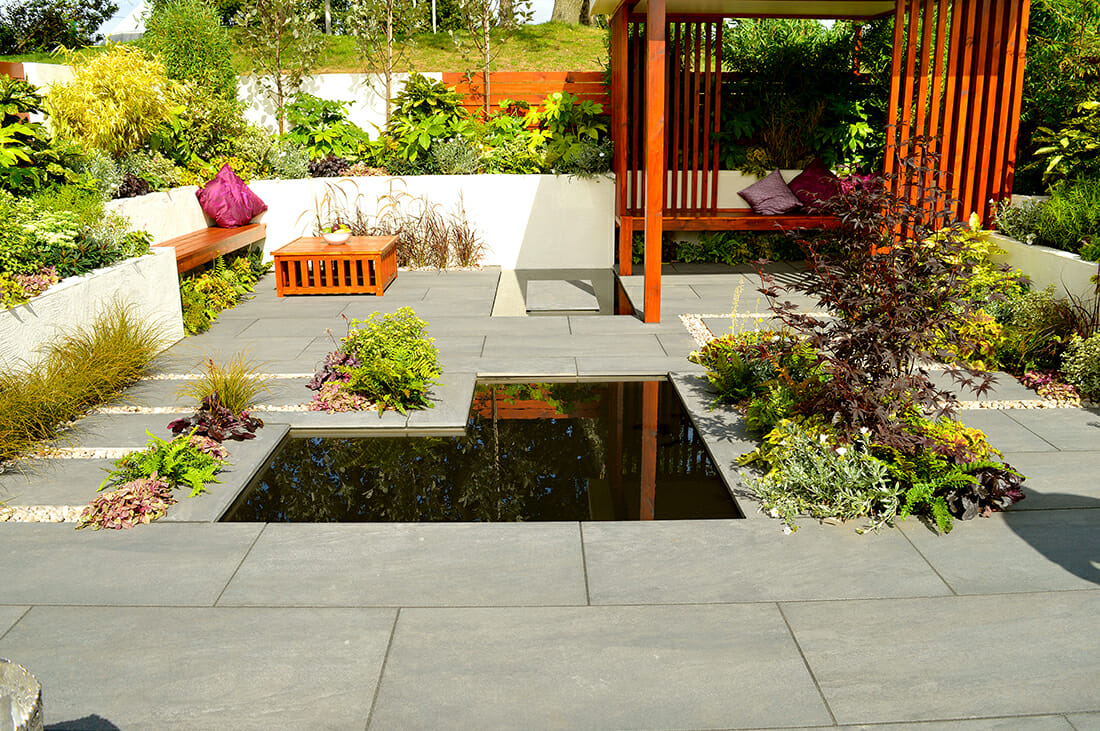
17. Get creative with your plant selections

Since you have a small space in your garden, you want to make the most of each corner and piece of land. This is why we recommend being selective with the plants you choose. Get creative and search for unique breeds with unusual flowers or leafs. You can make these plants stand out by covering the ground with stones and gravel instead of grass. Natural garden pebbles are an excellent ground cover and you can choose them in a neutral or coloured stones to create a beautiful contrast to your unique plants.

18. Lay down some astro turf

If your small garden has poor quality soil and is missing a green touch, you can make the backyard and patio look bigger by laying astro turf on the ground. Astro-turf is an artificial turf (it’s also much easier to maintain than real grass) and its luscious greenery offers the illusion of nature as well as transforming your garden into a natural oasis.

19. Create succulent wall art

If you don’t have a green thumb or are too busy to take care of a full garden, but you still want to create some greenery in your small garden, create wall art from succulents. You can easily do this by dividing a rectangular plastic tray or shallow wooden box into planting cells. In each cell, plant a different succulent and voila! You have yourself a low maintenance piece of art and greenery that doesn’t take up too much space either.

20. Use modular deck tiles

If your backyard is too small to install a built-in deck or patio, and you want to both have one and create an illusion of space, you can use snap-in deck tiles instead. These wooden tiles can be simply snapped together and once installed, will make your deck appear as though it hovers just above the ground.

21. Build a cottage garden

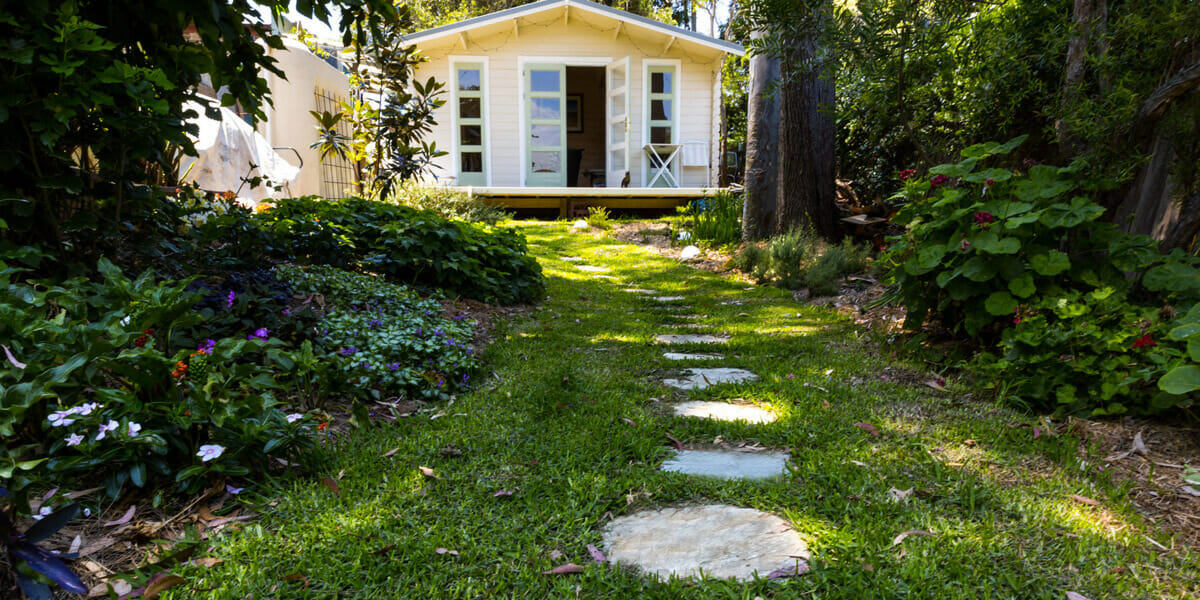
If your backyard looks messy with plants and other features scattered in random places, consider building a cottage garden. You can do this by creating a stone pathway using stepping stones that lead to the back of the yard. At the end of the path, place a seating area and bench and line the path with potted plants or border it with landscaped plants and flowers.

Citrine Quartz Stepping Stones 3Citrine Quartz Stepping Stones make a beautiful path leading to a cottage garden.

22. Create a relaxing area

Turn your dishevelled backyard into a relaxing area by building a garden bed along the border or wall, paving the entire yard, and then adding seating options in the corner/s. The photo below is an excellent example of how you can make the most of your small backyard, especially if you want something that looks good and is easy to maintain.

Armstone Landscape Your Outdoor 8Water feature, relaxing seating areas, plants and paving – a low maintenance idea for a small garden.
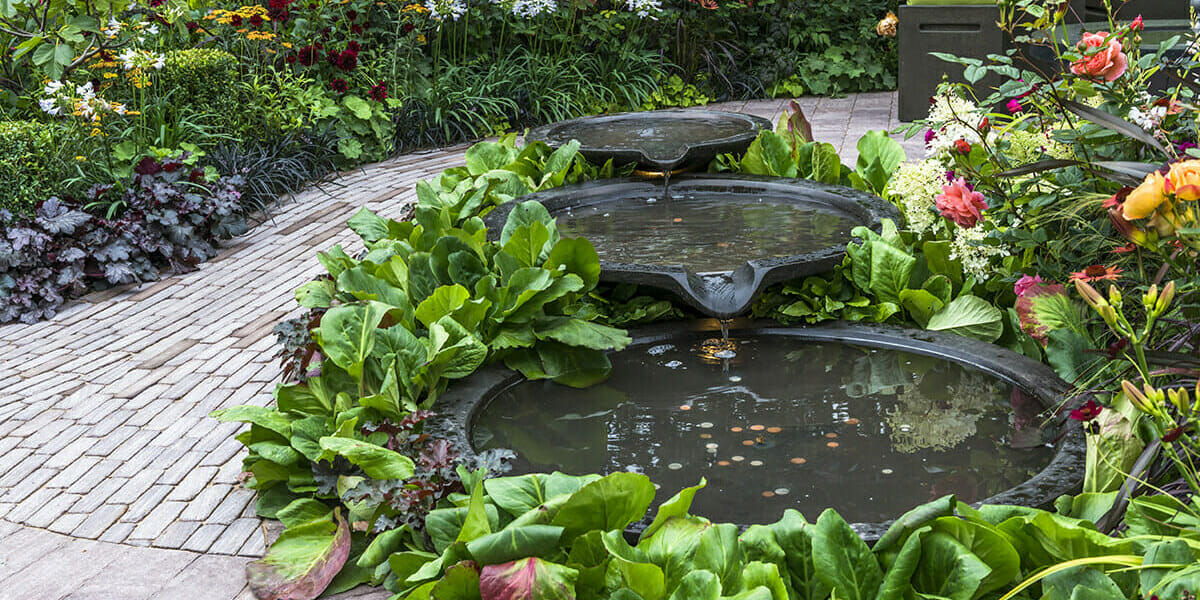
23. Skip the grass

If you’re not a fan of natural turf or grass or simply do not have the time, capacity or energy required to maintain a lawn, you don’t need to! You can still create a beautiful backyard by building a garden bed in one corner, a fire-pit in another corner, installing a patio beside the house, and adding any combination of a raised deck, border plants, and stone and gravel pathways to separate each area. If you need any help with choosing the best natural pavers or stones for this arrangement, reach out to our experts at Armstone online or at 1300 560 560. Alternatively, visit our Sydney showroom in Glebe for some ideas and inspiration.

24. Add modern flair

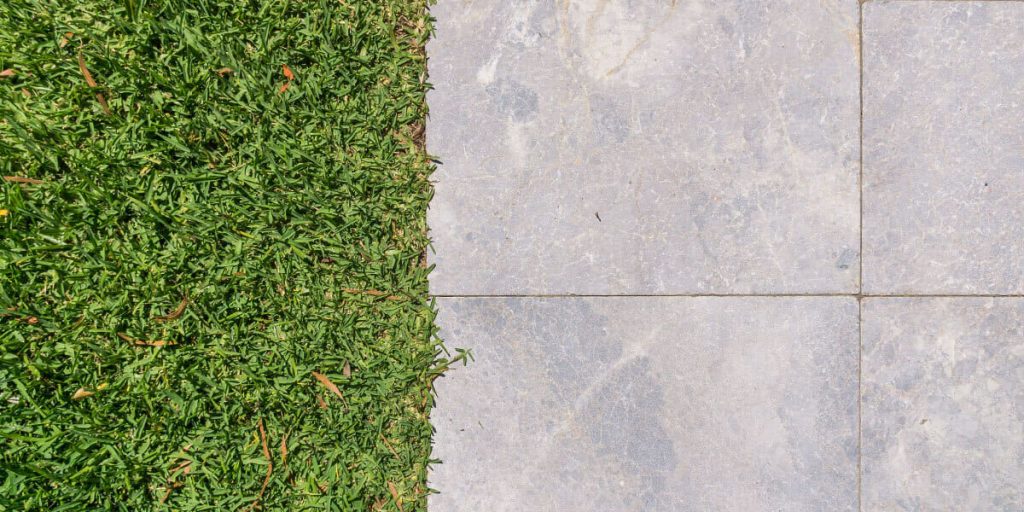
When working with a limited space, you really want to make the most of it by creating pockets of interest. One way to do this, is by giving the ground rhythm and movement. You can create this effect by alternating the paving materials from areas of stone tiles intermixed with pebbles or even cobblestones. This gives your garden a sense of style while keeping it super low maintenance. It’s an ideal solution if you lead a busy lifestyle.

25. Build a naturalistic sanctuary

If you love animals, one way you can attract native wildlife to your garden is adding various items like a bird-feeder, water fountain or pond. These will bring birds and other native animals to your yard. Additionally, you can bring your pond to life by placing fish in it.

Outdoor Water FeatureThis particular water feature requires a lot of space, however it gives you an idea of what you can do.
26. Create a built-in bar

If you intend to use your backyard for entertaining, save space by installing a built-in bar into the wall or fence. You can build this on a floating shelf as a placeholder for plants and drinks.

27. Use symmetry and balance

A simple landscaping trick that can help you establish a calm and soothing environment in your garden is by designing in a symmetrical and balanced manner. Whether you choose pockets within your garden for symmetry and balance or you design your entire back yard with this in mind, it makes your garden easier on the eye. Or, you can establish symmetrical borders for the garden by building the patio so that it’s mirrored from one side to the other with boxed plants. The possibilities are truly endless.

28. Have a fresh white backyard

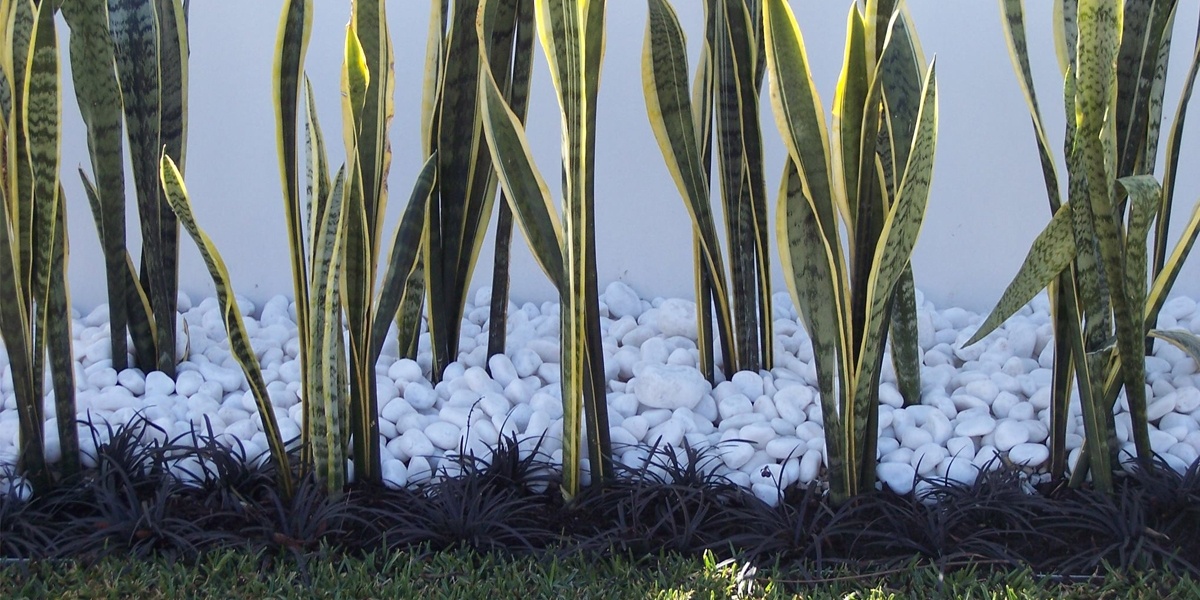
There is a known phenomenon in the art and design world: dark colours make a place appear smaller and lighter colours make a space appear bigger. So one way you can elongate your small garden is by utilising white colours throughout the space. For example, you can create a deck or outdoor lounge area with basic white gravel as a focal point. Alternatively, you could paint the tree stump with white lacquer to create a unique textural table or add snow white quartz pebbles throughout the garden beds to lighten up the space.

Snow White Quartz PebblesSnow White Quartz Pebbles give a clean touch to this green border.

29. Create a Japanese garden

If you want to add an oriental touch to your space, a Japanese garden is the perfect idea! Japanese gardens often have an abundance of plants, a tree for shade, a stone pathway surrounded by gravel, and a wooden deck. You can even add architectural elements such as screens and benches to spruce up the space. It’s a unique way to add everything you need in a confined space.

30. Build a Zen yard

Finally, you could make your small backyard into a zen sanctuary which is basically a tranquil oasis that draws its inspiration from the Asian home interiors. Imagine – if you will – reed matting as fencing, mirrored windows to reflect the garden and sunshine, tree-hung lanterns, bonsais in pots and splashes or red and jade green all around. If you choose this design, we recommend limiting patio furniture and making the trees the focal point of the garden.

Ready to transform your small backyard?

We hope you found inspiration from our 30 ideas to transform your small garden into your relaxing oasis.

If you have any questions, or would like help with choosing the right natural stone pavers, tiles, garden pebbles, cobblestones, pool pavers, stepping stones, step treads or wall cladding for your project, reach out to our natural stone experts at Armstone online or at 1300 560 560. We stock the world’s best quality natural stone products and would love to help you bring your idea to life.

How to Seal and Maintain Outdoor Stone Tiles

Norse Marble Pavers

In recent years, stone has become an extremely popular choice for modern outdoor areas.

And it’s easy to see why!

Natural stone is beautiful, durable and has timeless appeal.

However, what many people don’t realise is that even though stone is a hard material, it’s quite porous which makes it more susceptible to stains.

In saying that, maintaining your majestic stone tiles and pavers is actually relatively easy to do and with the right TLC (tender love and care), they will be able to outlast any other surface.

So let’s have a look at ….

How to Seal Your Stone Tiles to Protect Them?

In order to protect your natural stone from absorbing foreign liquids and moisture due to its porous nature, sealing is highly recommended. Sealing is a relatively simple process and there is a range of products that will be able to help you, but before starting this you need to ensure that the stone is sufficiently clean. To prepare your stone tiles or pavers for sealing, we suggest using our Stone Deep Clean product for a powerful clean.

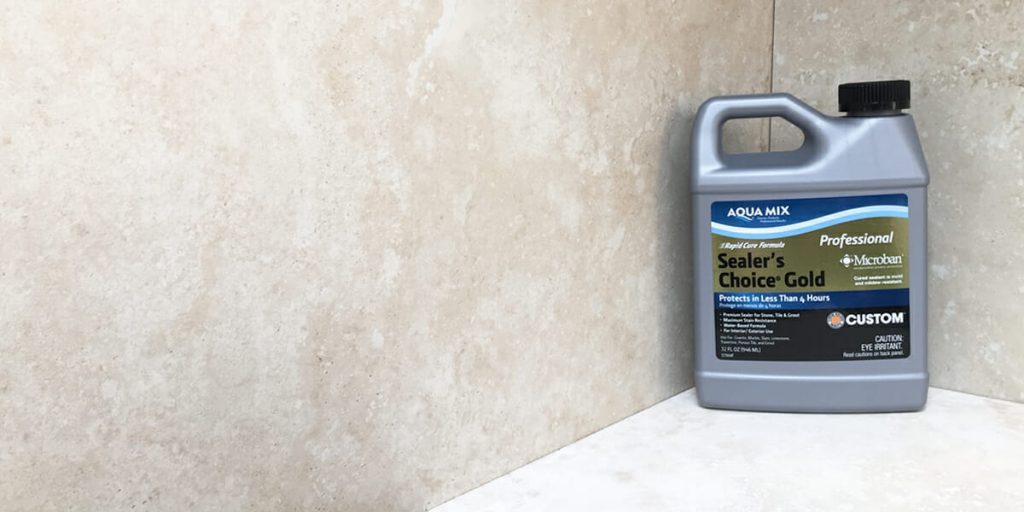
Now that the stone is clean, you can start the sealing process. Use a new mop or sponge (for extra cleanliness) and liberally apply a sealing product like our natural look Sealers Choice Gold. Allow the sealer up to five minutes to penetrate into the stone before wiping it dry with a clean towel. Depending on the surface, you may need to repeat this process multiple times. We recommend testing each application after 2 hours.

If you prefer a glossy finish use our High Gloss Sealer and to achieve wet look finish Enrich N Seal is the way to go.

To ensure that you achieve a clean application and effective drying, we also recommend using our Sealer Application Kit. This kit includes an application pad for even application and microfibre towels for efficient drying; all crucial for a successful sealing application.

Once the sealer is applied, give it enough time to dry. We recommend doing this not on a hot day and not on a wet day where the sealer can properly absorb into the stone without drying too quick.

Melba 2

** Melba Limestone Pavers

Maintenance and Cleaning Your Stone Flooring for Longevity

Keeping your natural stone floors looking their best is simply a matter of maintaining them on a regular basis. The first step to clearing surface debris is vacuuming or sweeping. After this, a water based cleanse is usually the most effective. Rather than using plain water or a standard soap solution, our cleaning products are specifically formulated for cleaning natural stone. Concentrated Stone and Grout Cleaner is the best product for your every day cleaning. You only need to add a cap full of this concentration into the 4L bucket of water. This is enough liquid to mop your entire floor.

Though it is recommended to use specific products and complete deep clean to keep your tiles properly maintained, you can also do simple things on a day-to-day basis to ensure that your natural stone look great!

Simple things include, wiping spills as soon as they happen immediately rather than giving them a chance to settle in and absorb (even on a sealed surface). Paper towels are excellent for initial spills because they quickly absorb the liquid. For most effective spillage wiping, we suggest using a dabbing motion rather than wiping or rubbing the spill. This absorbs the spill instead of spreading it to other parts of the stone. Regular sweeping will also help to ensure that debris doesn’t have a chance to stick or leak into the surface of the stone.

One of the benefits of natural stone is that when maintained properly, it can last a lifetime. Additionally, with the right care, stone can actually improve over time, adding long lasting character to your space. By using the right products and keeping the surface clean, you’ll be sure to enjoy your stone for years to come.

If you have any questions about sealers and maintaining your stone pavers, reach out to our expert team at Armstone.

You can find us online or call 1300 560 560.

We would love to help you!

How to Choose Groundcover to Plant between Pavers?

Avatar Bluestone Stepping Stones

So your front (or back) yard has pavers made from concrete, brick, or stone.

These may even be uniform or irregular shaped.

They may be in partial shade or fully exposed to the sun.

Regardless of the type of paver you have, chances are that there is some kind of gap between them.

As such, there are plenty of benefits of filling those gaps by planting a ground cover plants between the pavers.

While the gaps will vary in size.

For instance walkways generally have larger gaps than normal pavers hence creating that stepping stone effect.

If the gaps are neglected they become a catchall for weeds.

And if left unattended these weeds can grow out over time and the pavers may even begin to shift.

And you want to avoid this at all costs!

Raven Granite Stepping Stones**Granite Stepping Stones

So what are your options?

There’s sand.

But it’s a temporary solution as over time, sand will just wash away.

Gravel or cement are other alternatives but they lack that natural aesthetic.

That’s why we believe nothing quite compares to the wholesome appeal of ground-cover.

Initially, this may seem like a strange concept.

Because from an early-age, we’re taught not to walk on plants.

So planting a delicate-looking creeper along your walkway may seem a little odd.

What many don’t realise is that there are a number of hard, foot traffic-withstanding varieties of ground-cover that are perfect for use along paths, walkways, and other treading areas.

So, how do you get started?

Before choosing the creeping perennials to plant between pavers.

We recommend assessing your front or backyard as well as the climate of your area.

By matching the plants to the environment, you will be able to create the right look for your garden.

For example: it makes no sense planting tropical plants in an arctic location.

While that’s an extreme example, you get the idea.

So let’s review all the considerations you must make prior to venturing out to your local nursery.

HOW MUCH SUNLIGHT?

Reviewing how much your pavers are exposed to sunlight is important when finding the right plant.

Over the course of any day, keep a record of the sunlight exposure to the chosen area.

You want to determine whether your garden receives:

  • Full or direct sun,
  • Morning sun with afternoon shade
  • Morning shade with afternoon sun, or
  • Mostly shade.

Once you’ve deciphered this, here are some plants that work well in different settings:

  • Ground-cover varieties that enjoy full sun include Creeping Thyme and Dymondia.
  • Sedums, Chamomile, and Cranesbill work well in some shade.
  • Creeping Dogwood, Corsican Sandwort, Sweet Woodruff, and Blue Star Creepers are happy in damp shade.

HOW MUCH FOOT TRAFFIC?

A general rule of thumb when selecting creeping perennials is that the more delicate the leaf structure, the less traffic the plant will be able to withstand.

As a result, you should try to determine how often people will be treading on the ground-cover.

Will it be several times a day, once a day, or just once a week?

Depending on the above, you can then select the following plants:

  • Rupturewort is super tough and almost carpet-like, able to handle heavy foot traffic.Its foliage is nice and green, and turns bronze-red during winter.
  • Creeping Wire Vine is another great alternative that can even be mowed!

HOW MUCH SPACE IS BETWEEN THE PAVERS?

Gaps between stone pavers are very varied and so it’s essential to find the right plants to suit these gaps.

If you plant a fast and wide-spreading plant in a pathway that only provides narrow spaces between stones.

The plants will quickly cover the stones or consume your time with maintenance and trimming.

If your gaps are narrow, you’ll need to look for plants that can be sliced into thin pieces and tucked in between the pavers.

Plants such as Blue Star Creeper and Dwarf Mondo are ideal for this.

Firstly, they spread through creating an underground root system but also their root can be divided easily using a utility knife.

On the other hand, plants with a single main stem cannot be divided.

As such, may not be ideal to plant between pavers with narrow gaps.

HOW IS SOIL DRAINAGE?

Next, you want to check the area to determine if it stays continuously damp, dry, or soggy.

You see, depending on how well-drained the site is, will help you choose plants that suit the area.

Basalt Circular Stepping Stones

DO YOU WANT UNIFORMITY OR VARIETY?

A more formal looking outdoor area may call for a uniform effect in planting.

But for something a little more fun and natural, you may consider mixing up the uniformity with a variety of plants.

This creates a natural effect, as though the plants filled the gaps because the wind blew them there.

It also allows you to replace the plant if you find that it doesn’t compliment the paver or other surrounding plants.

We recommend aiming for a combination between uniformity and variety.

You see, using too many disparate heights and textures can look chaotic.

While using too few can create a mass space of nondescript greenery which can get boring after a while.

We suggest to aim for subtlety.

So look for combinations such as Blue Star Creeper between stones.

And a taller, more delicate Dianthus along the edges.

Avatar Bluestone Stepping Stones**Avatar Bluestone Organic Stepping Stones

HOW QUICKLY DO I WANT THE GAPS FILLED?

Impatient?

Have to put your house on the market and only have a few days or weeks to fix things in the garden?

Then you’re looking for a plant that has a faster fill-in period.

You can do this by breaking slower-spreading plants like Mondo Grass or Blue Star Creeper, into smaller pieces.

Otherwise, if your gaps can handle it, plants such as Creeping Jenny and Creeping Wire Vine are both wide-spreading and fast-growing and ideal for any situation where you are pressed for time.

OUR 6 FAVOURITE GROUNDCOVERS:

  1. BLUE STAR CREEPER

The tiny green leaves of the Blue Star Creeper form a dense, low mat between stepping stones and patio pavers, and have delicate, blue, star-shaped flowers.

This is a wonderful creeping perennial for moist landscapes.

  1. MONDO GRASS

Mondo Grass spreads rapidly through underground stems to form a soft, shag pile carpet.

It makes an excellent border and gap filler for pathways.

It’s drought and frost tolerant, and can withstand light traffic.

  1. NATIVE VIOLET

Native Violet is a fast-spreading creeper.

It’s very low growing and so won’t steamroll other plants.

It’s easily separated to fill lots of gaps, loves moist shade, and offers pretty purple and white flowers most of the year.

Avatar Bluestone Steppers

  1. TEMPLE GRASS

Temple Grass offers fine, bright leaves and is commonly used for rockeries and between stepping stones.

It will develop clumps or ‘lumps’ on the surface, which is generally considered an attractive feature.

  1. CREEPING JENNY

The roundish, chartreuse leaves and yellow flowers of the Creeping Jenny make it a popular ground-cover choice.

A mat-forming perennial, it grows around 10-20 centimetres tall and spreads its roots as it grows.

  1. CREEPING THYME

Creeping Thyme is one of the best low-growing ground-covers, offering beautiful colours for very low maintenance.

Better yet, it handles foot traffic very well which makes it an ideal fill-in plant.

In Summary

Finding the right plant to fill the gaps between your pavers will make a world of difference to your garden.

If you need any help deciding, contact us here to speak with an expert.

Landscaping with Garden Pebbles

somersby sandstone pebbles

Garden Pebbles are one of the most beautiful and versatile natural materials you can use for your garden.

They’re the perfect accompaniment to plants, trees, and pavers.

And can even be used as standalone elements to create texture, colour and draw interest to your yard.

Whether you’re building a modern, traditional, Japanese, country, Mediterranean, or Xeriscape garden, you’ll find stones and garden pebbles in all shapes and sizes to match your theme and project.

Snow White Quartz Pebbles

*Snow White Quartz pebbles


Garden pebbles are also practical.

They can be used to assist with drainage, create structure and physical change.

And overall help a garden look more established.

Pebbles make wonderful decorative elements and help restore water in the soil that is exposed to the sun.

They also prevent soil erosion and preserve the roots of plants.

Stone pebble paths can be used as walkways and decorative pebbles can replace the mulch.

Landscaping pebbles are very on-trend at the moment.

So much so that landscape gardeners are using them to replace mulching, paving, surfacing paths and driveways and even creating mosaics out of them!

Landscapers simply can’t get enough of pebbles and how much character they add to the homes they’re redecorating.

In this article we will answer some common and frequently asked questions about landscaping with garden pebbles.

If you find it helpful, please share with your gardening and landscaping friends!

Let’s begin…

Where do garden pebbles come from?

Garden pebbles are sourced from a variety of countries including China, Indonesia, the Philippines and Vietnam.

Sino black

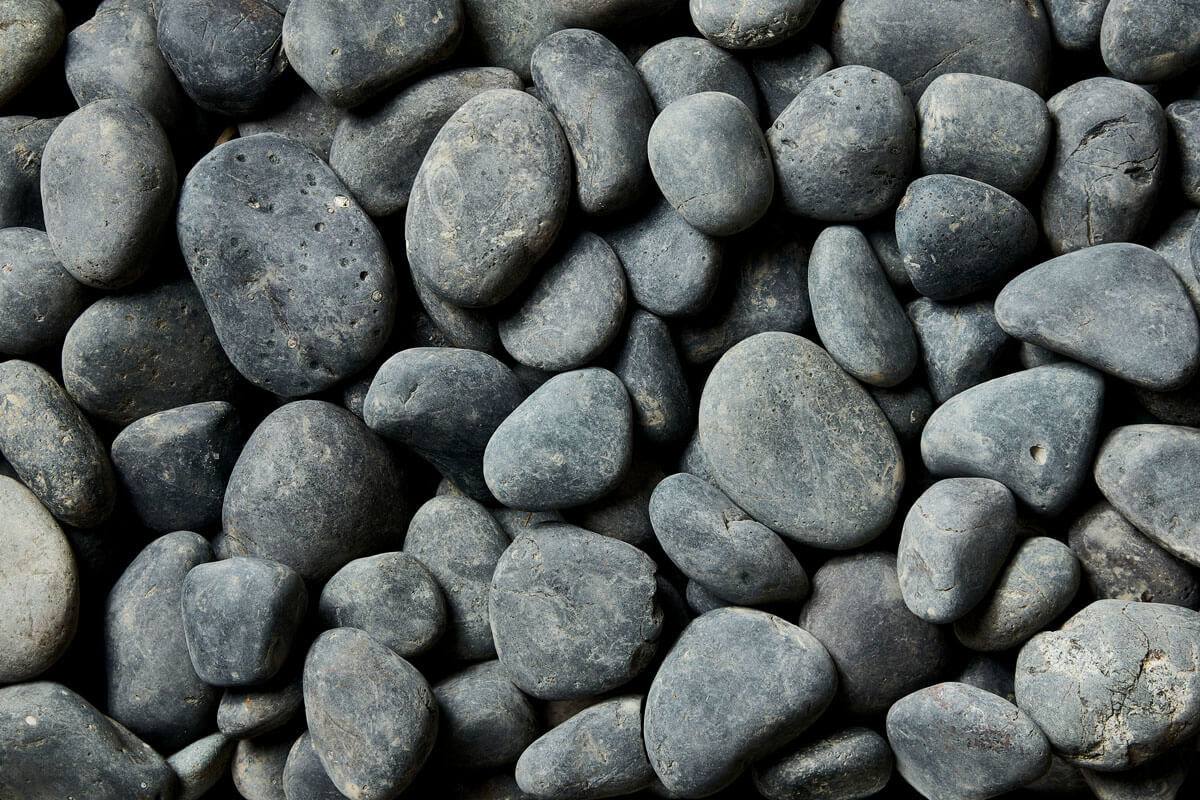
*Sino Black Garden Pebbles

How to install garden pebbles?

At the outset, it seems: “How complicated can it be to install garden pebbles?”

“Just sprinkle them all over the ground and et voila! You’re done.”

However…

There is a proper installation process even for something as ‘simple’ as garden pebbles.

You see, weeds can become quite an issue with pebbles.

This is why we suggest against skimping on materials.

And laying a thick layer of pebbles to prevent weeds from growing through them.

Alternatively, you can add Roundup as a treatment on the ground before laying the pebbles.

This will also prevent weeds from weaselling through the ground.

Another consideration is adding an underlay between the rocks and soil.

This creates a weed barrier and prevents weed seeds from touching the soil.

Here we recommend choosing a landscape fabric, double weed mat, or black plastic as the underlay.

Compared to landscape fabric, plastic creates a stronger weed barrier but water won’t pass through it to feed the bushes’ roots.

If you opt for the plastic option, make sure to punch holes in it so that the bushes get the water they need to grow.

Somersby Pebbles

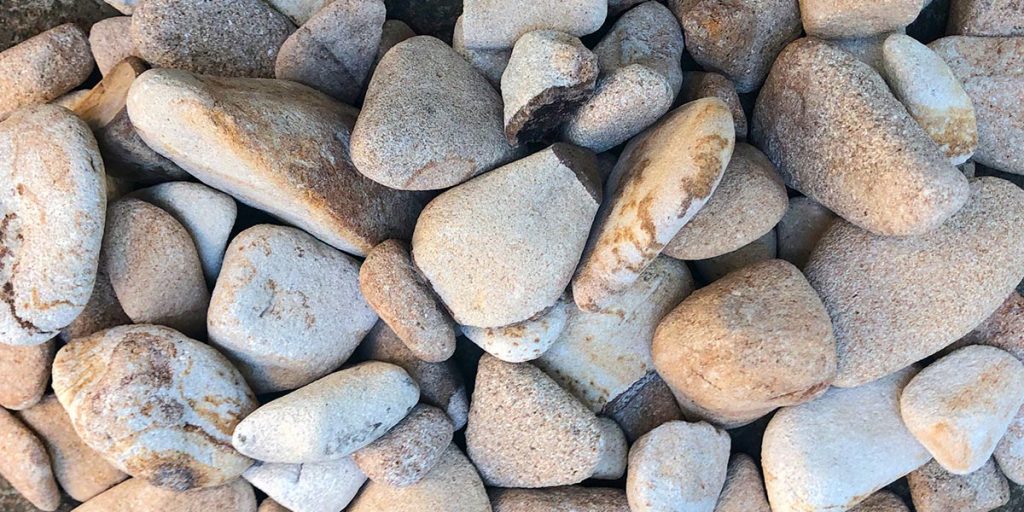
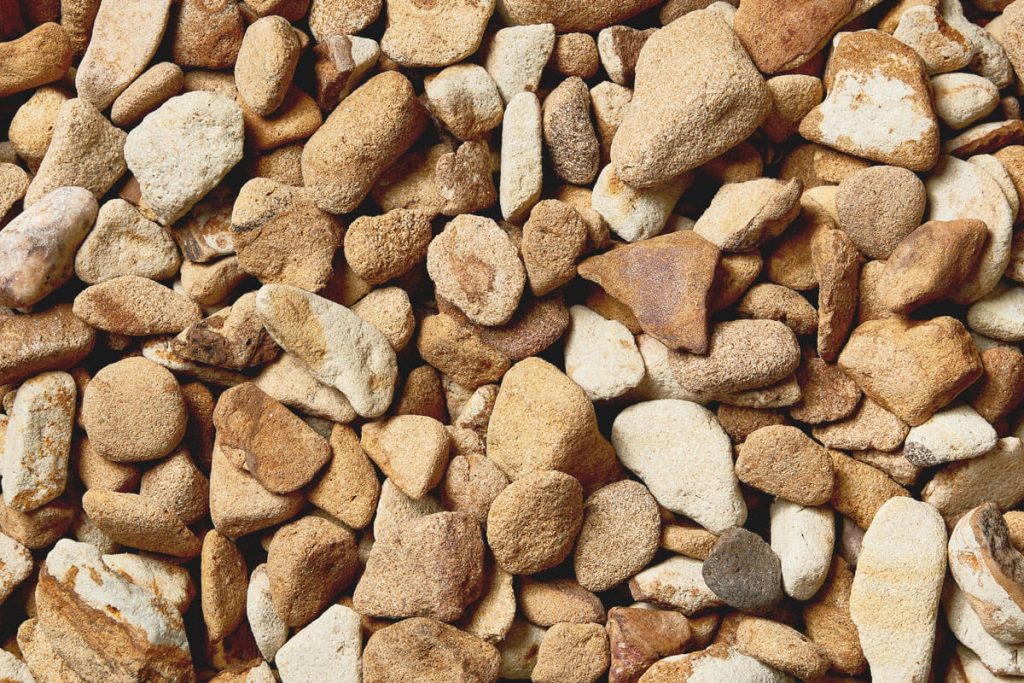
*Somersby Sandstone Garden Pebbles

How many garden pebbles do I need?

A few things affect the calculation for pebble coverage.

These include the actual size of the coverage area, the depth of area and also the shape and size of the pebbles themselves.

While there is no hard science when it comes to calculating how many garden pebbles you need.

At Armstone we’ve devised a formula that gets you close enough.

We’ve physically laid out pebbles on a square meter and in doing so, found an accurate formula.

While it may be very close to your requirements, please remember that it’s still only an approximate calculation.

If you need help with your calculations, you can contact us here.

What can you do with garden pebbles?

The better question is:

“What can’t you do with garden pebbles?”

Why?

Because they are so versatile that you can use them for many different things.

Below we will show you some of the options available for you.

Ivory Porcelain Pavers 12

Terraced Steps

Garden pebbles make a very strong focal point as terraced stone steps in a mix-and-match pattern.

If you have a sloped yard they offer a functional purpose too.

You can even add ground cover in and amongst your steps to diversify the terrace steps with a green carpet.

Alternatively, you can plant soil and sedum into the cracks and crannies amongst the stones.

Adding character plants on either side of the steps will also amplify the visual aesthetic.

Installing small flat lights will make the steps very enchanting at night.

Drought Tolerant Yard

Is your garden and environment prone to drought?

Then we suggest creating a bed of pebbles dotted with native grasses, such as Mingo or Purple Lea.

Grasses are great for attracting native birds and are well-equipped to tolerate frost and drought.

Zen Garden

A zen garden is a place of refuge and is a wonderful space for meditation.

Traditional Japanese zen spaces typically use stone, sand, and other natural materials to create lines and patterns to evoke that serene meditative environment.

Pool Border

Fancy feeling like you’re stepping into a resort every time you walk outside to your pool?

Then use polished pebbles to outline your pool with a stone border.

English Country Garden

There is nothing quite like a flagstone path that leads you to an outdoor table or bench where you can enjoy a good book or hot (or iced) tea.

Popular in English country gardens, these types of backyards incorporate more formal stone elements.

They can be brought to life with garden pebbles completing the gaps between stones.

As well as using perennials to line the path and a birdbath at the end of the journey to complete the effect.

Modern Path

If you have a modern home with paths made of Raven Black Granite Pavers, you can frame them with Sino Black Natural Pebbles!

The end result looks stylish and is maintenance-free.

Raven Granite Stepping Stones
*Raven Granite Stepping Stones

Gravel Mulch

If you want to pave your garden with easy-to-maintain mulch (i.e. something you never have to replace).

Then we recommend using gravel mulch, or else known as garden pebbles.

When lining your garden with gravel mulch, you need to ensure that the area is 40-60mm deep, or 10-20mm deep for pots.

If you want to avoid weeds breaking through, try the Roman technique of sprinkling salt on the soil first.

Word of caution, don’t do this in spaces where you want to grow ornamental plants as the result can be permanent and detrimental!

Succulent Garden

Succulents are a wonderful plant for busy people.

Why?

They require minimal fuss and maintenance.

In saying this, it’s important that when they’re planted, you choose the correct mulch.

You see, they prefer to be placed with stones or gravel than with moist leaf litter mulch.

You can even create an artistic feature by placing coloured pebbles to contrast against the pasty succulents.

What are other uses for garden pebbles?

Once you’ve started using garden pebbles in combination with your home projects, you’ll feel hooked and excited for your next project.

It is likely that you will have a lot of leftover stones.

The good news is that there are plenty of things you can do with the leftovers!

Here are some of our favourite ideas:

Avatar 12

Organic shape Stepping Stones 

Backsplash

Pretty pebbles in a variety of earth tones can make a beautiful resource for a unique backsplash in the kitchen, bathroom, or laundry.

If you have a lot, you can run the whole length, or otherwise, consider just creating an accent.

Mosaic

Leftover stones and pebbles are perfect for mosaics.

And the beauty of mosaics is that anyone can make something beautiful when they have quality material.

Try creating a picture frame, lamp, or coaster.

Sensory table

Sensory tables are great fun for kids and a valuable learning tool that encourages children to explore their world.

Fill a bin with your leftover gravel, and place objects inside for your child to find.

They can either guess with their eyes closed as to what each object is or can create a play area for some diggers or dinosaurs.

To see the full range of Garden pebbles click here.

If you have any questions about garden pebbles, contact our team of experts here.

Or call us at 1300 560 560.

Or visit our Sydney showroom in Glebe to see the garden pebbles in person.

We would love to help you decide which garden pebbles will work for your environment.

We can also help you work out the required coverage.

And then deliver the pebbles within 3 working days to your home.

Ease the Maintenance of Your Stone Walls and Floors With Aqua Mix Stone Sealers

Aqua Mix - Sealers Choice Gold

When you own something beautiful and precious, what do you typically want to do?

Protect it, right?

And understandably so!

The item either has sentimental value or you’ve invested time and funds into it, so it makes sense that you want to protect it in every way you can.

The same concept applies to natural stone pavers.

Investing and installing high-quality natural stone pavers is just one part of the equation.

Protecting them adequately with the correct maintenance is equally as important.

You see, sealers and cleaners are crucial to maintaining the beauty and longevity of stonework both inside and outside the home.

In this article, we review the importance of choosing a high-quality sealer and how it will help protect your natural stone pavers.

Stone Sealers

Stone sealers protect the integrity of the stone so that they stand the test of time. Even travertine pavers – a durable and heavy-duty stone – can become damaged over time when exposed to various environmental elements like acid from in rain and even fallen, decomposing leaves.

Silver Travertine Pavers 11

Travertine pavers have beautiful naturally appearing crevices and veining which need to be protected from harsh environmental spills and rain.

Thus, using a high-quality stone sealer can ensure your natural stone pavers effectively repel moisture, resist staining and are easier to clean. Additionally, applying a good quality stone sealer helps extend its lifespan and maintain its beautiful appearance.

What to look for in a sealer?

One of the recommendations we give to all our customers who enquire about natural stone sealers is to find a brand that is environmentally friendly.

Why?

Well, you’ve just invested in a superior quality natural stone product. Protecting it with an environmentally friendly option means that you aren’t adding harsh chemicals that will damage the stone and additionally, you’re providing superior protection to the stone. So it’s a win-win: for the environment and for protecting the stone’s surface and integrity.

Now, when it comes to recommending a brand, at Armstone, we vouch for Aqua Mix Stone Sealers. This brand’s products coat the surface of the stone with a thin and durable finish that protects the stone from general wear and tear. It also repels stains that can be caused by both water and oil.

Finish

Depending on your stone’s finish, you can invest in a sealer that provides a low-gloss finish or a high-gloss finish. For example, stones with a matte finish (like slate), would look out of place with a high-gloss finish, so you’re better off getting a low-gloss finish. On the other hand, marble tiles – with their shiny and smooth surface – will definitely require a sealer that provides a high-gloss finish.

Ingredients

Another advantage of Aqua Mix Stone Sealers is that they’re water-based. This means that they have a low impact on the environment. They also contain ‘Microban’ which is an anti-microbial ingredient that halts the growth of unhealthy germs and moulds within the stone. This is a very beneficial feature, especially when using the sealer on floors and other stonework that is exposed to high levels of moisture, like bathrooms and kitchens.

Permeability

Different stones have different levels of permeability. This means that a dense stone (like granite) will require a completely different chemical formula to protect its surface, compared to a less dense stone (like sandstone). Aqua Mix understands these nuances and as such, has a range of premium products specifically formulated to protect different types of stones and their various levels of permeability.


Sealers-Choice-Gold

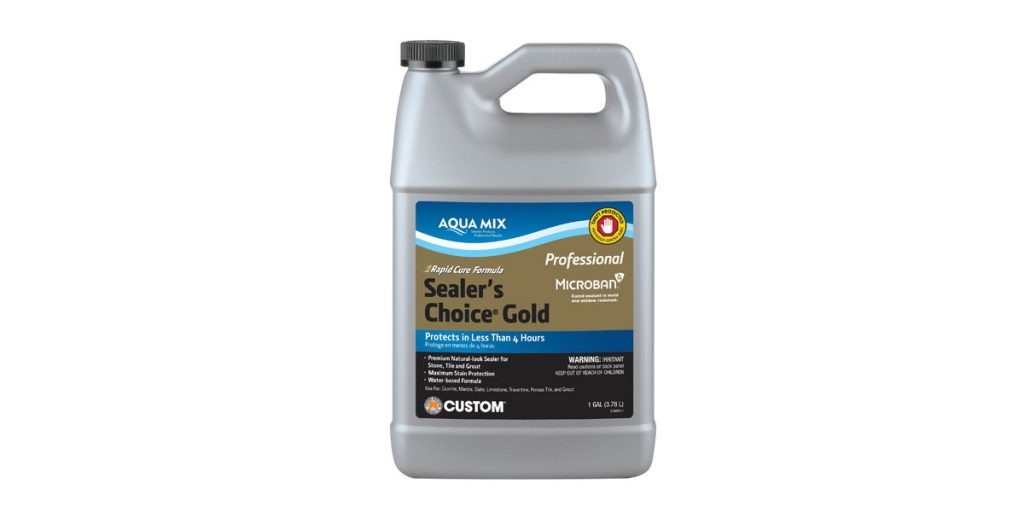
Aqua Mix Stone Sealers Choice Gold Stone Sealer is our recommended choice of natural-look stone sealer.

And there you have it.

Everything you need to know and look for in a natural stone sealer so that your majestic stone pavers are protected against environmental factors – like rain and heat, life factors – like spills, and age factors – like general wear and tear.


If you have any questions about choosing the best sealer for your natural stone pavers, or you want to understand how often to apply them, reach out to our natural stone experts at Armstone online or at 1300 560 560. We stock the full range of Aqua Mix Stone Sealers and would love to help you choose the right one for your home.

Add an Elegance to Your Outdoors with Silver Travertine Pavers & Tiles

Silver Travertine Pavers

If you are looking to add elegance to your outdoor area, look no further than silver travertine pavers and tiles.

For thousands of years travertine has been used by engineers and stonemasons to build anything from ornate temples to lavish palaces. Many structures in Ancient Rome that were built thousands of years ago, are still standing: a testament to travertine’s robust nature.

Made from calcium carbonate, this spectacular and elegant natural stone is formed from mineral springs over aeons of years, giving travertine its ageless durability and appeal. It’s typically found in limestone caves or at the mouth of hot springs.

Being a calcium-carbonate stone, formed under pressure, silver travertine natural pavers are strong and durable. They are also beautiful and unique, with elegant veining and textures ranging from warm, honey-coloured tones, to cool blues, silvers and greys, which means that no two stones are ever the same.

In today’s article we focus on how you can add elegance to your outdoor setting with silver travertine.

Let’s dive in!

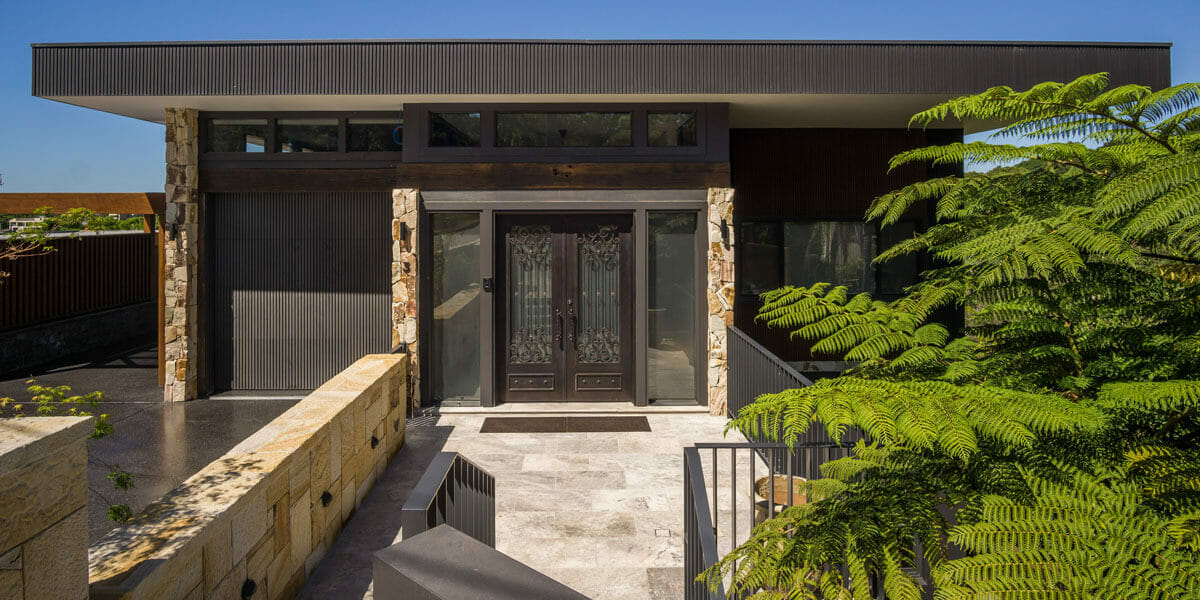
Silver trav web5These silver travertine pavers add a majestic touch to this home’s entrance.

So, why would you want to consider silver travertine pavers for your outdoors?

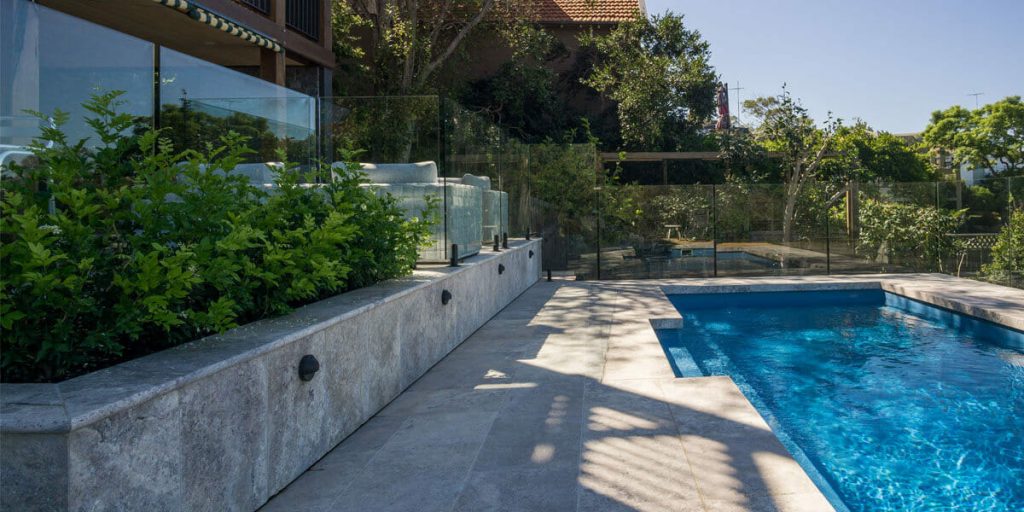
First and foremost, silver travertine stones have a balanced combination of light and dark shades of silver flowing through each slab, along with tinges of warm beige undertones interspersed throughout. This striking and electrifying aesthetic provides an elegant touch to modern landscapes and works especially well for outdoor areas like patios, pathways near ponds or poolside surrounds, where the stone’s blue and silver tones blend well with the colour of the water. The warm beige and gold undertones reflect beautifully off the sun, adding a homely touch to the overall space.

Along with being an elegant choice, silver travertine natural stone pavers – like all other travertine pavers – are also practical for outdoor installation. With Australia’s hot summers reaching 40 degrees Celsius (and sometimes higher), you’d want to consider how much the stone pavers will heat up underfoot, especially in areas where your family and friends will be walking barefoot like pool surrounds, pathways, steps or the patio area. As such, silver travertine pavers are an excellent choice as they will remain cool to the touch even during extreme heatwaves and even in direct sunlight. As well as being safe and comfortable to walk on, the pavers will reflect heat, helping keep the rest of your home much cooler. On the flip-side, silver travertine pavers can also withstand freezing temperatures without cracking under the pressure of changing climates and seasons.

Cinnamon Travertine Pavers

When researching what natural stone pavers to install for your outdoor project, one of your considerations is if the stone will be able to withstand a variety of environmental conditions while keeping its structure integrity. This is exactly one of the benefits of silver travertine: it doesn’t fade and given durability, will also stand the test of time.

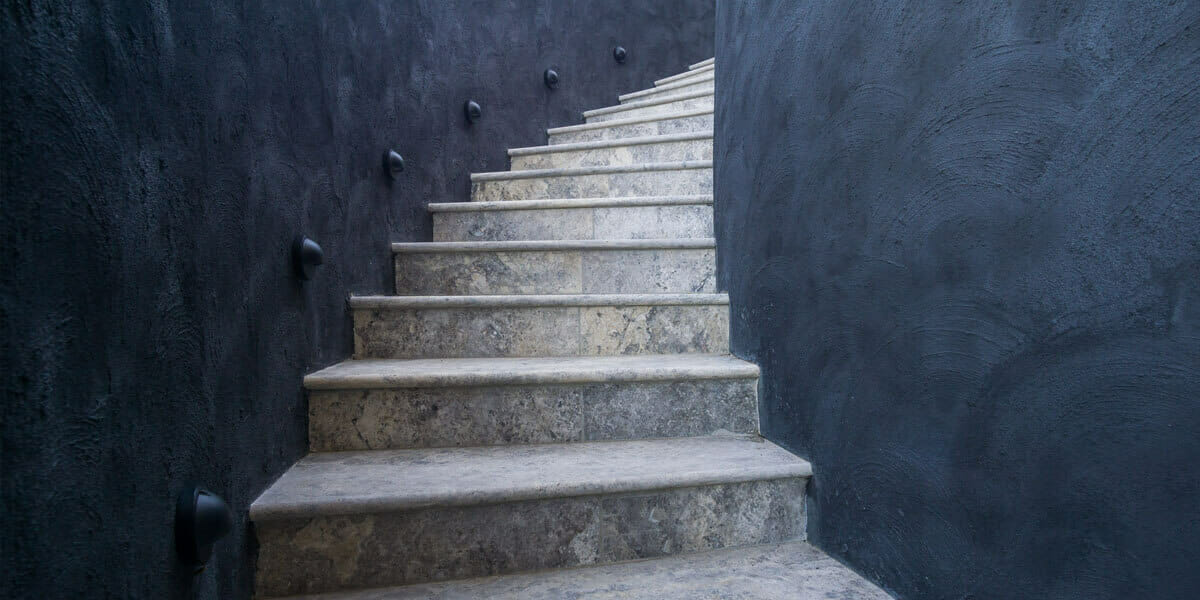
Choosing a natural stone paver for outdoor locations means finding one that can also withstand high foot traffic. Some flooring choices like concrete and asphalt are obvious choices, however they aren’t elegant and can detract for the contemporary or modern aesthetic of the rest of your home’s exterior. Silver travertine pavers, on the other hand, can make a dull design look instantly elegant, and blend beautifully with a modern look, while simultaneously bearing the load of high foot traffic areas without wear and tear! As you can see in the photo below, silver travertine gives this staircase an instantly majestic and royal feel.

Silver trav web3Elegant, durable and versatile – silver travertine is an ideal paver for this spiralling staircase.

So whether you’re looking to add a WOW factor to your outdoor landscape, or you simply desire to invest in a natural stone paver that will meet a certain criteria for your building – or renovation – project, we definitely recommend considering silver travertine tiles and pavers as an option.

At Armstone, we stock the finest grade travertine products. Our range includes French pattern, pencil round, finely honed bull-nosed coping, and drop-edge coping as well as tumbled pavers, step treads, pavers, tiles and coping. If you have questions, reach out to us online or call 1300 560 560, and one of our natural stone experts will help you. Alternatively, you can find us in Glebe, where you can visit our showroom and see the silver travertine in person.

We look forward to helping you bring you project to life and add some elegance to your outdoors with silver travertine tiles and pavers.