Ways to Manage Weeds in Groundcover Between Pavers

Armstone Replacing Damaged Travertine Tiles 1

Nobody likes weeds, let alone managing them: they’re pesky, bothersome and let’s be honest, they don’t look nice at all.

However, what most people don’t realise is that the reason weeds grow in the first place is because the area is neglected, giving them a chance to grow.

If this is news for you, you wouldn’t be the first.

Weeds tend to find the way through the most awkward spaces in the garden and typically the ones we tend to notoriously neglect -like the gaps between stepping stones or between borders.

While banishing weeds completely is the ideal goal, it isn’t easy. Instead, there are a few tried and tested methods that you can apply to keep them at bay.

In the article below, we have a look at a few of them.

Control by design

Now, if you’re starting from scratch and currently designing your garden, you’re at a huge advantage.

Why?

Well for starters, you can design your garden in such a way that limits the areas for weeds to grow. How do you achieve this? Preparation is absolutely essential! You can do this by laying a barrier under pavers or between the fence posts. Another solution is using weed block instead of plastic as it’s easier to handle and much less likely to puncture.

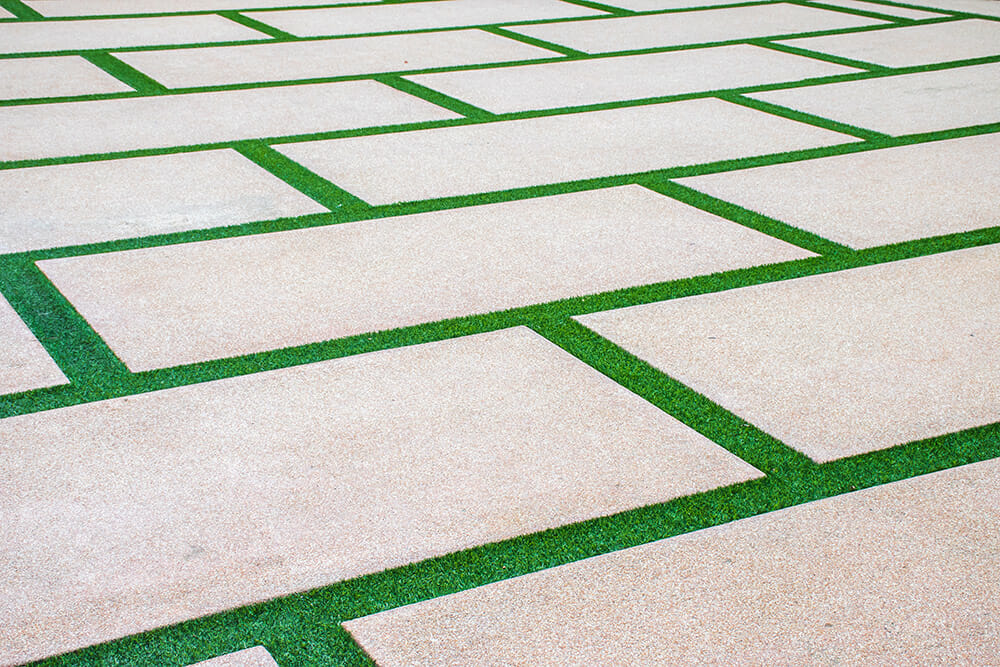
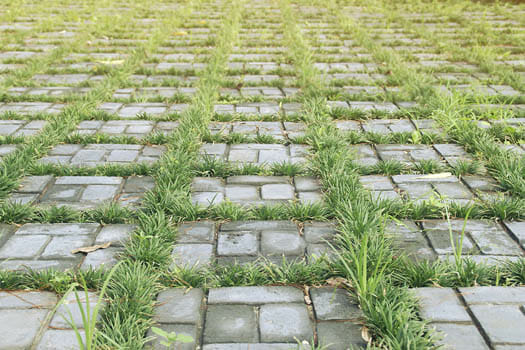
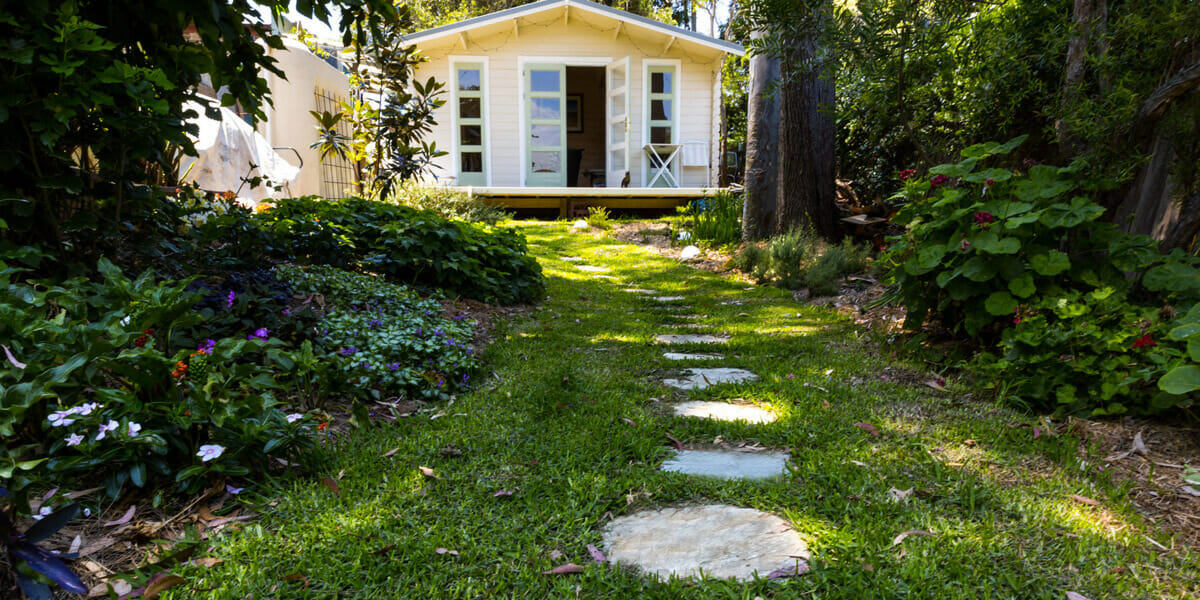
Another way to avoid weeds altogether is by constructing the stone pavers correcting and planting ground-cover between the pavers as a way to crowd out weeds.

Choose an appropriate ground-cover

Continuing on the subject of ground-cover, while it works to crowd the space so it’s harder for weeds to grow, planting ground-cover doesn’t necessarily eliminate weeds completely.

Some weeds are stubborn and will push through regardless and if they do appear, handling them can be a big challenge.

Here we would recommend avoiding thin ground-cover because it will give weeds an excellent opportunity to grow and flourish. On the other hand, if you keep your ground-cover dense and concentrated with foliage, weeds will stand next to no chance to grow. You can achieve thick ground-cover by frequently watering and replanting foliage when the ground-cover thins. The ideal density of ground-cover would resemble a carpet but also not be so invasive that it appears that the pavers are swallowed by the foliage. Achieving the perfect balance can take a few years so be prepared to invest in it for the long haul.

When choosing plants for your ground-cover between the pavers, find ones that are tough and durable as they are more likely to  withstand being trampled – occasionally or frequently – by humans and animals. Tough and durable plants also have more chance to stand the test of time and will save you the effort and resources required to frequently replant them.

You also want your ground-cover to involve as little maintenance as possible. So let’s have a look at the best plants for full sun, part-sun and shady areas.
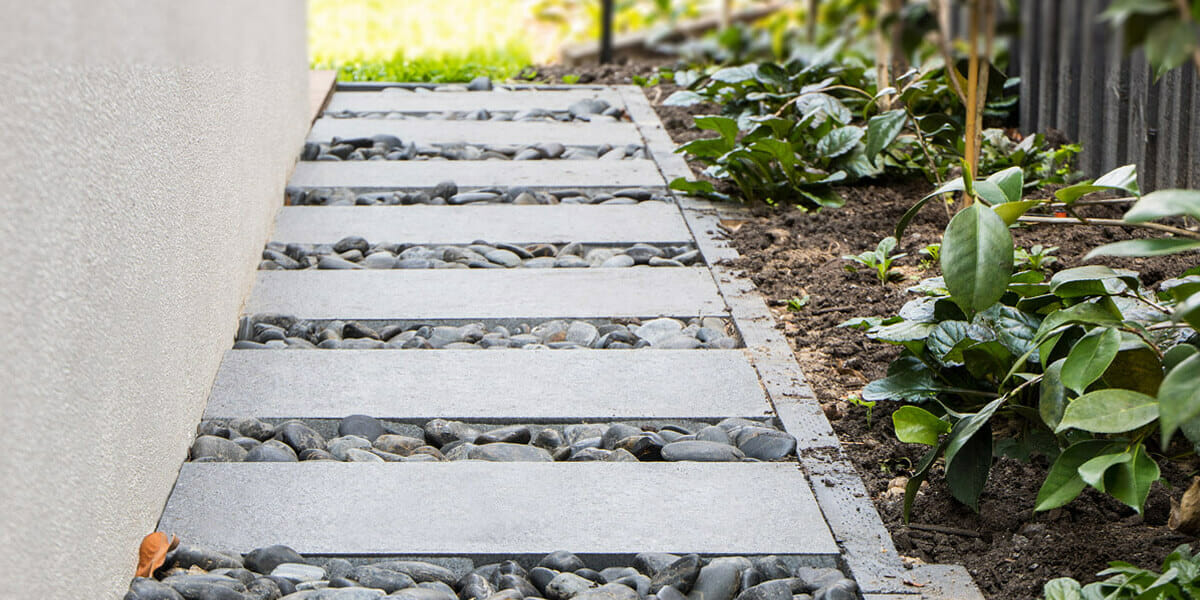
 

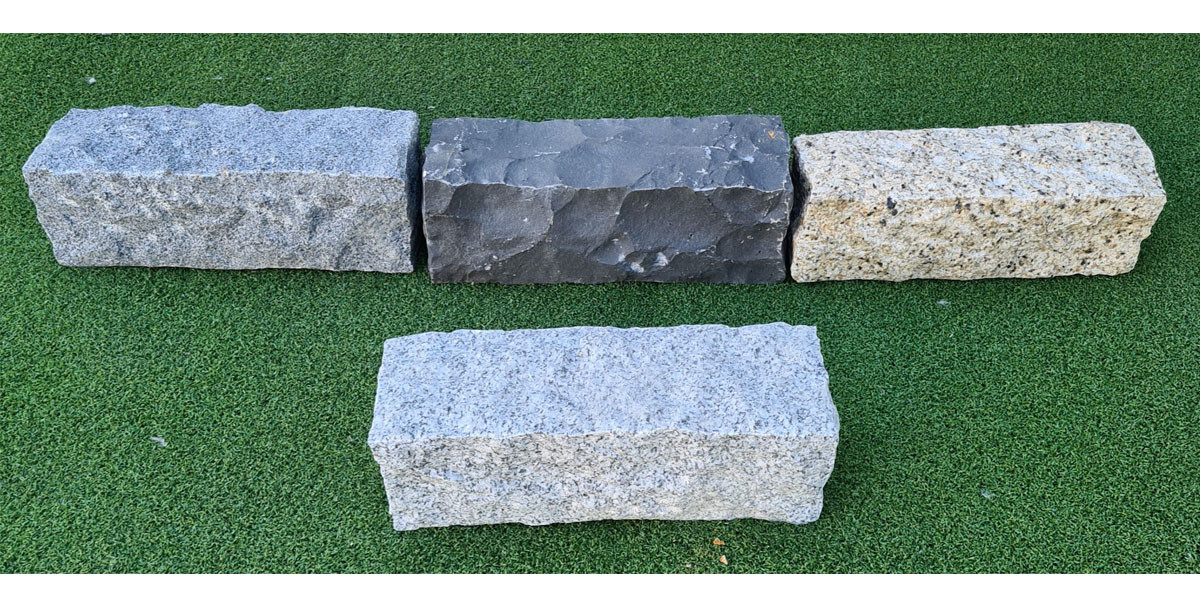
Raven Granite Stepping Stones

**Natural Stone Large Stepping Stones

Recommended plants

Prior to choosing which plants to install as ground-cover for your project, it’s important to consider the environment that it will grow in. Below we have suggestions for the best plants for different environmental conditions:

Ground-cover for full sun areas

  • Creeping thyme – This is definitely a premium ground-cover plant! It’s petite and available in many varieties, so chances are you’ll find a version of it that best suit your needs. Something to consider with thyme is that some varieties do have spikes that can grow tall enough to stub toes and become a tripping hazard. Also, the flowers – while pretty – can attract bees (which is also good for your garden), however this might not be the ideal solution for your primary pathway or the entrance to your home.
  • Dymondia – Flat and tidy with slender leaves, this plant is green on top and grey underneath which is why each leaf’s curl creates a lovely colour-variation. It’s also a low maintenance plant that requires very little watering. A perfect solution for ground-cover in full sun areas!

Ground-cover for part-sun areas

  • Chamomile – The petite white daisy-style flowers definitely evoke a meadow-like ambience wherever they are planted. However, while they are extremely pretty, there is a downside. Chamomile requires moderate watering and once the flowers appear, it needs to be regularly trimmed.
  • Goldmuss sedum – A dainty succulent, the lush green leaves and bright yellow flowers that bloom in spring are a tidy alternative for ground-cover.
  • Jewel mint of Corsica – Though this plant also requires regular watering, the miniature green leaves strongly resemble moss. But unlike moss, as you walk along the path, the leaves will release delicious wafts of mint.
  • Blue star creeper – Flat, green leaves with starry blue flowers, that despite its delicate appearance, this ground-cover is quite tough which makes it ideal for pavers with high foot traffic.
  • Irish moss – Requiring virtually no maintenance and resembling moss, Irish Moss grows quickly in a uniformed texture.
  • Grass – Yes, lawn grass is an excellent alternative for ground-cover, especially if pavers are large and installed with a good distance between them. However, grass requires watering, fertilising and mowing so it is considered a high-maintenance option. If you are stretched with time, it’s not recommended as a ground-cover option.

Ground-cover for shady areas

  • Baby’s tears – Resembling clovers, this plant has petite, bright green flowers and with enough moisture, will run perfectly through the crevices of your ground-cover.
  • Sweet woodruff – This plant has larger leaves than the others, but with small white flowers. While it makes for a pretty ground-cover, it does tend to spread very quickly so be wary when installing it in areas where you want minimum maintenance.
  • Mondo grass – Fancy yourself a dark green carpet all year round? Mondo grass is perfect for you! While slow to grow, once fully grown, it’s an excellent choice for your ground-cover.

Avatar 9

Other tips and tricks

There you have it!

A selection of plants you can install as ground-cover to keep those pesky weeds at bay.

Of course, it’s not just about what you plant, it’s also about managing the landscape, especially when it comes to weeds. Some ways you can do this is by adding mulch where possible because it prevents light from reaching the weeds and essentially acts as a suffocating blanket. An added bonus is that mulch holds the moisture in the ground that is required for the plants to thrive.

If perchance you need to pull weeds, water them first. Pulling weeds is much easier when the soil is moist and it’s much more effective as you’re likely to get the whole root system rather than just the top bit, and this stops them from growing all over again.

Regardless of how you choose to control them, everyone can agree that weeds are pesky garden fiends. So get on top of the situation early and remember, prevention is the best form of protection.

If you need any assistance or have any questions about the information above, or would like to browse our natural stone paver collection, reach out to our stone experts online or at 1300 560 560. We would love to help you bring your dream project to life!
Tips for Designing A Sandstone Garden Path

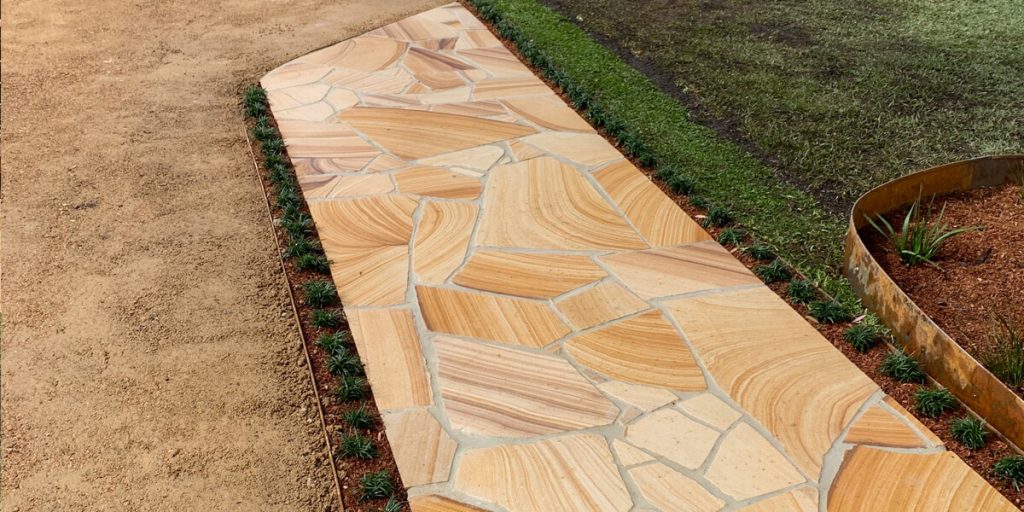
Sydney Sandstone yellow banded crazy paving

Walkways are as practical as they are beautiful.

They can be used to divide the garden and also ensure that your grass is protected from any unwanted trampling.

If you will be using your garden frequently, a path also gives your family and guests a stable surface to walk on and directs their eye-line and way around the backyard.

So whether you want to create a full walkway or add stepping stones set in grass, creating a sandstone path isn’t as hard as it seems.

Citrine Stepping Stones 3

** Citrine Quartz Stepping Stones

Why do you need a path?

One of the main reasons to create a path through your garden is to give people a stable surface to walk on. Without a walkway, the grass, soil and surrounding plants will simply erode over time as people trample over it. Also, if the ground is wet, a pathway reduces the risk of slippage and people ruining their shoes.

But there are plenty other reasons to install a path in your garden. Some of these include:

  1. To define an area – for example, a dining area or a relaxed sitting area
  2. To direct traffic – if you have a specific area you want to be used more than another area, a pathway directs people towards it.
  3. To create visual interest – it’s great to have grass, plants and trees in your garden and adding a path adds textures and layers to your garden, breaking up all the green with something contrasting or complementary.
  4. To draw the eye to an area of the garden that usually goes unnoticed.

In fact, sometimes pathways are embedded purely for aesthetic reasons – to add an element of drama or contrast to your backyard.

Getting started

Before you start building your path, your first course of action is to decide the purpose you want for it and whether you want to build a full walkway or if stepping stones will suffice.

Next, draw it out so you can actually see your ideas on paper. If you’re more tactile and want to see how the path will physically look, grab a garden hose and physically lay it out.

Some other important considerations include:

  1. Will it be a high traffic area? If so, it’s a good idea to make it wide enough for two people to walk side-by-side.
  2. Will the path divide the garden in some way? If so, carefully decide how to place it.
  3. If it will suit your aesthetic, consider adding some curves to your design. That way, it can be both practical and scenic.
  4. Will it cope with all types of weather? For example, paths made from sandstone are a popular choice amongst Australian homeowners and designers alike, however sandstone is also a porous stone and if the path is exposed to wet weather very often, it can erode over time.
  5. Ensuring that your chosen design nicely complements the rest of the landscaping instead of detracting from it. If we use the example of sandstone, you’re on the right path again (pun intended). Why? Because sandstone is an elegant stone with a natural appearance so it tends to effortlessly blend in with its surrounding elements. Its timeless appeal also means it works well in both modern and traditional gardens.

sydney sandstone stepping stone

Next steps

Once you’ve decided on the design, it’s time to get out your measuring tools and materials. A rule of thumb we always suggest is to always overestimate. Why? Because you never know what may go wrong when you start laying the path and so it’s always better to have extra materials on hand so you can troubleshoot as you go. Another reason you want to overestimate is when you finish the construction, it’s also handy to have extra stones on hand because if in two years’ time something happens and you need to replace a tile, you’ll have a perfect match (from the same batch) handy!

So you have the materials and tools, now you’ll actually have to lay out the path. Before permanently securing your pavers, arrange the pavers or stepping stones in your in your desired design. Whether you’re installing a full path or stepping stones, this helps you visually see what the final layout will look like and it it needs any tweaks, you can make them without needing to rip anything out in the process. If you’re using stepping stones, test out the path and take a walk along it to make sure the pavers are spaced correctly and aren’t wobbling. Then adjust as necessary.

Armstone - Designing A Sandstone Garden Path (2)

Before you lay the path or stepping stones, remember to pad the ground underneath the pavers with the correct material. Most of the time, some sand-cement screen is a good enough foundation, however, cement is also an equally reasonable option.

The last step is to lay the pavers. Of course, you can get experts to help with this part (well, you can get an expert to take over this entire process if you really wanted to) but if you’re doing it yourself, make sure you properly prepare the turf and surface underneath it. The trick of the trade here is to make sure you’re installing the pavers at the correct height as well because if you install the pavers too low, the grass will constantly grow over them and the pathway will just disappear from view. On the other hand, if you install them too high, you won’t be able to push a lawnmower over the stone to cut the grass. It’s a fiddly, and important, matter. So be sure to get it right or hire someone who can help you.

Avatar Bluestone Stepping Stones

Some final tips

Whether they are a full walkway or a set of stepping stones, paths add an additional layer to your garden and help direct traffic to specific places. They’re also a lovely and gentle way to divide the space into different sections.

If you are creating a garden path using sandstone pavers or stepping stones, it’s all about embracing the elements of the landscape and complementing the style of home. The beauty about sandstone is that it works with almost every type of garden and every type of home, whether it is modern, grand, humble or eclectic.

If you’re ready to get started and have questions about sandstone pavers in a variety of colours, sizes and textures, at Armstone we stock them all!

Reach out to us online, call 1300 560 560 or visiting our Sydney showroom in Glebe.

We’ve over 10 years experience helping our clients bring their paths from paper to life.

We love this stuff and would love to help you too!

4 Things to Get Right When Creating the Perfect Outdoor Dining Area

Armstone - Outdoor Dining Area

Outdoor dining spaces are the perfect way to grab some fresh air while enjoying a delectable meal. And during the festive season, having the perfect dining area means you can even take the party outdoors.

So how do you go about creating a warm, inviting, practical and useful space all in one area? Here are some tips and tricks.

Location

There’s no point having a dining area so far away from the kitchen that you never use it. By the same token, there’s always a use for a dining space. So no matter whether you have a sprawling backyard or a small nook where a table will fit, find somewhere and create the perfect outdoor setting.

If you have a large backyard, it can be tricky to find the perfect spot. Consider how you want to divide the outdoor space. You may even find you move the table around a bit before settling on one location. Finding that elusive perfect spot means taking into account the rest of the outdoor landscape and how the dining area will complement it.

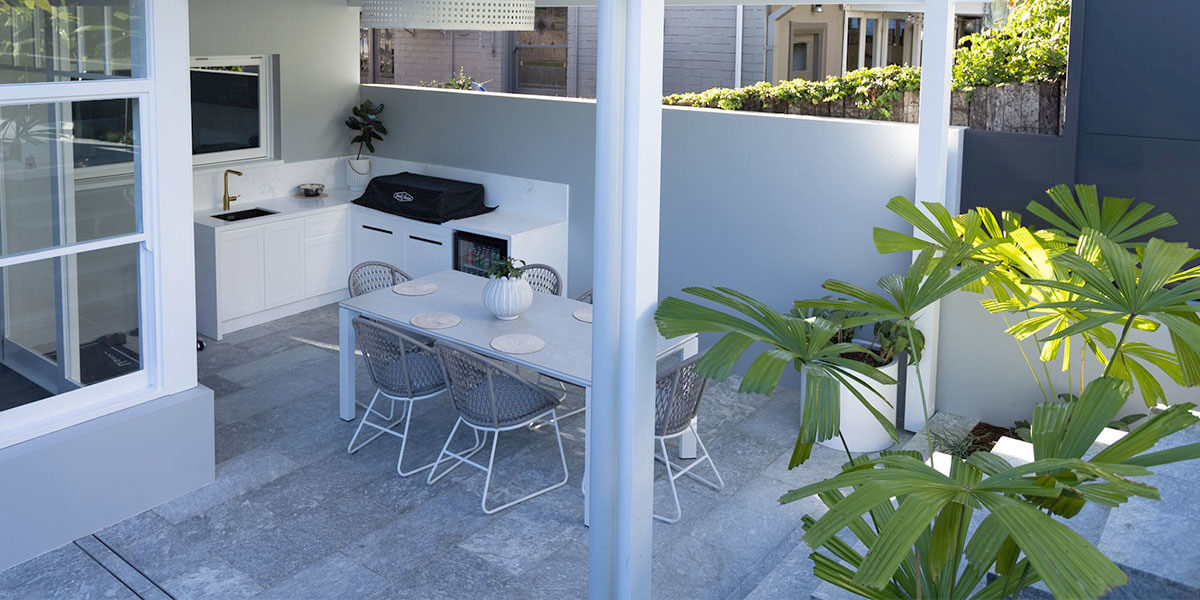
If it can’t be close to the kitchen, at least try to get it as close to a door as possible. This makes it easier to transport food, crockery and drinks. Alternatively, consider putting in an outdoor kitchen so you can cook outside – everything will be at your fingertips.

Another element to consider is the shelter. If an area is open to wind, rain or direct sun, sitting outside may not be so pleasant.

And finally, there’s privacy. Who wants to be right on top of their neighbours? Creating a bit of space between your common fence and your dining area means you won’t be disturbing your neighbours if you’re a bit rowdy and it also means they won’t be able to hear every word you say.

Design

There is a key question here: do you want your dining space to be an extension of your indoor area or a completely separate design with its own style and theme? This ties in directly with the location – if the area is close to the house, ensuring it’s a seamless transition from indoors to outdoors may be the way to go. However, if the space is at the other end of the property, you may have a bit more flexibility in terms of the style and design.

If you’re keeping the theme the same inside and out, consider finding a similar table and chairs. If you can’t do this, perhaps use similar accent colours so it ties in nicely.

If you want to give it an exotic luxury feel, pop some palm trees around and create an oasis. And if you plan to make the dining area stand out, consider pavers and stacked stones, or install a water feature! Find a style that suits your outdoor space and your personality and really stick to it.

Another way to make your outdoor area really shine is to use natural materials such as stone or timber for the furnishings. This creates a seamless, elegant style. They’re also exceptionally weather resistant which is a must for outdoor areas.

Frostine Marble pool Pavers

Function and flexibility

When it comes to entertaining outside, it helps to have flexibility in the function of your furniture. This means, finding a table that can seat six or eight, but extend to 10 or 12. This means you can sit and enjoy the great outdoors if it’s just your immediate family or even when you’re having a whole dinner party.

If you only have a small space, consider finding a small table that can be tucked into a corner with some folding chairs that can be brought out when needed but tucked away when no longer required.

In terms of seating, find chairs that can double as a seating area. Benches with cushions on top work perfectly.

When we look at functionality, you have to consider whether the outdoor space can be used all year round. Perhaps the most important element is whether the area is under cover. If not, can we put a pergola in or a retractable awning? This means come rain, hail, wind or extreme sunshine, the area can be used. It’s also key to have some form of heating element. If you can’t put an outdoor heater or fireplace there, definitely provide guests with blankets on those colder evenings.

If you don’t want much maintenance and you’re sick of mowing the grass every weekend, then you can design a functional yard with pebbles, stone pavers, and some groundcover to soften the space. This is also a great way to conserve water and add value to your home. Call us today with any questions you have – we’re here to help you with your landscaping needs.

Lighting

What good is being able to sit outside if you can’t even see each other across the table? While a star-studded sky sounds romantic and whimsical, if you can’t see your food, there’s a problem. Of course, there are numerous ways you can ensure there is enough light while still creating a mood. If you don’t want downlights or a pendant light, perhaps some wall-mounted lights nearby will work. If you want a lovely fairytale atmosphere, fairy lights will be your new best friend. And then, of course, there are lantern varieties. Whether electronic or candles, lanterns spotted around the table and garden area are a lovely way to create the right mood.

10 Secrets to a Successful Low Maintenance Garden

Secrets to a Successful Low-Maintenance Garden

Imagine if you will…

A well-kept garden, with bright green grass manicured to a reasonable height that has a neat pathway running through it, leading to a patio and an assortment of colourful flowers.

This image might conjure an array of tasks you need to do on a daily basis to maintain the picturesque garden. However, we want to propose this: you can have a beautiful garden and it can be easy to maintain.

That’s right – there are plenty of ways to reduce maintenance and, in turn, make gardening enjoyable. You see, a low-maintenance garden will help you can eliminate (or at least reduce) repetitive chores like mowing, trimming, edging and watering plants. In fact, you can make a stylish garden that only needs a few hours of maintenance each week.

Interested in how you can achieve this?

Sit back, relax and dive into today’s article and the 10 secrets to creating a low-maintenance – yet beautiful – garden.

1. Reduce grass or install artificial grass

Mowing the lawn and maintaining it can take a lot of your time. You can reduce this by minimising the amount of grass in your garden by installing pebble paths instead of grassy walkways. Pebble paths are also helpful because they allow water to drain freely, stop weeds from growing through them and don’t require weekly maintenance.

Another way you can reduce the amount of grass in your lawn is by surrounding your trees with plants instead of grass. Woodland plants are ideal because they easily thrive around tree roots.

If you are completely pressed with the time required to maintain a lawn, consider replacing natural grass with an artificial lawn. This way instead of watering, feeding, or mowing on a weekly basis, all you have to do is keep it clean by occasionally vacuum it.

Kreis Bluestone Circular Stepping Stone
** Kreis Bluestone Circular Stepping Stone

2. Create paths and seating areas with stone pavers

One way you can reduce the maintenance hours required to look after your paths and seating is by making the paths wide and big with soft and simple lines, built from structural porcelain pavers or natural stone pavers. This way, you can keep these areas of your garden weed-free and all you need to do is hose them down or brush away fallen leaves and debris when required.

Another simple trick of the trade that helps to minimise the time spent cleaning your garden is by installing your paths and seating in areas that get full sunlight where they can dry faster if (and when) it rains. If you place the seating or paths under trees or damp and shady areas, they will get wet and slippery and will need regular pressure washing to keep them clean and free from mould.

Avatar Bluestone Stepping Stones

** Avatar Organic shape Bluestone Stepping Stones

3. Sprinkle compost on your garden beds

Simple ways you can keep your garden thriving is by feeding the soil in your garden beds with compost, mulch or compost tea. Compost provides your plants with vital nutrients to keep them thriving, alive and healthy. You can also conserve the moisture in your garden bed, suppress weeds from growing and balance the shifts in temperature by applying a 5-10cm layer of mulch to your garden, twice a year. This way, your garden will only need minor watering, feeding, and weeding to keep it looking beautiful and nourished. As for compost tea, you can spray an aerobically brewed tea on poor soil to efficiently improve its texture and tilth.

4. Choose plants that suit your climate and soil

Another way to reduce the amount of time you spend tending to your garden is by choosing plants that suit the type of climate you live in. For example, If you live in a hot, dry climate, pick plants that love this kind of weather. If you live in a cold, wet climate, choose plants that love this type of weather. Next, if your soil is acidic, choose plants that thrive in acidic soil.

In the same vein, choosing native plants is always a winner because they have proven time and time again that they thrive in the climate of your area. As a result, once planted they will thrive and help reduce the time and money you need to spend on watering, pruning and feeding them. What’s more, if you choose native plants that are drought-tolerant, you will instantly reduce your garden’s water consumption during long, dry summers.

Other plants that are easier to maintain in an Australian garden include perennials and drifts of ornamental grasses. These only need to be trimmed once a year and with plenty of ground-cover installed between them, you will be able to reduce weeds growing through them and the amount of watering required.

Frostine Marble Pavers

** Frostine Marble Pavers

5. Grow a variety of plants together

Growing a variety of plants together will help you maximise your space as well as reduce the time required to maintain them separately. You can combine evergreens with native border shrubs, perennials, and bulbs. What’s more, when plants are close to each other, less soil is exposed to the sun thus locking in moisture and inhibiting weed growth. You can also grow plants that bloom at different seasons and showcase their ornamental leaves throughout the year making your garden attractive and colourful all year around, without having to lift a finger more than necessary to do so.

6. Add lavender to your garden

Lavender is a very special plant for several reasons. Firstly, it will add a relaxing aroma and burst of colour to your garden. Secondly, if you live in a climate with limited rain, you only have to water lavender 1-2 times a week. And finally, lavender is a natural bug-repellent for your garden and if you own woollen clothing, lavender is an excellent source of keeping your clothes from being chewed by wool flies. Simply cut and dry some lavender flowers and sprinkle them over your woollen clothes when you store them away in the summer months.

7. Plant in large pots or containers

Another way to reduce the time and energy required to maintain your garden is by utilising pots and containers to help style your backyard and grow plants that won’t thrive in its soil. Pick plants that enjoy good drainage (like olives, lavenders, and ornamental grasses) and can go for long periods without watering (such as succulents, and drought-tolerant bedding plants). Plant them in large pots or containers that will retain moisture or use water-retaining gels to reduce the amount of watering required.

Potted plants make an ideal addition to a low-maintenance garden because you only need to water the plant in the pot and in the same vein, you can easily move it around to catch the sun, and rain or store it in the shade on a hot day. Potted plants also help add a splash of colour to different parts of your garden. Additionally, if you have pets, planting in large pots is a great way to deter your pet from digging them up and causing a mess and destroying your garden.

Frostine Marble Pavers

** Frostine Marble Pavers

8. Add edging around your garden with stone pavers

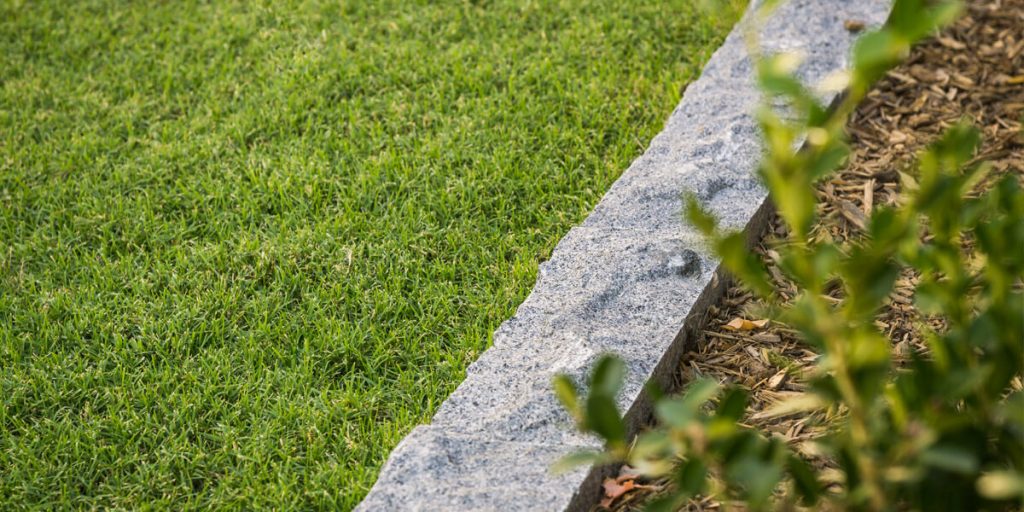
Building edging around your garden can help separate your grass and garden, making it look neater and easier to maintain. This detail will also make it easier for you to mow or sweep without having to edge your lawn. If you want to add character to your garden, consider installing the edging in a curved format. Curved stone pavers will enhance your landscape all year round and very easily transform your garden into a beautiful oasis.

9. Plant flowers, herbs, and other greenery in large beds

Instead of growing a little bit of this here and a little bit of that there, reduce your garden maintenance by growing plants and vegetables in large beds. This will keep them organised, reduce the growth of weeds, give them the necessary space to grow in a specific area and add depth to your garden. You might want to consider raising the garden beds or lining them with boards or granite slabs so that plants don’t get crushed by foot traffic, kids or pets. These types of garden beds look pretty while simultaneously promoting good plant health and allowing them to grow within a designated area where you can prune them at the same time, halving the maintenance required.

10. Use crushed stones or pebbles in your garden beds

A simple and cost-effective way to reduce the time and water required to nourish your garden is by adding crushed stones and pebbles as a mulch replacement. These can help conserve water and you never have to replace them. So if you want to spend less time watering your plants and replacing the beds, consider adding them to your garden.

white quartz pebbles

** Snow White Garden Pebbles

Creating a stylish garden that needs little work

There you have it!

10 simple and effective ways you can create a low-maintenance garden, because caring for a garden should be fun, not a chore. These tips can help you create a stylish garden that requires little maintenance. What’s more, with less work, you can spend more time sitting back, relaxing and enjoying the view.

If you need any assistance or have any questions about the best natural stone pavers, stepping stones, garden edging or garden pebbles for your low-maintenance garden, reach out to our natural stone experts at Armstone online, call us at 1300 560 560 or visit our Sydney showroom in Glebe.

We would love to help bring your garden to life.

15 Smart Ways to Keep Your Property Safe From a Bushfire

Keep Your Property Safe From a Bushfire

With summer around the corner, we are bound to have many beautiful days filled with sunshine and warmth along with friends and family gathered around the pool or BBQ.

But an Australian summer, while beautiful, can also turn very hot and very dry, increasing the chance of bushfires. As such, it is imperative that you, your family and your property are prepared.

If you’re not prepared, this article outlines 15 changes you can make around your property to survive a bushfire. You see, a well-prepared home can also be easier to defend. So whether it’s cleaning the gutters or keeping the grass and trees trimmed, here are 15 ways to make your property safe for the bushfire season.

1. Use crushed rock or Garden pebbles around your plants

Mulch or loose leaves can easily fuel fires. Instead, use crushed rocks or garden pebbles to cover the soil around your plants and garden.

Earth Natural Pebbles

2. Create firebreaks with tiles and pebbles

Garden edging is an excellent way to create a barrier and a defendable space in your garden. If you’re currently using timber edging around your garden beds, consider replacing it with an edging made from stone to decrease its potential to fuel a fire.

Garden Edging

3. Build walkways and seating areas


Any break in your garden can reduce a potential fire. One of the ways you can break up your garden is by building walkways with stepping stones and seating areas that are paved with stones and pebbles.

4. Keep plants away from your windows

Anything natural is highly flammable, so it’s best to keep it as far away from the house and windows as possible. As such, don’t install planter boxes under your windows as these can catch fire, burn down your windows and subsequently catch your house on fire. Instead, use the width of a stone path around your house as the ideal distance to measure where to pot your plants.

5. Plant in pots

Pot plants are extremely versatile because you can easily move them to be near your property in the winter and then far away from your property and in the garden, for the summer. To protect your home during the bushfire season, consider investing in or moving your plants into pots.

6. Remove fallen leaves, twigs, and debris

Any loose fallen leaves, twigs, and debris around your property can easily catch fire and then send flying embers to light up and burn your home and surrounding objects. So it is best to clean these up and ensure that they don’t cause unnecessary damage.

7. Trim the grass, trees, and shrubs

Dry long grass, trees with long branches, and overhanging shrubs can easily catch and spread fire. Consider mowing your grass on a regular basis, and pruning your trees and shrubs to keep them 2 metres away from your home.

8. Have a long hose that reaches around your house


While this particular point is not preventative and more reactive, in the unfortunate (and hypothetical case) where part of your property catches fire, a hose that’s long enough to reach around your house can help you put out the fire quickly and easily. A long enough hose will also help you cool down the roof and the sides of your home to make them less vulnerable to incoming flames and prevent any incoming embers from turning into bigger flames.

A few things to consider is to make sure the hose is fitted with a good nozzle and doesn’t leak. If you’re getting your water from a tank, ensure the pump is in a good condition so it doesn’t break down when you use it.

9. Clean your gutters

As we mentioned in point 6, leaves, twigs, and debris easily catch on fire and spread it fast. This goes for your gutters too so make sure to remove leaves, twigs and debris from them regularly because flying embers can take a hold of them and set your roof on fire.

10. Install gutter guards and a fire sprinkler system

You can further protect your roof and the rest of your property against a bushfire by installing metal gutter guards and attaching a fire sprinkler system to your gutters.

11. Repair your roof if tiles are damaged or missing

If your roof has damaged tiles, repair or replaces them. And if there are missing tiles, install new ones. This way, the roof will act as a buffer against the fire and stop it from spreading into your home. And because fire moves quickly, stalling it in any way you can give you more time to put it out.

12. Seal gaps in walls, under the house and around doors and windows


Further protect your home from flames and embers entering it by repairing and covering gaps in external walls, enclosing gaps under your house, and fitting seals around doors/windows to completely close any openings. Remember you want to stall the fire as much as possible and taking such proactive measures may seem a lot of work now, but they will give you that extra bit of time to protect your home in case there is a fire around it.

13. Install door and window screens

You can further protect your property from bushfires by installing fine metal mesh screens on your doors and windows.

14. Store flammable items away from your house

This one seems like a common sense point, however, it’s important to add because sometimes we might just overlook things – no matter how obvious they are. So ensure that you store your flammable fuels and chemicals such as painting solvents and methylated spirits in a shed outside your home. Building materials like timber and other flammable items like firewood should also be safely secured away from your house. Also, when you’re not using the LPG cylinder for your BBQ, the pressure relief valve should be facing away from the house.

15. Put a Static Water Supply sign on your property entrance

If your house has a swimming pool, dam, or tank, put a Static Water Supply sign on the entrance of your property. This way, firefighters will know that they can get water from your place to put out a fire.

Protecting your home against bushfires

Bushfires are dangerous and deadly, so don’t wait until the last minute to prepare and protect your property. Use the cooler winter months to get your home prepared and get your family involved so that when summer rolls around, you can enjoy it knowing that your property is protected just in case.

If you have any questions about stone pavers, pebbles and other ways to protect your home from bushfires, please reach out to our expert team at Armstone here. We have over 10 years of experience helping customers be prepared for many of life’s unexpected changes and can definitely help you too.

10 Great Stone BBQ Ideas

armstone - 10 Great Stone BBQ Ideas

An Australian lifestyle is synonymous with family and friends gathered together around a barbeque all year around, which is why having an outdoor BBQ is ideal for most home owners.

Even though many people see BBQ as a functional item on which they can cook, we will let you in on a little secret: BBQs can also be designed in such a way that they add beauty to the exterior of your home.

Below we have listed 10 great stone BBQ ideas to help inspire you when you’re creating a BBQ for your own backyard.

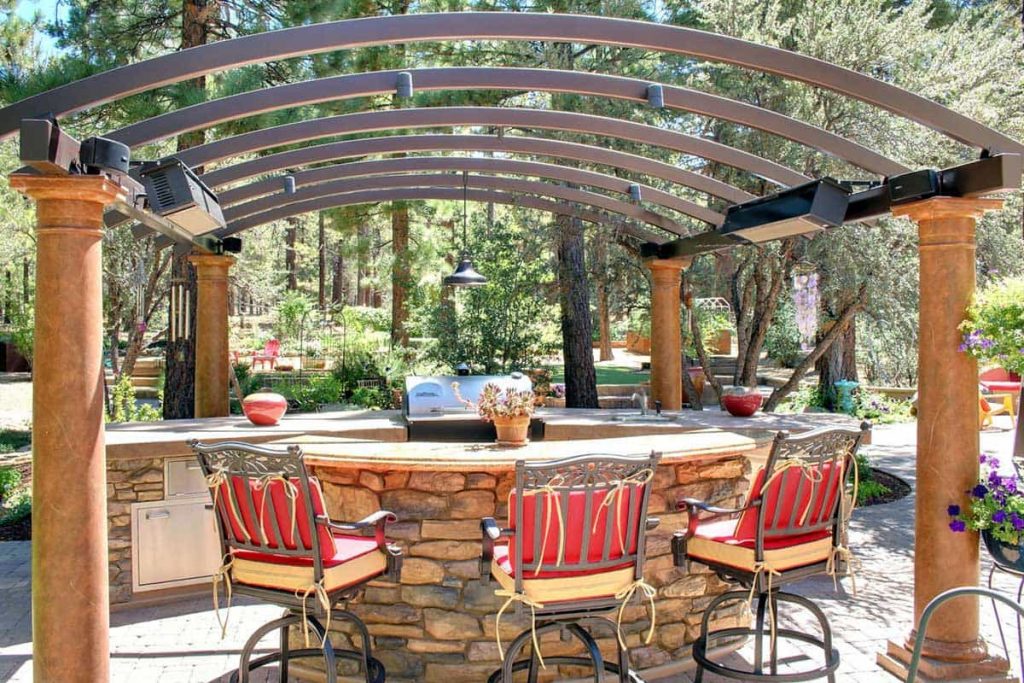
1. Build a BBQ into the stone wall

Does your backyard have a stone border wall? If not – have you ever considered building one? You see, a stone wall gives your patio extra space by keeping the grill off of it and it also creates an outdoor kitchen appeal. You can add a fridge and other kitchen items to this area and give it even more functionality. So you’ll end up with an area that looks great and also saves your patio space as well! It’s a win-win all around.

2. Add a stone fire pit with grate

If you’re looking to add something beautiful to your backyard, we highly recommend installing a stone fire pit. There is something magical about sitting outside on a cool summer evening or a cold winter’s night and toasting marshmallows over the fire. And if you want to make it into a BBQ, simply add a large grate over the top of a running fire and voila! You now have an outdoor fire pit / BBQ: one of the more affordable and beautiful options for an outdoor BBQ.

1 5

3. Create a stone chimney BBQ

If you want to create an area where the smoke doesn’t sit and build around the patio area, adding a stone chimney to your BBQ is the best way to do so. While it’s a luxury BBQ addition, you can BBQ right over the chimney, while adding any BBQ grill that you’d like under it. Extremely functional and time savvy.

4. Add appeal with a stone casing

4 2

Do you want to hide the grill or maybe have it blend in nicely with the rest of your patio aesthetic? Stone casing is the solution! It adds a beautiful appeal and you can leave the back open to reach the tank while covering the rest of the grill to match the patio design.

5. Install a built-in stone BBQ smoker

So you prefer to skip the grill altogether and just create a smoker? Easily done! How? With stone of course! Building a small smoker where you can put food inside and cook it slowly with a fire lighted beneath it will create delicious food for all your family and friends. Complete your outdoor kitchen area with matching your smoker with a BBQ look.

6. Add a stone BBQ island

6 1

Creating a central place where you gather and cook means that the smoke, mess and food can be contained within a central location – which also allows for easier maintenance after the cooking feast is finished. From a functionality perspective, creating an island in the middle of your patio allows you to grill and still be part of the party conversation. It’s also an eye-catching addition to your yard. Our one suggestion is that if you plan to build a large stone BBQ in your backyard, it may be a good idea to consult with a professional contractor to ensure everything is designed and built just right.

7. Create a built-in BBQ pit

Instead of building a BBQ on your patio wall, you can extend your patio and build a separate stone BBQ area. This gives you a separate area where you can grill your food and have the setting match the rest of your patio aesthetic. If you really want to enhance the overall appearance of your outdoor entertaining area, simply match your patio pavers to the stone when you add a built-in BBQ pit.

8. Stacked stone grill

Fancy something a bit more fancy? Let us introduce you to a stacked stone grill! This type of BBQ gives you multiple areas to use for grilling purposes and if you want to add extras, simply add them to the side.

8

9. Invest in an outdoor stone pizza oven

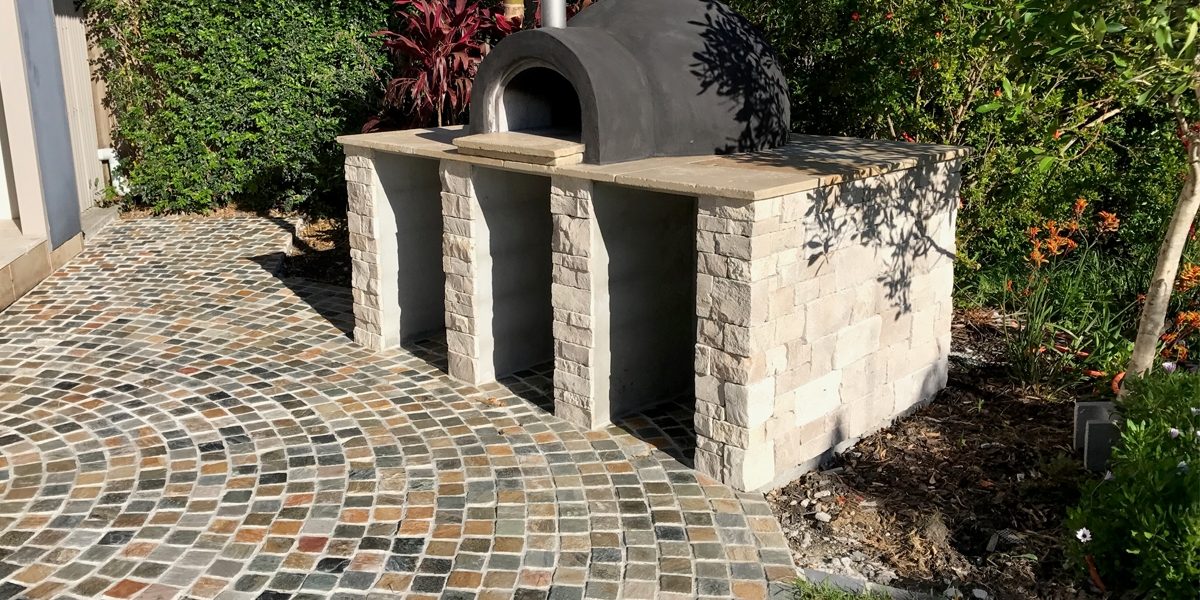
Who doesn’t love a traditional wood fired pizza oven? Most do and rightfully so! Wood fired pizza’s have a smoky deliciousness that runs through them that other pizzas don’t. And though pizza ovens are not your traditional grills, they give you a different way to heat up your dinner. These ovens reach the high temperatures required to cook delicious pizzas and the best part is that they look awesome in your backyard, too!

Bonza Quartz Cobblestones

10. Have a separate stone grill area

If you like to keep you cooking and entertaining areas separate, then simply create a separate stone grill area away from your patio or pool. When doing this, be sure to create a stone area to place the grill on and add side tables and shelves to keep your BBQing all organised.

There you have it! 10 great stone BBQ ideas for your patio and backyard.

Each of these options will add a beautiful appeal in your yard. If you are finding it challenging choosing which of these options would suit your home, consider your lifestyle and your current patio design. Do you want a more natural look? Do you prefer to keep the food prep area separate from the entertaining area or do you like it all in the same space? Additionally, consider your budget as well.

It’s quite amazing how you can boost the appearance of your backyard, create more functional space and have a great return on the investment by simply by adding a stone BBQ to your home.

If you would like any help making a decision or choosing the best stone for your BBQ, reach out to our experts at Armstone.

We have over 10 years experience with helping customers bring their dream backyard to life.

We would love to help you too!

How to Lay Natural Stone Pavers? Informative and Technical

Oyster Limestone Pavers

This is a very good question because installing stone pavers can be quite challenging.

On top of that, you may have found there are a lot of different opinions on the “correct” and “best” method of installing natural stone pavers.

As with any industry, there are also many “techniques” (read as ‘shortcuts’) that can save time and money.

Now, these are all well and good.

Until something goes wrong.

When this happens, you will be left with devastating consequences for your home or commercial project.

This will add extra costs and time to fix.

Not to mention the added stress on your mental health.

Doing it properly from the beginning would be best, wouldn’t you agree?

This is why it’s important to take advice from those professionals who have a successful track record in the industry.

It’s equally important to invest your hard-earned money in products supplied by companies that have a track record for quality materials.

You see, it’s all part of the package.

If you want to create impeccable pavement, this involves investing in quality materials and quality workmanship.

Having one without the other will make a world of difference once the project is completed.

Also, cutting costs (or corners) may seem like you are ‘saving’ today.

But in reality, it is likely to increase ongoing maintenance costs or fork out lumpy sums for repairs in the long haul.

In this article, we will review four methods of laying stone pavers.

This will give you a solid foundation when starting your project.

When you speak to your installer, be sure to make notes and compare them with what we discuss in this article.

If you find inconsistencies, make sure to get another opinion.

If you would like additional support, we are happy to chat with you over the phone and assist with:

  1. Interviewing your installer for you.
  2. Cross-checking the information the installer provided to you.

Oyster Limestone 0Limestone Pavers – Installed by Just Clip It

When choosing an installer.

Make sure to take notes of what they say.

And compare their words with our methods below to see if there are any inconsistencies.

Also check out this article to understand why it’s important that your stone supplier works closely with an installer.

But now…

Let’s get to the technical things.

3 METHODS HOW TO LAY NATURAL STONE PAVERS


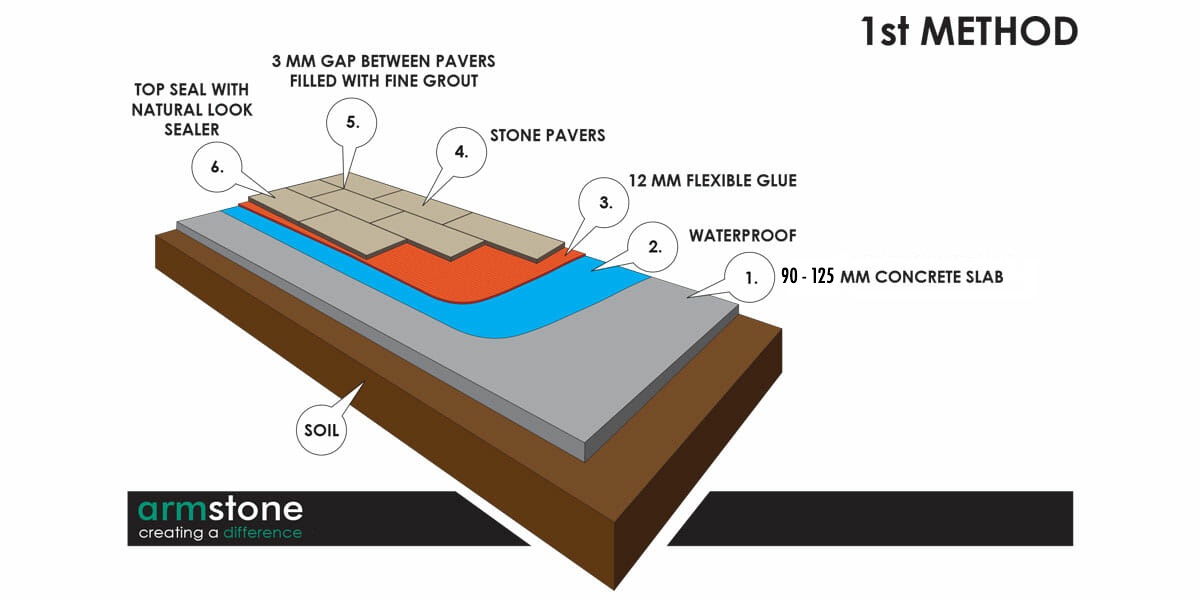
The 1st Method called “SLAB PAVING”- The best and most ideal method

Our preferred method for laying stone pavers is to always start with installing a concrete slab that’s 50-60mm high.

Let’s have a look at the steps involved:

  1. Install 100mm compacted road base footing.
  2. Pour a concrete slab min 90-100mm thick for foot traffic and 125mm thick minimum for a driveway. Once poured, allow 14 days for it to cure.
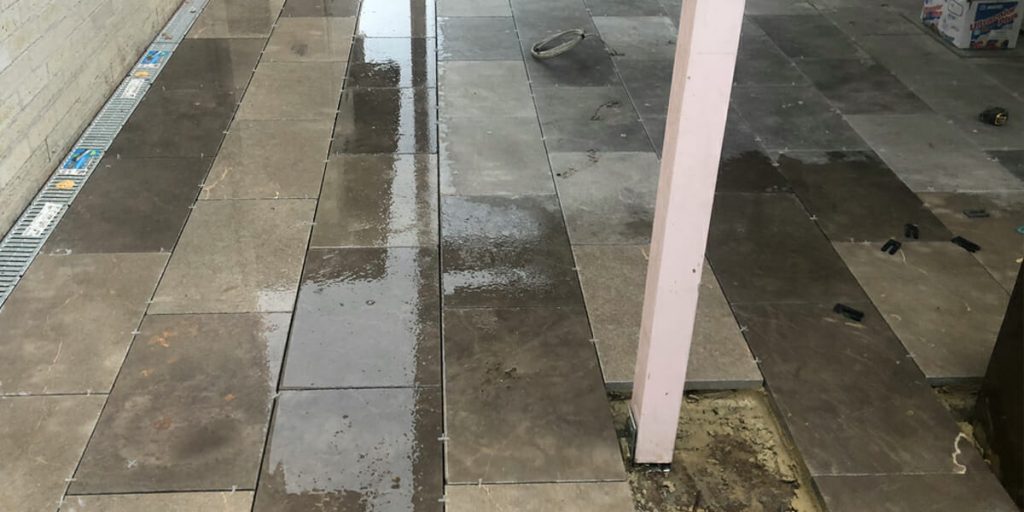
  3. Waterproof your concrete slab to avoid efflorescence. Efflorescence happens when salts come to the surface of the concrete. This creates a white icky, foam-like substance along the grout joints. As most natural stones are porous.If the concrete slab is not waterproofed. Efflorescence can come out of the pores of the stone.Otherwise, with stones like porcelain pavers, the salt will find any way to seep through.And this typically happens through the grout joints.

    But efflorescence can also occur when using a traditional mortar bed installation.

    Why?

    Well, there are salts and minerals found in the bush sand.

    We recommend using a product like Mapei Mapelastic Smart!

  4. Once your concrete slab has been waterproofed. Use your 12mm Notch Towel to apply a flexible glue, like Ardex x18, onto each paver. Allow a minimum 3mm gap between each stone paver for expansion and contraction.
  5. If you are working with highly textured surfaces, be sure to pre-seal them before you start grouting. Otherwise, it will be very challenging to remove any grout haze from the textured surface. To do this, you can use a specific non-bond-breaking sealant, such as the Aqua-Mix Pro Block. This product improves adhesion and lightly seals your natural stone which makes cleaning the excess grout easier.
  6. Once you’ve laid the concrete slab, waterproofed it, sealed the stones and applied the glue, you can finally grout your pavers! Here we recommend using either the Mapei Ultracolour Plus range or the Ardex FG8 with an added Grout Booster. The Mapei Ultracolor Plus products have an in-built sealer. This helps the stones resist efflorescence as well as fight against mould and/or staining. The majority of other grouts on the market do not have this added feature.As always, research the products to ensure they are a premium make.With helpful benefits for your home in the long term.
  7. Once you’ve finished grouting, you want to clean off any excess grout from your pavers. To make this process easier, we suggest using the Aqua Mix – Grout Haze Clean-UpSimply add this liquid to your bucket of water while you are cleaning the grout. After you’ve completed the initial clean, revisit the grout the following day. When you do this, you may find that some pavers still have grout haze left on them.This typically has a film-type look.Remove this with the Aqua Mix- Cement Grout Haze Remover.

    This product has Phosphoric Acid in it so before application, read the instructions to determine the correct mixing ratio.

    Call 1300AQUAMIX if you need any technical assistance with Aqua Mix products.

  8. Now that your pavers look schmick and clean, you can add the final touch with the top sealer! We recommend using a product from the Aqua Mix range called the Sealers Choice Gold. As a water-based sealer, it penetrates well into the pores of the stone and typically lasts up to 15 years. You are using nanotechnology and micro-band formulation. It also fights against active mould and is specifically created to have a low VOC rating.

There is nothing better than having an A-grade product with an A-grade environmental rating!

Congratulations!

Now that your pavers are sealed you enjoy your entertainment area with your family and friends.


Natural Stone Installation method 1


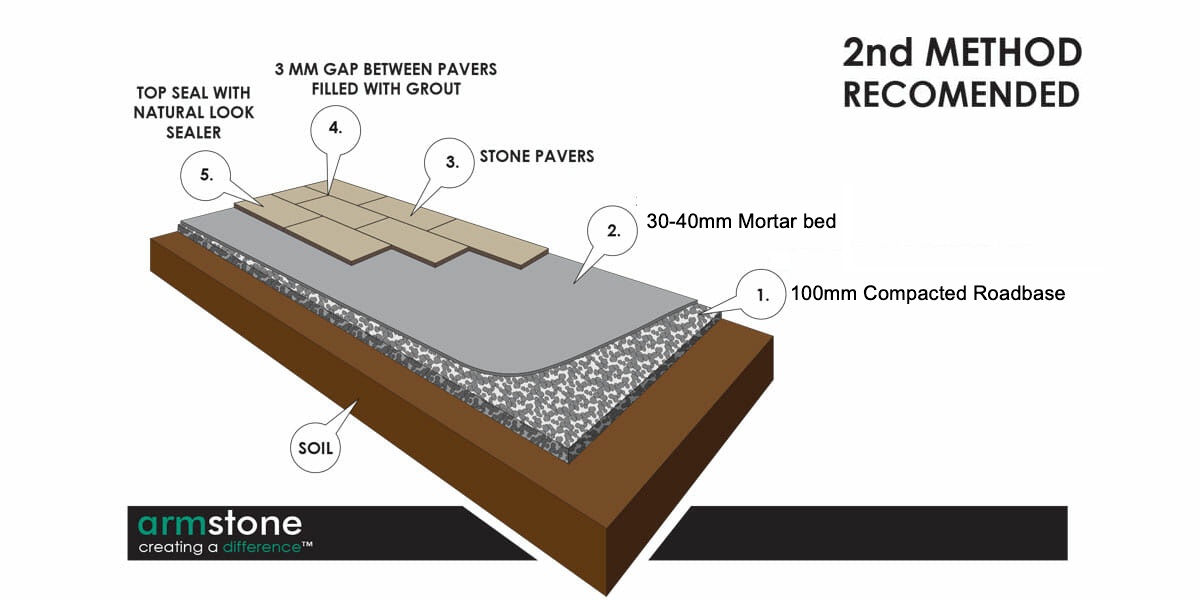
The 2nd Method called “RIGID PAVING” – Recommended method

When it involves improving one’s home.

We understand that this can become a costly investment.

And sometimes concessions need to be made along the way.

This is why we have this method as a recommended alternative to the first one.

This installation method can only be used on stones that have a thickness of 30mm and more.

20mm porcelains can be used as they are very dense and tough.

However, for any stone slabs that are less than 20mm or 12mm, this method is not recommended.

This is because this thickness is classified as a tile.

And, as such, must be installed using a tile adhesive on a sand cement tile screed.

Or using a direct stick method as referred to in the 1st point.

Here’s how this method works:

  1. Install 100mm compacted road base footing.
  2. Once the road base is set. The stone can be installed using a mortar bed installation. This consists of:
    – 3 parts washed bush sand: 1 part GP white cement.
    – 1 part water and or/additive.
  3. Once the mortar mix is made, the mortar can be trowled out onto the slab. Or on road-base footing. The mortar bed should be no more than 30-40mm thick. Using a bricklayer’s trowel the mortar can be spread evenly. Make sure there are no air pockets. Once the mortar is ready, the paver can be placed on the mortar bed.Tap into place using a rubber mallet.Only tap a few times.

    Roo much mortar or over-hitting can loosen the bond between the mortar.

    This will cause it to be drumy once set.

  4. Using a string line for correct fall(s) is recommended when using this technique. This will ensure that the stone is even and has correct falling.
  5. Once installed in its desired position. Leave a 3-5mm joint for grout. Fill any voids and air pockets around the perimeters of the stone leaving it completely sealed.
  6. Once this paver is set you can move on to the next stone installation following the same technique.
  7. Once the mortar is set and the paver is solid you can now walk on the area and proceed grouting.

While this method is less costly and more efficient.

It is still considered a quality installation for laying natural stone pavers or porcelain pavers.

Stone pavers Installation method 2


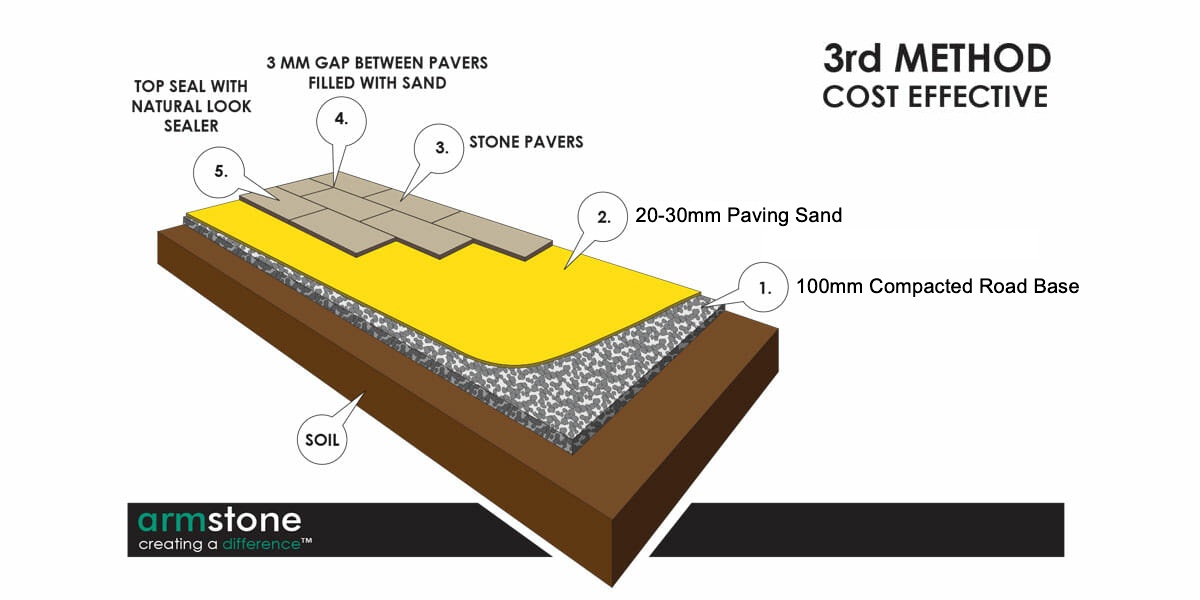
The 3rd Method called “FLEXIBLE PAVING”The most cost-effective

Another widely accepted and adapted method of installing stone pavers.

Is known as flexible paving.

This is traditionally seen and used on brick paving.

Any pavers or stones that are 30mm thick (or thicker) can use this method.

  1. Install a 100mm compacted roadbase footing.
  2. Install a 20-30mm paving sand/river sand bed.
  3. You can use screed rails or some form of rigid steel bar or pipe. This can be used as a gauge for your sand bed. Place the screed rails evenly apart (enough to get a large screed or level to be placed over the top).
  4. Set the two rails to the desired height and fall.
  5. Once set, infill with your paving/river sand. Scrape the sand back using the rails as a guide with your screed or level to create the perfect fall and surface.
  6. Repeat this until the area is complete.
  7. Once complete, carefully remove the screed rails. Then infill where the rails have been with paving/river sand to fill in the voids.
  8. Once the screed and level are complete you can begin by placing your pavers into position. And lightly tapping them down with a hammer.
  9. Leave a 3mm gap in between each paver.
  10. Fill the gap with Sydney sand/paving sand.
  11. Lightly mist the surface of the pavers. Sweep sand in the joints until they are flush with the surface.

This is by far the most cost-effective option.

It involves laying your natural stone pavers or porcelain pavers onto a substrate made of compacted road base and 20-30mm of River Sand.

An alternative to stone for this method would be installing the Armstone 20mm Structural Porcelain Paving range.

We recommend our structural porcelain paving range in this situation because the material is extremely dense and hard-wearing.

This is an ideal solution where using other (more natural) pavers may be somewhat dangerous.

While you still need to allow a 3mm gap between pavers (for expansion and contraction due to temperature changes).

You fill those gaps with sand, instead of grout.

As this method of installation will naturally evoke the movement in the base and pavements.

Grout will create visible cracks in the paving joints.

Ideally, you want to avoid this.

As with all budget options.

There are a few disadvantages to this method.

Namely:

  • Strong rain can wash off the sand between the pavers. This means you will need to regularly refill the gaps. Depending on Mother Nature, this may become a regular (and time-consuming) process and occurrence.
  • Weeds can easily grow through the grout joints because there is nothing stopping them from coming through. The time it will take for you to maintain the grout joints can cost you more than if you had invested your funds (and time) in methods 1 and 2.


Stone Pavers method 3


Conclusion

Unless you are in extremely dire circumstances.

At Armstone we recommend using methods 1 and 2 for laying natural stone pavers.

We suggest holding off on method 3 as long as possible.

Overall, installing stone pavers does require a certain level of expertise.

As such, we strongly recommend finding a professional who can tailor the ideal solution for your unique landscape.

You are, after all, working with a valuable asset.

A little piece of Australia: your home.

We wrote this article to serve you as a general guide and blueprint.

If you are looking for an installer, we can easily recommend one.

You can reach us on the phone or online here.

As always, thank you for reading this article.

It’s been a pleasure helping you!

And if you found the information useful.

Please share it with a friend.

Front Yard Fix Ups to Create a Good First Impression

Avatar Bluestone Stepping Stones

First impressions last a lifetime.

Which is probably why the saying is: “You never get a second chance to make a first impression.”

So what has this got to do with your garden?

More than you think.

You see, a good first impression of your front garden and façade can impact the market value of your home by tens of thousands of dollars.

Crazy, right?

In fact, your front façade and garden is the first dependent on how your neighbours and potential buyers perceive you and your home. So if you get this right, the value of your home may just increase.

So, where do you start?

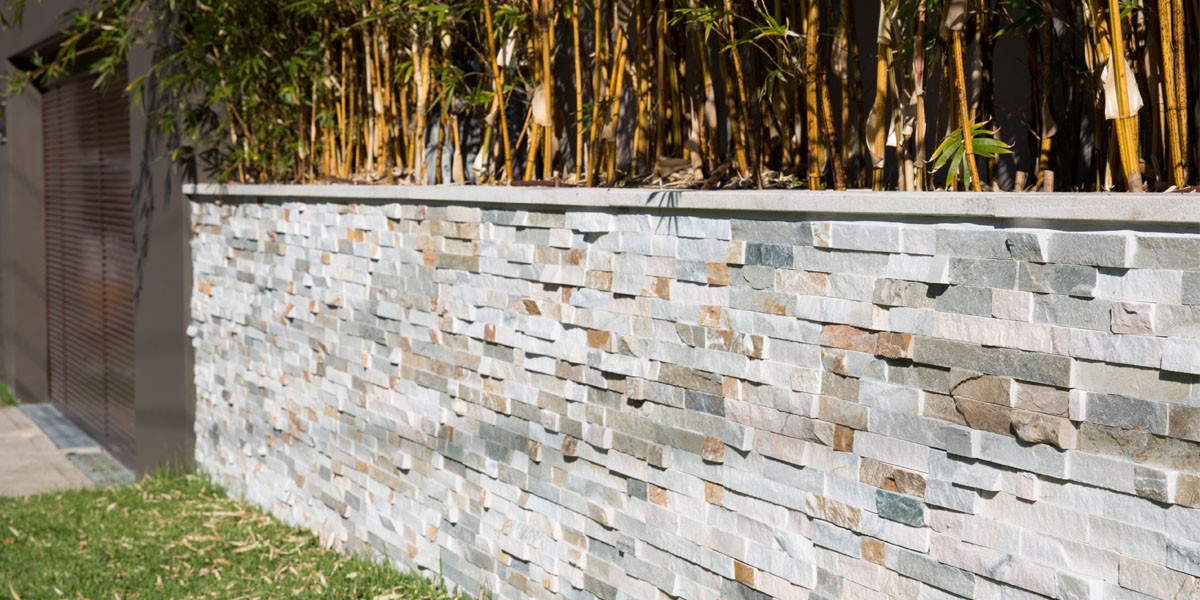
Improving your home’s appeal is as simple as giving your yard a little makeover, fixing the fence or simply slapping some paint on it or adding a stone veneer or wall cladding to liven an exterior wall. Of course if you want to make bigger changes, you can opt for a more more drastic makeover – all this depends on your budget, time and lifestyle.

We decided to put together an article outlining a few simple (and nifty) ideas on how you can quickly improve your front yard and create a better first impression for all those who pass by.

Clean it up

The easiest place to start sprucing up your front yard is actually the most obvious: i.e. doing a bit of spring cleaning. You see, regardless of how recently you’ve tidied up your front garden, there is always something more that can be done to beautify it.

Here are some simple checkpoints: Are your windows spotless? Have the weeds been pulled? How’s the grass looking: dry, too long, patchy? Does your furniture need to be cleaned or replaced? Take a good look at everything and make some executive decisions.

You can also transform your front yard by doing a few simple things like: Sweeping the pathways, fixing torn screens, trimming hedges, cleaning the gutters, throwing away any junk that has accumulated in the front yard and mowing the lawn. Take a good look at the actual house: Does it need a touchup paint job? If so, get it done. If you’re on a budget, a trick of the trade is to spruce up the trimmings with fresh paint: it might not seem like much, but it makes a huge difference!

Yes, cleaning up your front yard requires work. However, you can do most of it yourself by applying some elbow grease and taking the time to get it done. The best thing is that most of these tasks won’t cost you a cent and if you want to be extra productive, get the whole family involved!

Fix the pathways

Another simple way to spruce up your front yard is to look at your pathways: are any of them cracked or broken? If yes, then either fix them or replace them. Alternatively (if you don’t have any pathways) perhaps it’s time to install one? A pathway is an excellent way to divide your outdoor space and guide your guests around your garden, not to mention a perfect way to protect the natural vegetation from trampling foot traffic.

A pathway can provide a clean entrance to your front door and you can use pavers or cobblestones, stepping stones or pebbles to easily create one. Pathways have a way of drawing a person’s attention to a focal point which means that if other parts of the front yard still need to be tidied, people will focus on the pathway rather than those unsightly parts buying you more time to fix them. In essence, a pathway is a quick fix that adds another dimension to your yard.

As your pathway leads to your front door, if your doorsteps are tiled and in need for some TLC and re-tiling, make sure you get onto this quick-smart. The landing to your home sets the tone for your entire yard. You can even get creative and design the tiling to contrast against the path to make a point of difference. Finally, replace the old mulch surrounding the pathway with a fresh batch. This can make a huge difference to flower beds and allow the bright flowers to pop against the earthy backdrop.

Avatar Bluestone Stepping StonesStepping Stones Create a Clean Entrance to Your Home

Look at the parameter

The fences you have installed may do the job, but do they look the part? If the fence seems a bit haphazard and disjointed from the rest of your home’s aesthetic and design, we strongly recommend replacing it. A timber picket fence can give your home a more traditional “Australian Dream” backyard look. Alternatively, if your home has a more modern or contemporary aesthetic, use stone or wall cladding to give your home’s parameter a rustic look. Either way, the fence is generally the first thing people see so if it looks shabby, chances are that your visitor will also have a shabby first impression of your home. While you’re at it, do you need to replace or update your letterbox and/or house numbers? These features may seem only insignificant details compared to the big stuff, however, they can really change a person’s perspective and first impression of your home. Just think about how many times you’ve stopped to appreciate a beautiful letterbox or easy to see house numbers?

Bisque Stacked Stone
Wall Cladding is an excellent way to tidy up your front yard fence

Spruce up the lighting

Though you might predominantly have visitors call on your home during the day, let’s consider everyone who drives or walks past your home at night (not to mention all the guests who visit after hours or when daylight savings ends and it’s dark at 5:30pm at night). There’s nothing worse than a dark, dingy-looking home where you can’t see the next step in front of you – wouldn’t you agree? Luckily, fixing this is as simple as investing in some outdoor lighting. Whether it’s lighting the pathway with landscape lighting, fixing the porch down-lights or adding some sconces to the front façade: these little changes can make powerful statements. Lighting your front yard will add another magical dimension to your home and also make your passers by and visitors feel safe. If you have some trees or plants in the front yard you can also accent these with fairy lights. If there’s no electrical points nearby, don’t be discouraged, you can always install solar lighting: their light is a bit more subdued and they’re excellent for the environment so it’s a win-win-win solution!

Add some greenery

Now that your front yard has the main features set and spruced up, let’s review your garden: is there enough greenery or foliage to create an earthy and welcoming space? If you don’t have a lot of garden space, that’s okay! Adding potted plants can accentuate spaces and even make a statement. On the other hand, if you do have the garden space, add some garden beds with flowers or shrubs. This is where your creativity can really shine. Picking and choosing the types of plants you want, designing your garden and purchasing matching feature pots is an exciting and fun task. Before you get too carried away with the fun and creativity of it all, remember that the function of your front garden is to give a good impression and frame your house as the focal point. To achieve this, make sure that the elements you choose always complement your home and match its overall aesthetic and design. So if you have a modern home, choose greenery that is as elegant and contemporary as your exterior. If you have a traditional designed home, you can spruce up the space with older trees and romantic rose gardens. If you really want to make your front yard pop, add a water feature! You can buy these in a store and they are fairly easy to install. Water features give your garden a delightful focal point and add a point of difference from neighbouring front yards.

Earth Natural PebblesGarden pebbles make an excellent addition to your greenery and water feature.

Hire an excavator

Outdoor landscaping is a lot easier with the right tools and equipment. Hiring an excavator for small to medium sized projects is simple and affordable. It also helps you get the work done quickly. Whether you’re creating a path or installing a water feature, you’ll save time and see better results if you do it properly. When hiring an excavator, there are plenty of different sizes and attachments to choose from to suit your individual needs.

Small improvements go a long way

The amount of time and effort you will need to spend on improving your front yard really depends on what you had to work with from the beginning. But you really don’t need to spend too much time or money transforming your front yard to create a good first impression. As we’ve highlighted in this article, small and simple improvements really go a long to create a positive first impression in your visitor’s mind.

We hope you learnt something helpful and in case you have any questions, please reach out to our team of experts at Armstone online or at 1300 560 560. We’ve 10 years experience in the industry and love guiding our clients to make the best choices for their home improvement projects.

How to Choose the Right Garden Edges for Your Outdoor Space

Garden Edging

So you’ve nearly finished updating your outdoor space?

This is extremely exciting!

All that is left to do is complete the edging for your garden beds.

Sounds simple enough – right?

Pick the material, install and wipe your hands clean off the decision!

Done!

Well… it’s not quite as clear-cut as that.

You see, when your garden edges look good, they work with the outdoor space flawlessly – whether they blend with the garden or contrast against it. However, when the edging is wrong, it can be very wrong. And we’re not just talking aesthetically. Things that can go wrong include the edging not being able to hold the soil in place for your garden bed and this can spill over onto your pathway and create a mess.

So whether you’re creating a garden or updating your outdoor space, in this article we will review some of the things to consider when choosing the material for your garden edges.

But first let’s start with …

Why use garden edging?

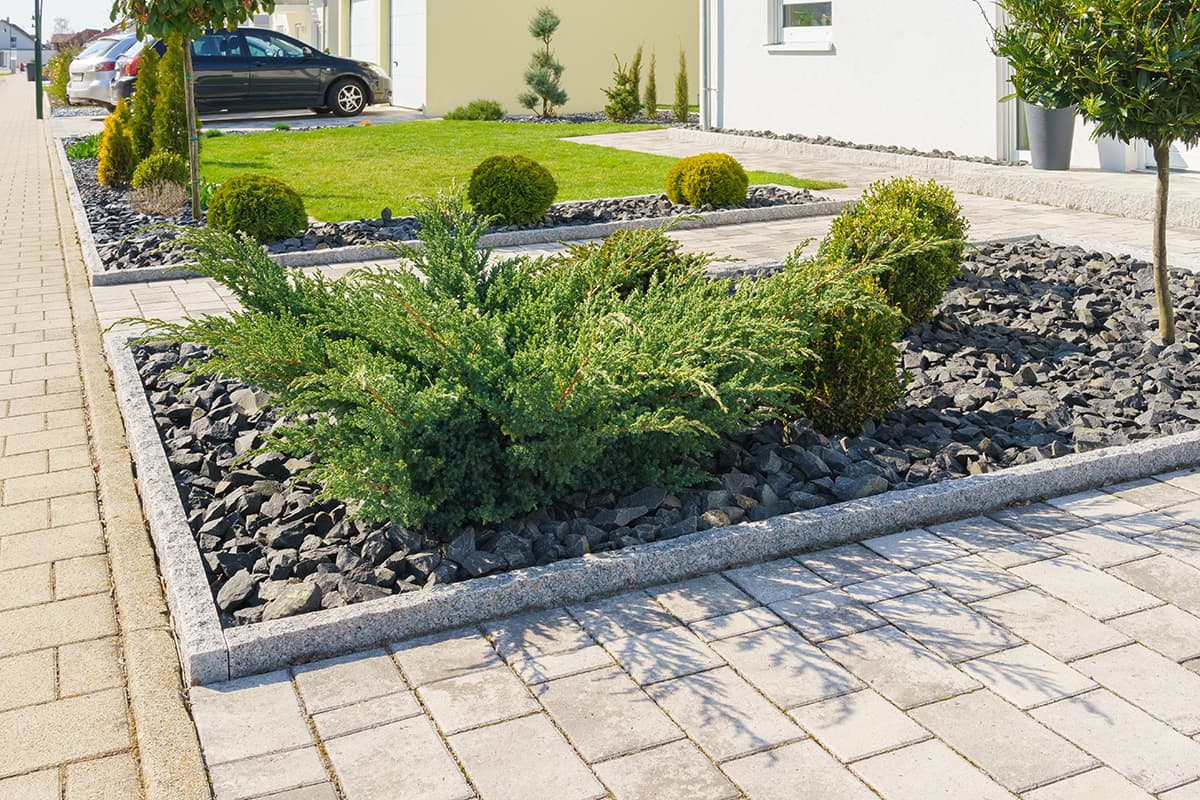
Garden edging is designed to define and divide spaces. Most commonly, borders are used between garden beds and lawns for easier garden maintenance. However garden edging can also be used within a garden bed to separate planting styles or to contain certain species.

Garden edging can also be used to define straight or curved pathways and can even function as a retaining wall to hold back soil where there is a change of elevation in your garden.

armstone - How to Choose the Right Garden Edges for Your Outdoor Space

Things to consider

Now that you have a better idea of what garden edging is used for, there are a few things to consider before starting your project. These include choosing a style and material and reviewing its durability and cost. If you’re not confident in your own ability to make this decision, you can always consult a professional. If you would like any help with this, reach out to our team of experts at Armstone’s headquarters in Sydney at 1300 560 560. We would be happy to help or point you in the right direction.

Style

While garden edges are mainly about maintenance, its still best to choose a style that matches your home and garden’s general decor as well as something that reflects your personal style. It is recommended to choose materials and colours that complement your current garden themes and match your furniture and general outdoor ambience. As with all style choices, remember that you can either choose your garden edges to be statement pieces or you can design them to blend inconspicuously with the rest of the home.

Durability

It goes without saying that anything you choose to install in your garden needs to have some sort of longevity. This might mean that you need to invest more in a particular material just so that it withstands the test of time, especially since it is for your garden – a space exposed not just to the elements like the weather but also lawnmowers, moisture, line trimmers and all other gardening products. As such, choosing a durable material and spending a little extra on it not only secures your space for the foreseeable future but it also gives you a peace of mind.

Price

A mistake we see many people make when renovating, upgrading or building their home is opting for the cheaper option only to end up with a broken product in a year’s time. Why is this problematic? Well, eventually, you’ll spend so much money on replacing the edging that you would have spent less if you had decided to invest a little extra to begin with. In saying that, we don’t recommend just choosing a material because it costs more. What we recommend is finding a material that is durable and matches your style and gives you the most value for your money. If you are working on a budget and are unable to invest in the type of edging you want across your entire garden, mix it up by getting the higher investment one for your key areas such as the entry to your home and entertainment areas and a cost effective option for the rest.

Choosing the material

With so many materials to choose from, it can be overwhelming to decide which one is the best for your project. Below we will review a few options and their best application.

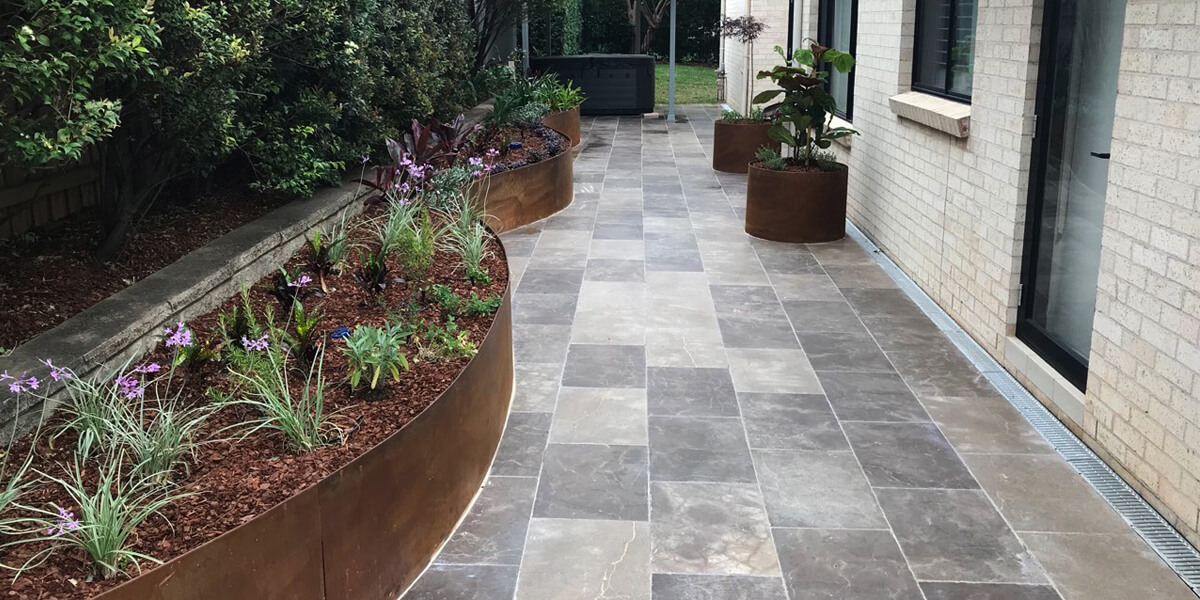
Simple Borders – Metal

When it comes to choosing a garden edging that is simple and subtle, metal is definitely your go to material. This is because metal (steel or aluminium) and plastic are easier to bend and as a result, they can be curved around garden beds or pathways with ease. These materials also tend to blend into the background and disappear against the grass and garden bed so it looks like there is nothing separating the areas. Finally, metal and plastic is easy to install and long-lasting.

Limestone Pavers Oyster

Bamboo

Ah, bamboo! You might remember the scene from Rush Hour with Jackie Chan and Chris Tucker where Chan says that bamboo is very strong? Well … it is. So this material definitely passes the durability test. It also works fabulously in tropical gardens or as an accent against traditional spaces. When it comes to garden edging, you can dye bamboo in different colours and cut it to different sizes to suit your needs. Not only is it durable, it’s also flexible and can be adapted to most spaces. Bamboo adds a neat finish to the edge of your garden or flower bed. It’s definitely an excellent choice!

Stone

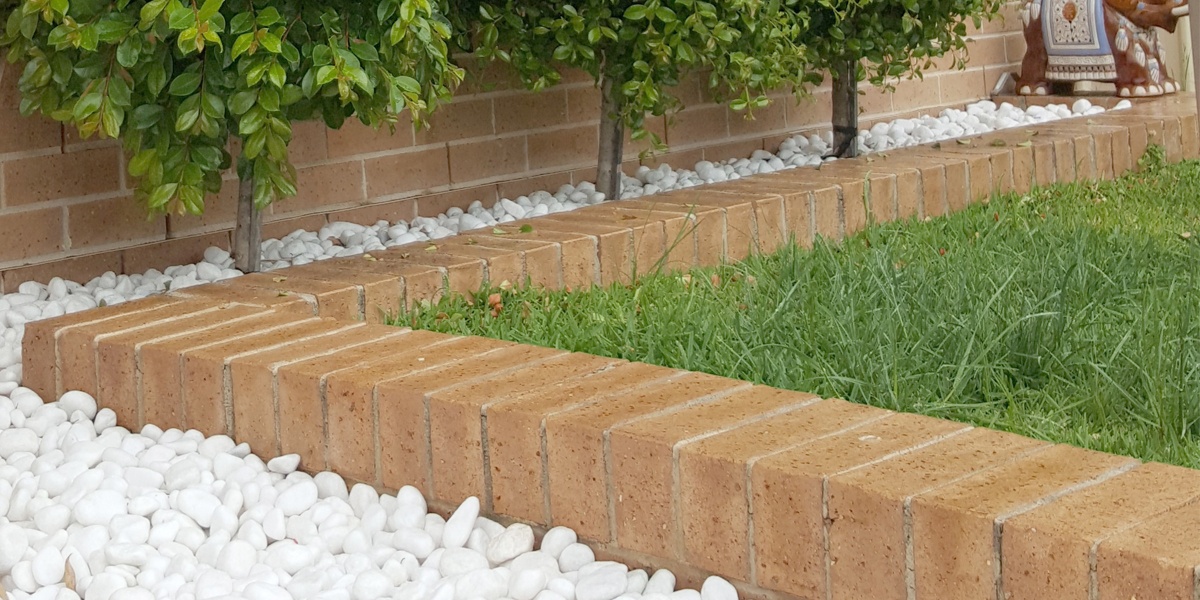
If you are looking for investing in a material that will 100% stand the test of time, stone and concrete are definitely ideal for you. These materials also suit almost all gardens and outdoor aesthetics: from more traditional spaces to contemporary and modern ones. There are also so many options within the stone category, from sandstone pavers to limestone or slate and stone cladding. If you desire versatility for your garden edging, then choosing to invest in either stone, concrete or brick, allows you the chance to play around with the edging design and bring a unique and custom look to your outdoor area. With regards to durability, these materials will hold up to almost anything that comes at them: from weather to garden tools. Finally, if you have a particular design that you want to stick to throughout your garden, installing stone, concrete or brick as your garden edging adds a level of consistency throughout because they can be used anywhere and still be as effective as ever.

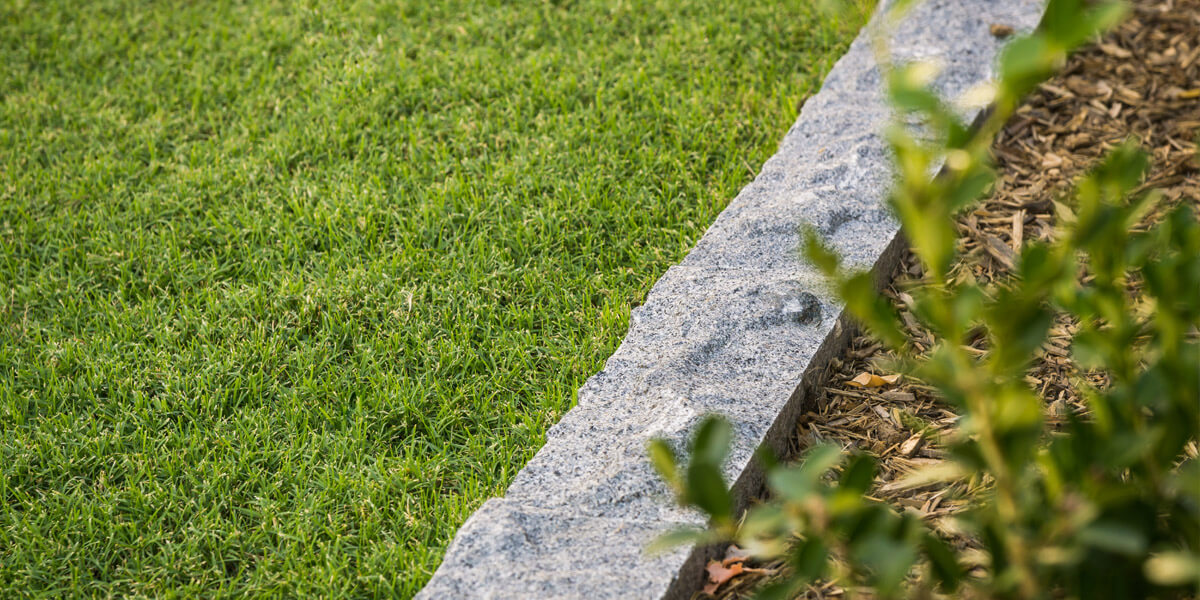
Stone Garden Edge

Call us to find out the cost of the above Stone Garden edging on 1300 560 560

Timber

When it comes to blending into the natural environment seamlessly, timber is definitely the most suitable choice. However, choosing natural wooden garden edging finishes has a few downfalls. Namely, when it comes to longevity, wood can fall short, particularly in wetter climates where humidity and moisture can damage the material’s composition causing it to deteriorate and require replacement. On the other hand, it’s cheap and easy to install, which is a big advantage. It’s also available in a wide range of styles, colours and varieties. If you’re set on creating a cohesive look across all areas of the garden without necessarily using the same material throughout, timber is a good choice. For example, you can use timber for the deck, the pathway and the edging but for variety, you can install different styles. Additionally, you can use timber to create a sense of drama and distinction, simply by using a larger piece of wood.

Wire

It’s simple and elegant and it looks great in cottage-style gardens: what is it? It’s wire garden edging! And it works best when it’s not actually being used to hold foliage in but rather for the purposes of stunning visual effect. The wonderful thing about wire is that it is extremely versatile and flexible which means that it can be shaped in a variety of ways like hooped or crisscross style, so even if your next door neighbour uses wire to edges their garden, yours will look completely different. In case you needed more advantages to use wire, it’s available in a wide range of colours and is exceptionally easy to install.

Strength and simplicity

Now that you are fully equipped with the information for your garden edging project, remember this one thing: no matter the material or materials you use, strong and simple is always the best choice. Carefully consider the options before investing, determine how much wear and tear your edging will be subjected to, how will the environment affect the material, how much budget you want to allocate to this part of the project and off you go!

A few rules of thumb before we finish this article: if you use the whipper snipper or lawnmower often, then stone edging will be more suitable than wire and if you live in a tropical area, you may want to use bamboo rather than timber.

Finally, remember that not every material will suit every home and garden aesthetic and reflect your particular style. If you’re unsure with your research and what to invest in, reach out to our team of experts at Armstone.

We would love to help you out!